Boosting your VS Code productivity using Emmet Expressions
What’s one of the most common things every developer does? Yeah, you got it, writing code. We spend most of our time typing; we write "poems" to our machines so they can run and execute programmed tasks for our application users; we make our user's life easier by automating repetitive tasks or processes, sometimes at the cost of developer happiness or comfort to create such applications.
IDEs are one of the main tools developers use daily. It offers powerful features that increase productivity, from IntelliSense providing code completion, parameter information, inline documentation, code snippets, and usage examples. This code completion is based on language semantics and analysis coming from the source code.
Getting the value of Emmet expressions
VS Code is among the most popular IDEs. It’s free and provides a fantastic development environment experience. Let's learn how to write HTML and CSS more effectively using Emmet. If you're a front-end developer or just want to understand how Emmet expressions works, this article is for you.
Usually, when writing repetitive code, the underlying programming language offers built-in mechanisms, like functions, so you can encapsulate them and call them every time you need them; from the tooling perspective, IDE offers code blocks in the form of snippets, so you don’t need to write over and over again the same things, let’s see an example: In VS Code, there are built-in code snippets you can use to prevent typing blocks of code (conditionals, loops, try-catch statements); they’re pretty common expressions. You can use them by typing, pressing the tab key, or using light bulb suggestions.
More productivity tools are available, but most are around code suggestions in their different flavors: refactoring, code completion, AI suggestions, etc.
One of the most underrated features VS Code provides is Emmet expressions, they are like the missing piece in terms of developer productivity, and as you will see, it can save you tons of time when writing code.
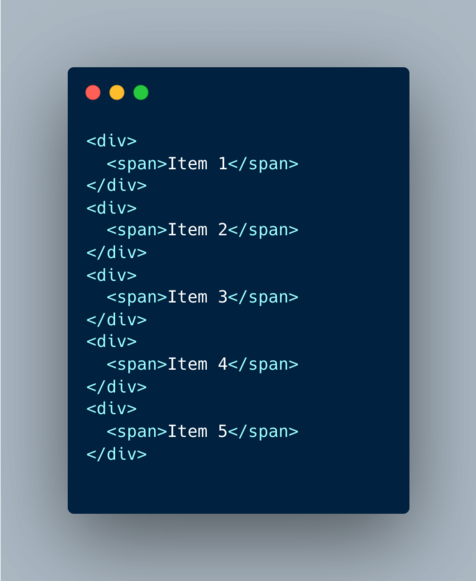
Emmet expressions take Web developers' code writing experience to the next level. Stop for a minute reading this article, and write the following markup in VS Code: Five siblings divs, each of them with a child span with the value Item 1, Item 2, and so, where the div number corresponds to the corresponding number of the div, in the end, you will end up with something like:

I just wanted to let you know that you did it!. How did you do it? You probably defined the first div, copy-pasted the other items, and then replaced the corresponding item numbers. Did you ever wonder if there is a better way to do such a mundane task? Entering Emmet Expressions to the rescue!
In the same HTML file you created the previous example, type the following:
div*5>span{Item $}
Awesome, right? That’s an Emmet expression, already supported by VS Code by default. You don’t need to install any extension. Think about them as dynamic snippets defined at runtime instead of having them previously defined
Syntax
Writing Emmet expressions will feel similar to how CSS selectors work in the context of the position of the elements and their attributes.
Elements are usually HTML tags, but you can even define your tags with Emmet.
If you have the suggestion documentation fly-out enabled, you will see a preview of the result of the Emmet expression. To enable it, click the information icon. The preview will be enabled by default after that.
Nesting operators
The fundamental piece of Emmet expressions is nesting operators and elements. Elements can be HTML tags (div, p, a, etc.) or any name you need. For example, this is useful if you are writing a React component. Nesting operators are used to position abbreviation elements inside a generated tree: whether it should be placed inside or near the context element. You can learn more by visiting the official docs
In case you are in a rush, check out the following examples of the most commonly used expressions:
Example 1: Basic Emmet Expression
Example 2: Advanced Emmet Expression
