Slack OAuth: How to Implement It in a Node.js App
Over 12 million people use Slack every day to communicate with their team members and coordinate work tasks. If you're not one of them yet, you're missing out! Slack is a powerful communication tool that can help streamline your workflow and make working with your team easier than ever before.
A great thing about Slack is that it allows you to connect to it via APIs from outside apps. For example, you can use Slack to connect to your Google Calendar or Trello account. In this blog post, we're going to show you how to connect your own application to Slack and a Slack workspace so you can post and retrieve messages dynamically from your own app.
You'll start by creating a new Slack team and setting up a Slack app. Then, you'll create and configure your app settings in Slack. After that, you'll write the code necessary to implement Slack OAuth in our Node.js app. Finally, you'll test our implementation to make sure everything is working as expected.
What Is OAuth?
Before diving into the implementation, let's take a moment to review what OAuth is and how it works. OAuth is an open standard for authorization that enables third-party apps to access users' data without needing their passwords.
When you authorize an app like Trello or Google Calendar to use Slack, you're using OAuth to give them access without providing them with your login credentials. They can then communicate with Slack in the background without you needing to log in.
When you authorize an app like Trello or Google Calendar to use Slack, you're using OAuth to give them access without providing them with your login credentials.
The application (Trello, for example) requests that the OAuth provider authenticates you, and then that OAuth provider provides an authorization token to the application, which they then use to access the services on your behalf.
How to Use OAuth
In order for an app to use OAuth, it needs to be registered with the service that it wants to request data from. For example, our Node.js app will need to be registered with Slack in order to use Slack OAuth.
Each OAuth provider (like Slack or Facebook) has its own process for registering apps. However, the general idea is the same: you create a new app, give it a name and description, specify the permissions that it needs, and then get an OAuth token that can be used to access the data.
What Is OAuth in Slack?
Slack provides an OAuth service like Facebook and Google so that you can use it in your application to allow external applications to access Slack on your behalf without sharing your login credentials. Once implemented in your application, your users can choose to authorize with Slack to allow your application to add/remove/update messages and more in your Slack workspace.
How Does Slack Authentication Work?
To grant access tokens, Slack uses the Authorization Code Grant Flow in OAuth 2.0. It's a simple procedure for unlocking access tokens. You simply provide a client ID and client secret to access an authorization code that is then exchanged for a token. You need to do the authorization flow on the server side of your application, as the client secret needs to remain a secret.
With the Authorization Code Grant Flow, creating access tokens programmatically outside of an application is impossible due to security restrictions on apps.
Connecting to Slack From Node.js
Create a New Slack Team and Workspace
Before you start coding, you need to have a Slack Workspace.
Go to Slack and either sign in or create a new account.
Next, click on "Create a New Workspace."

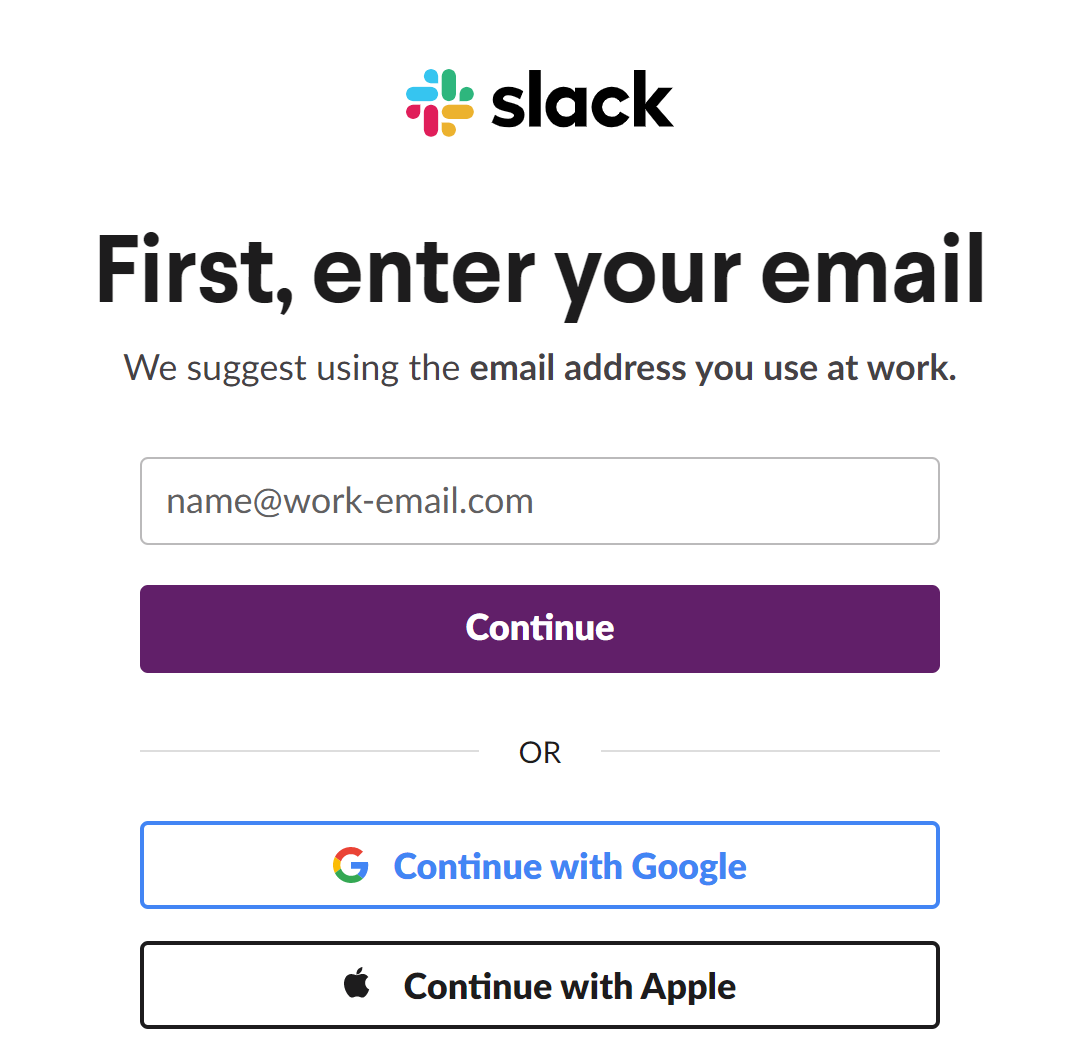
Enter your email and click "Continue."
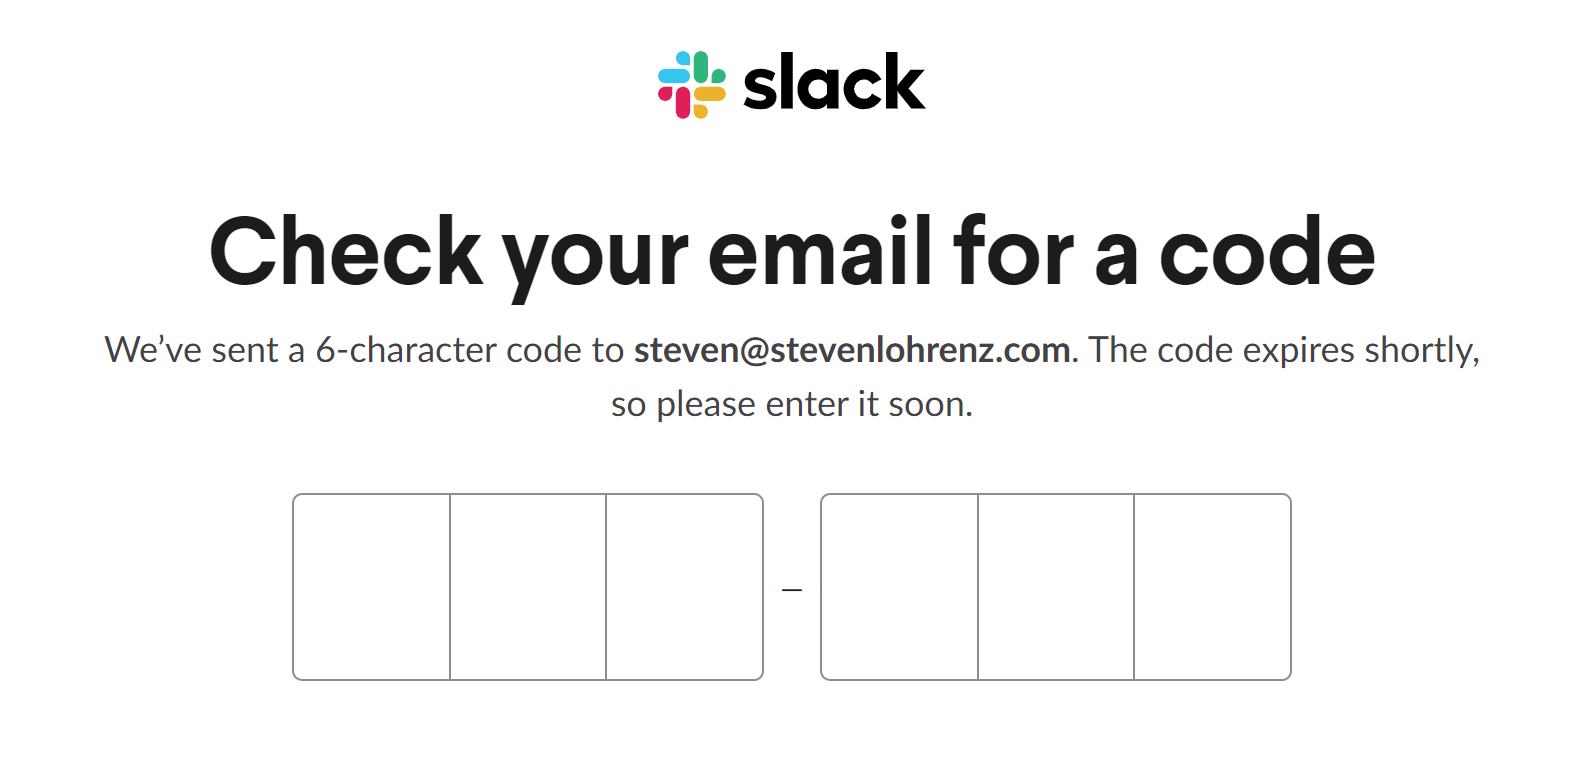
Slack asks you for a code for validation. Check your email and enter the code.
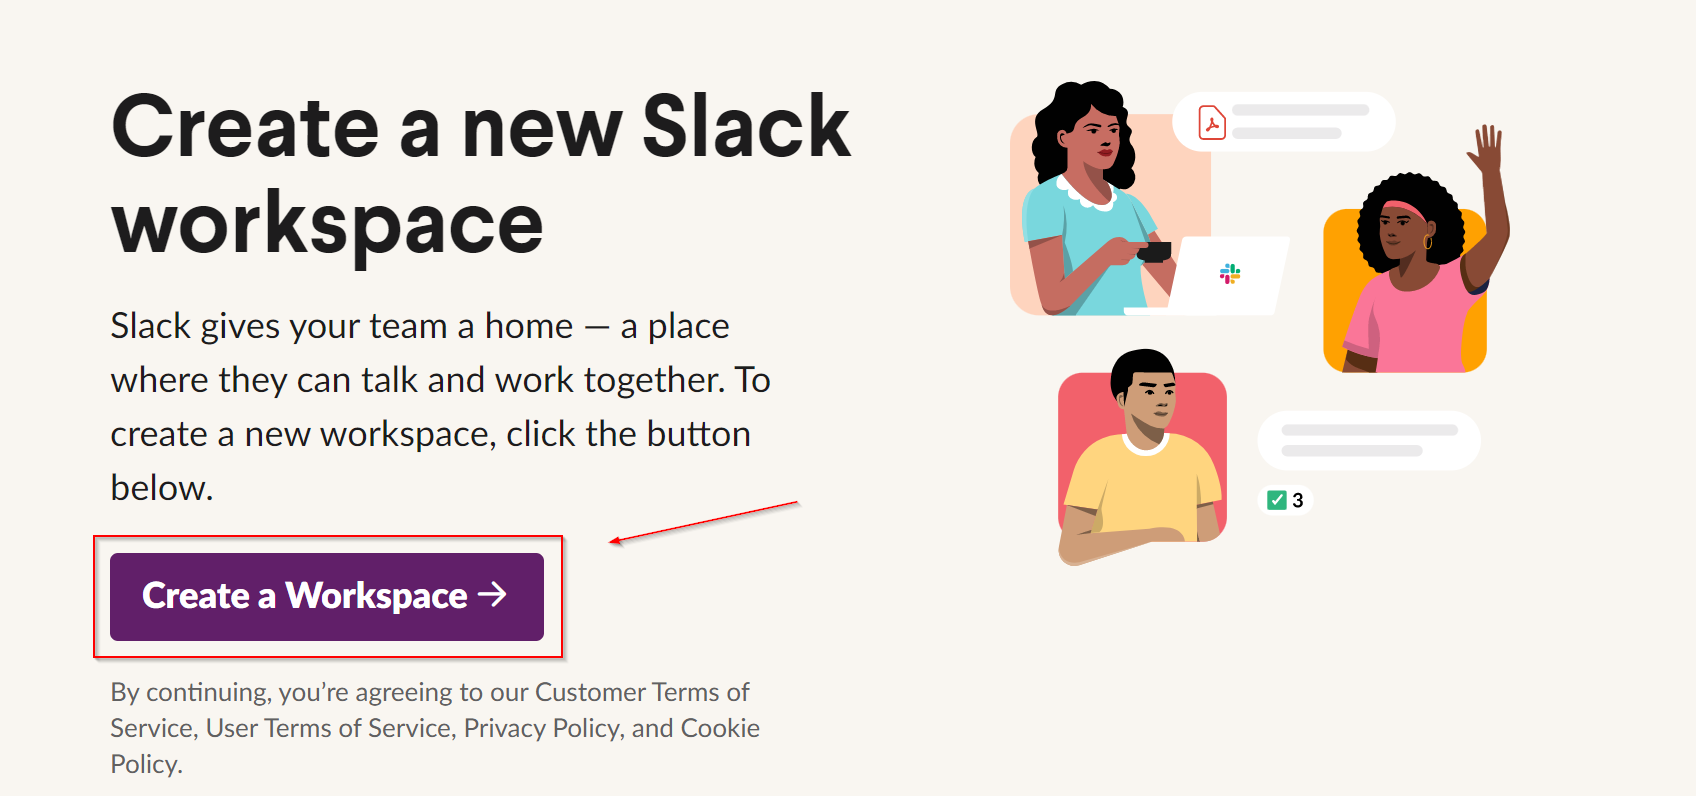
Then, click on "Create a Workspace."
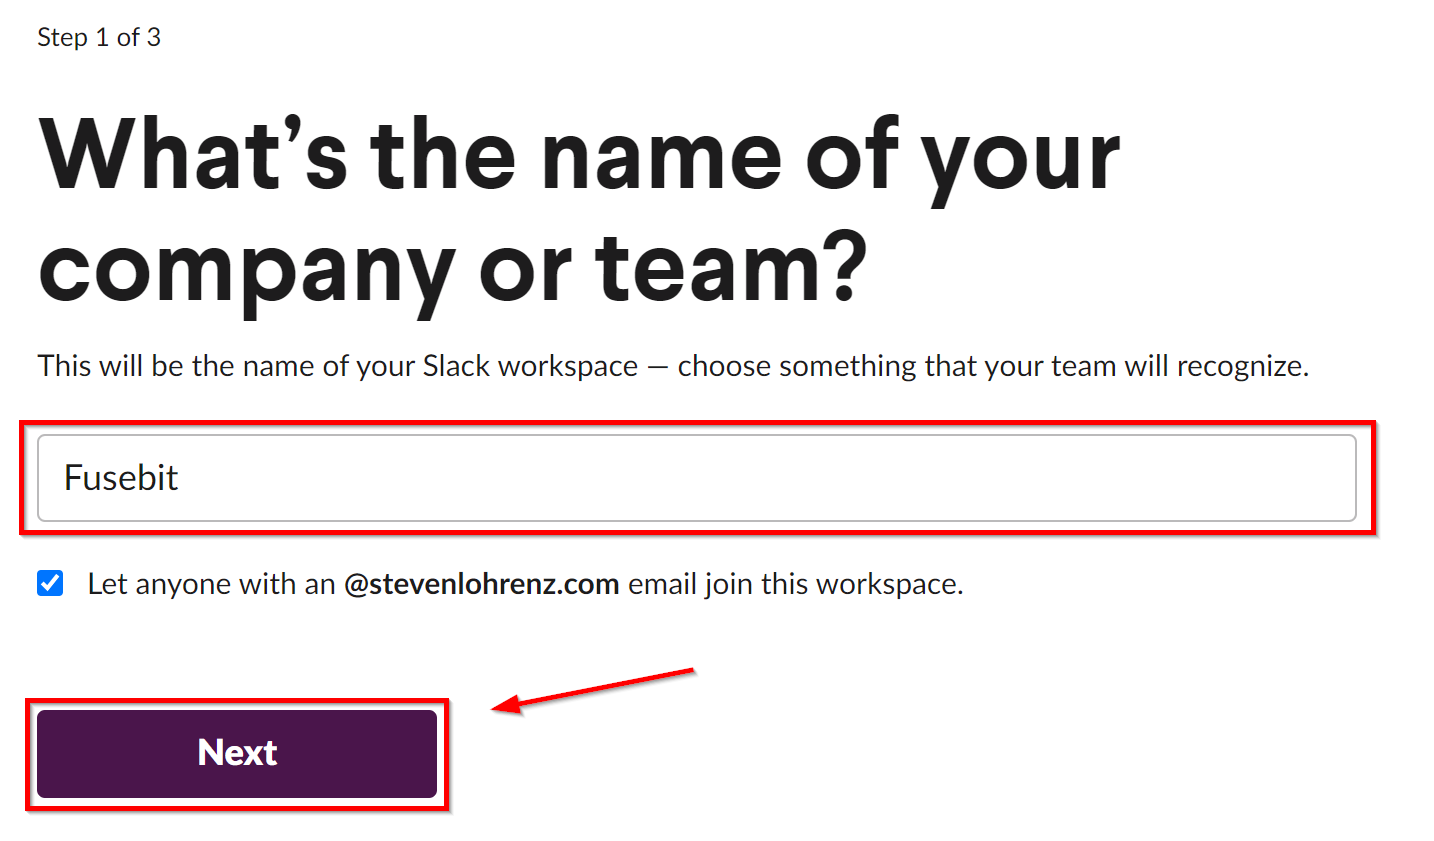
Enter the name of your company or team and click on "Next."
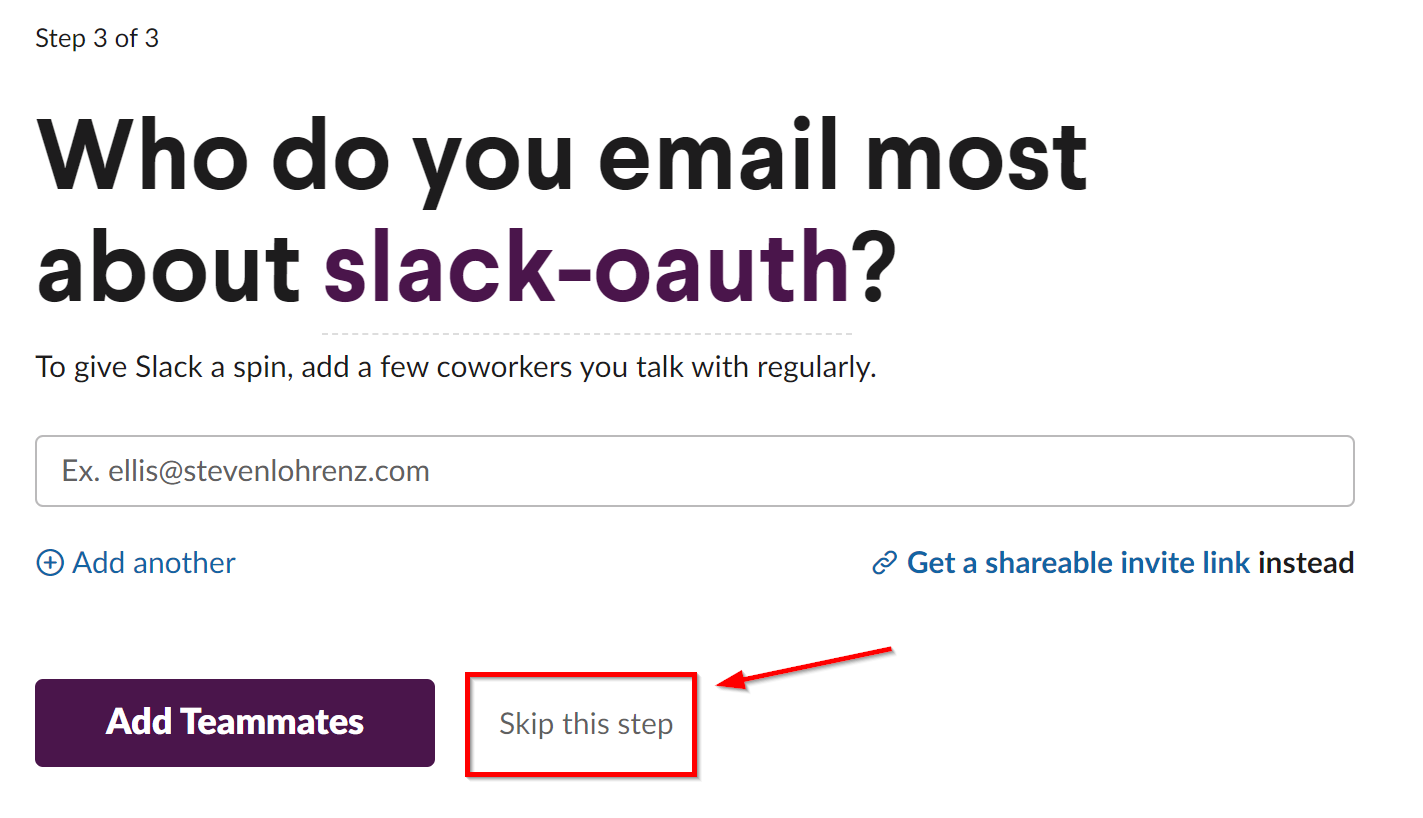
You can enter your email address and click "Next" or "Skip this Step."
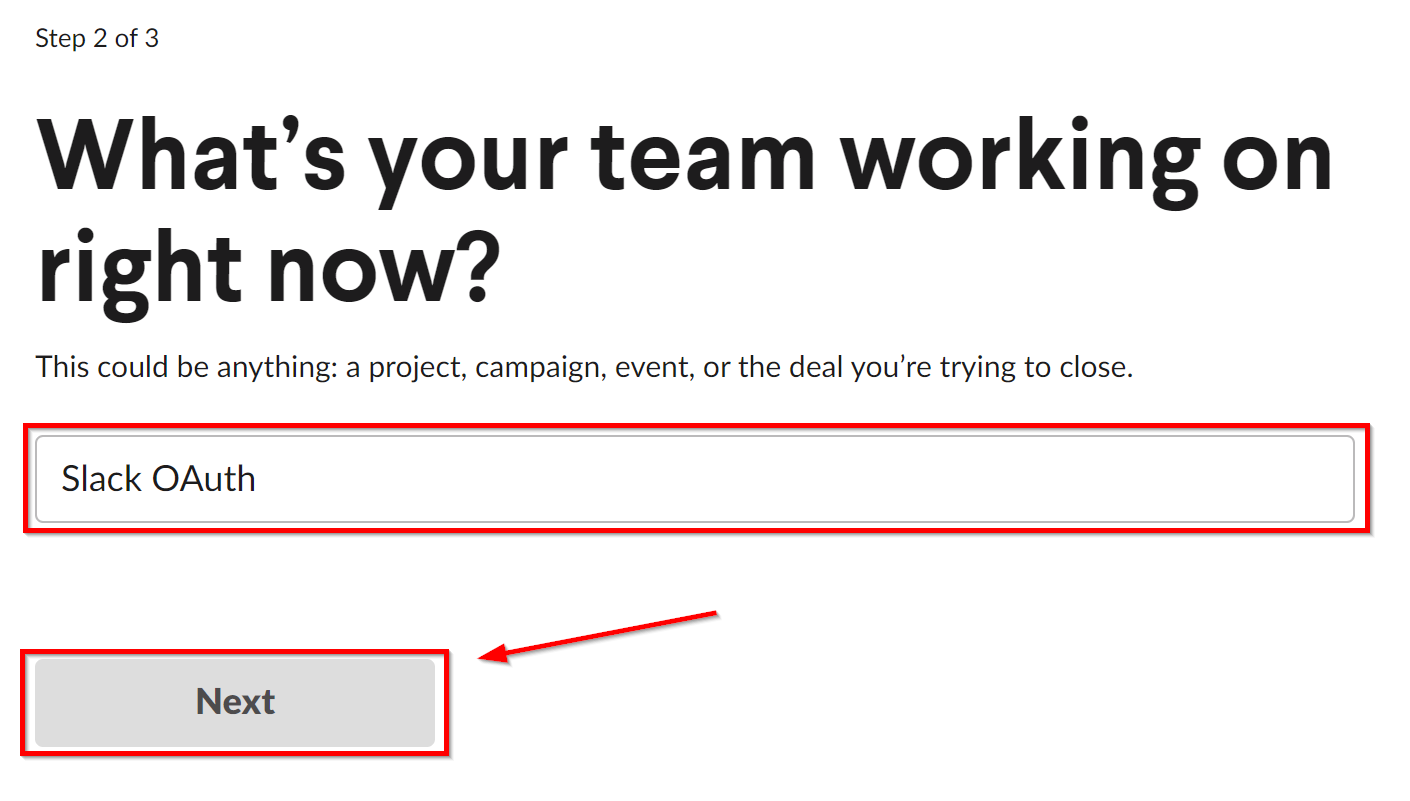
After that, enter Slack OAuth and click on "Next."
At this point, Slack opens your new workspace.
Get an OAuth Token in Slack
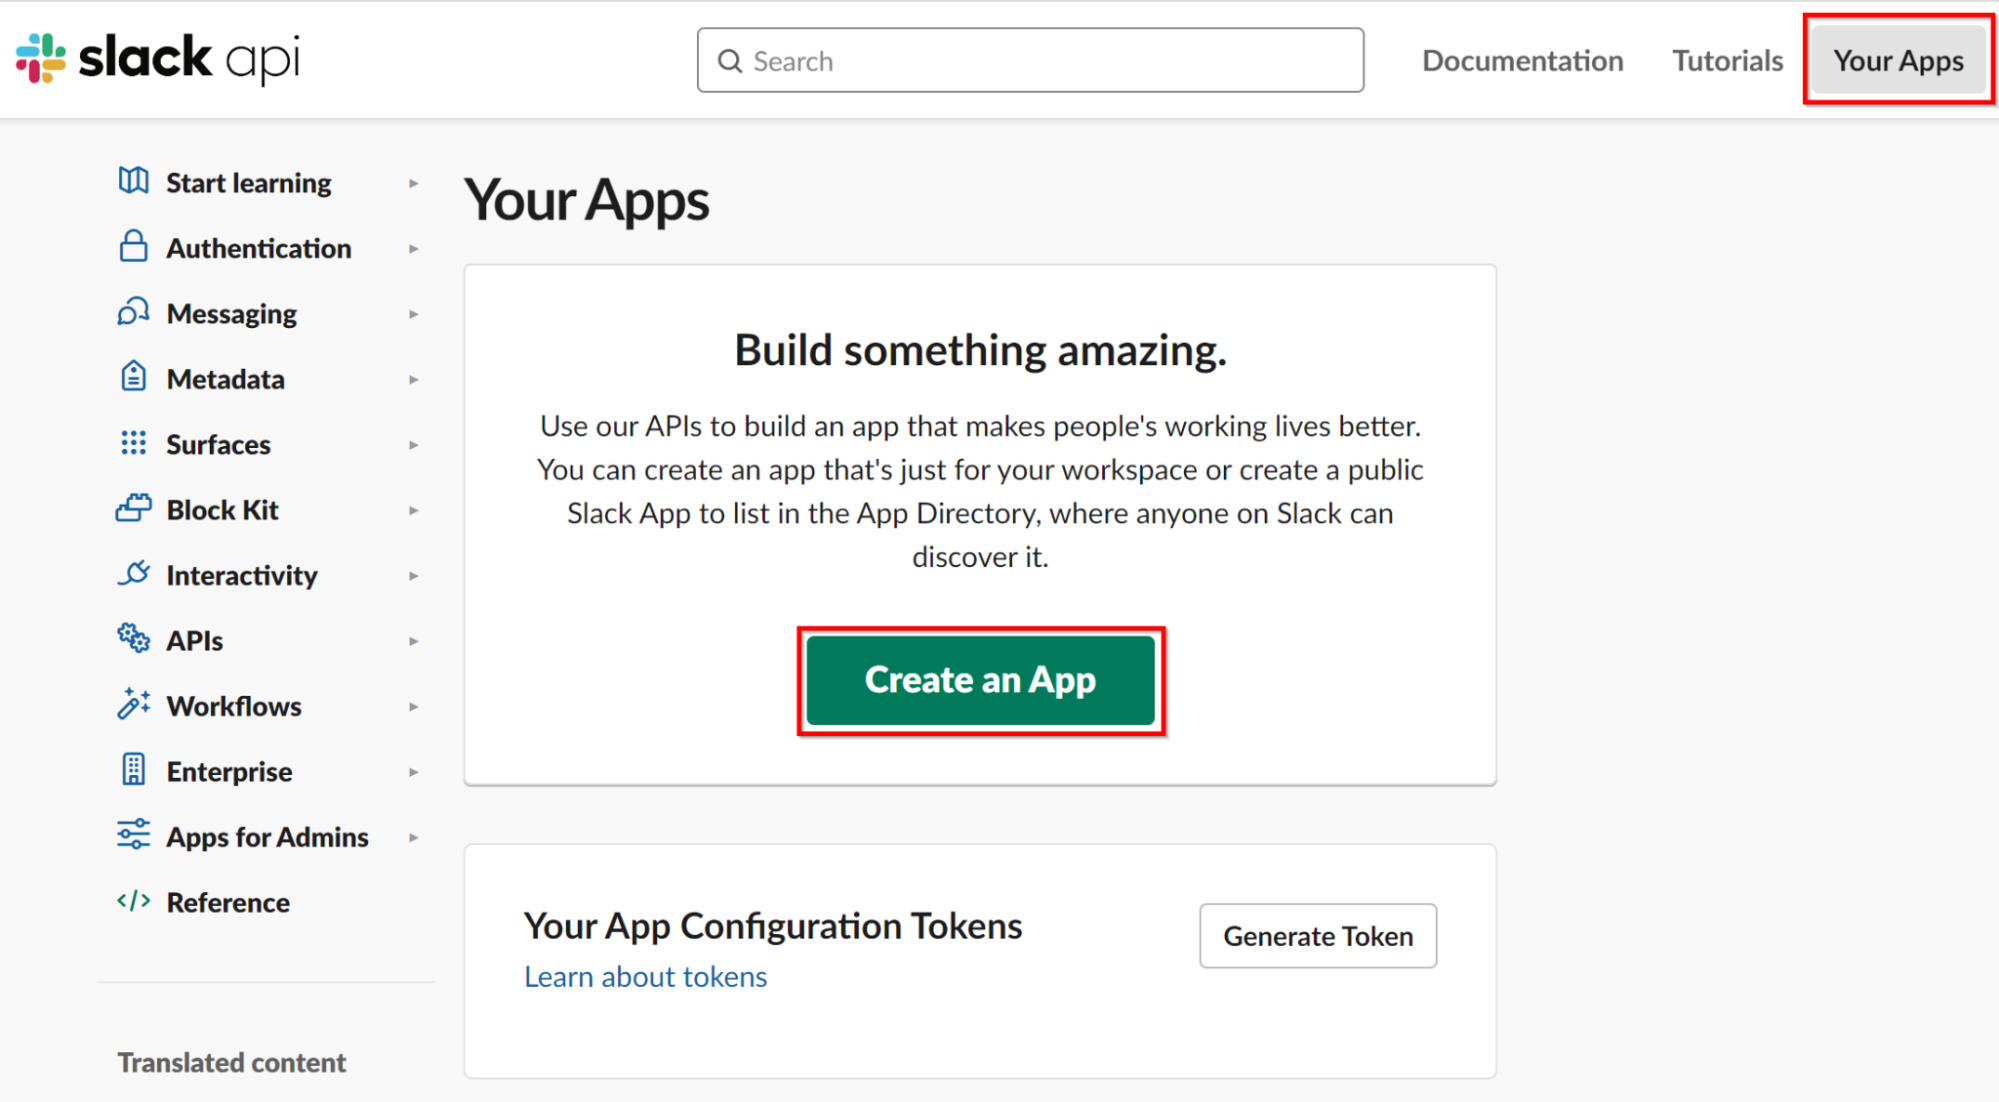
Next, you need to navigate to the API tools and set up a new app within Slack.
First, click on "Create an App."
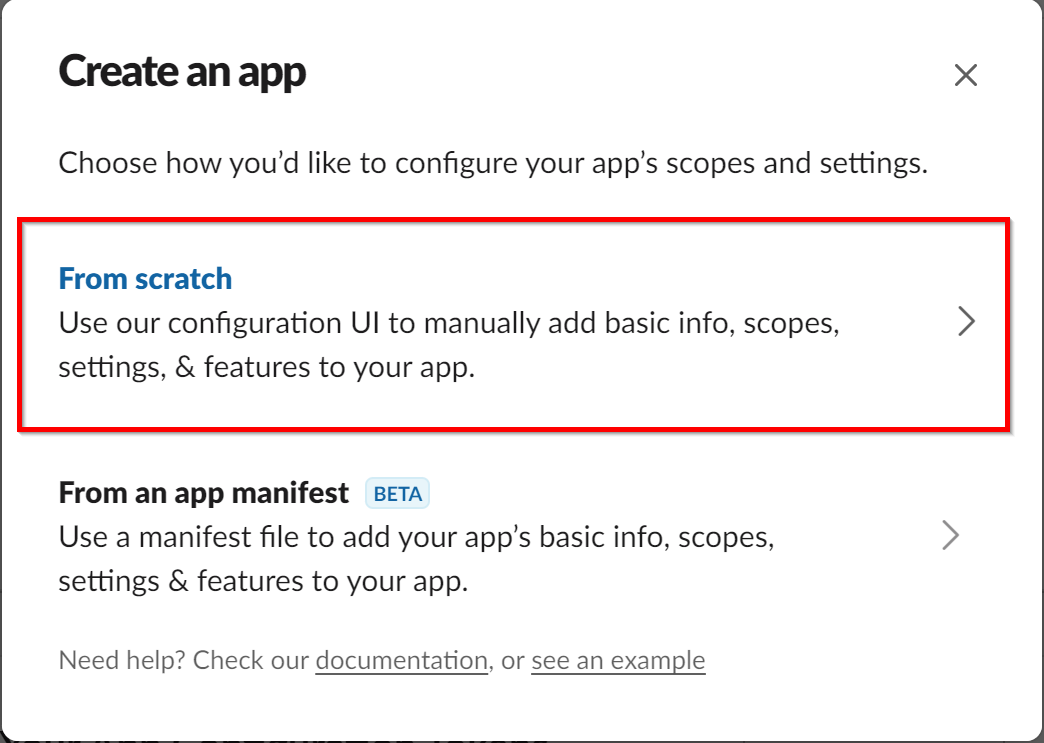
Then, select "From Scratch."
After that, enter your app name and select the workspace you created above. Next, click "Create App."
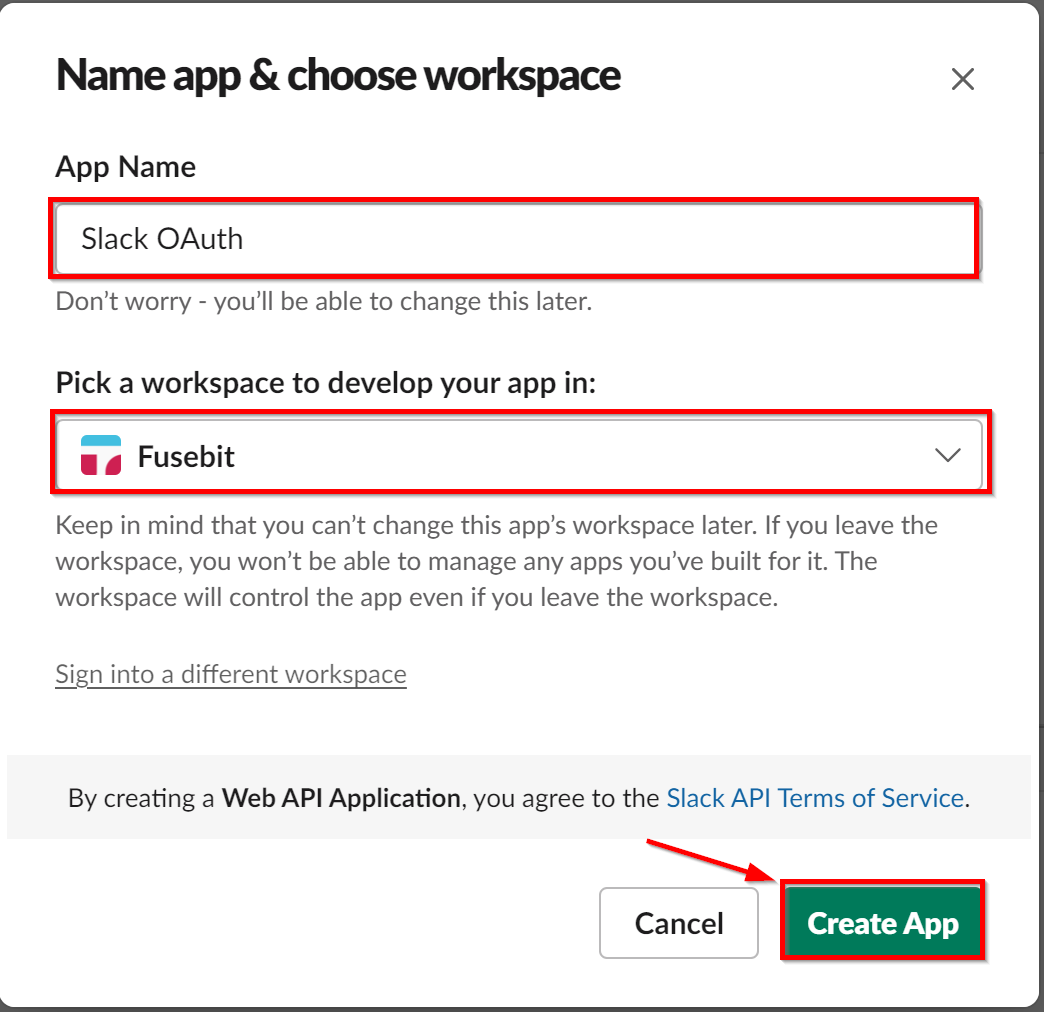
Once you have the app set up, scroll down to the "App Credentials" section. This section contains the details such as client ID and client secret that you'll need in order to connect to the Slack APIs. Keep them around for easy access later.
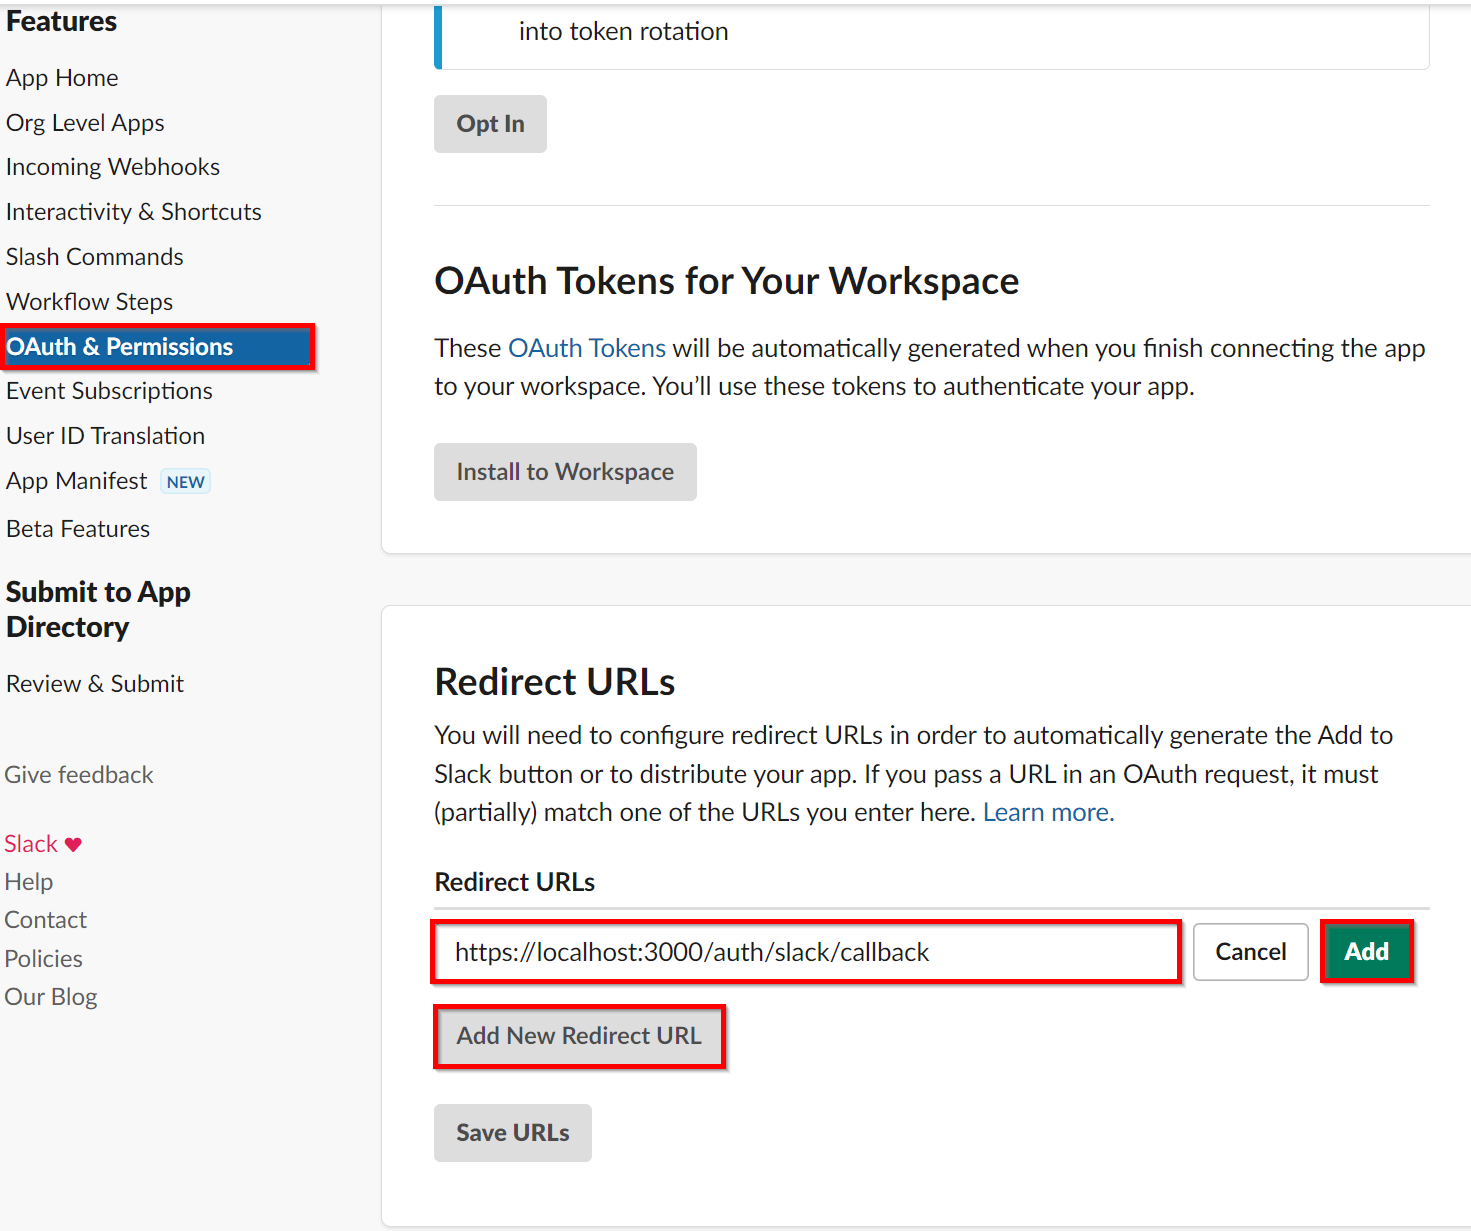
In addition, navigate to "OAuth & Permissions" on the left-hand navigation bar, and scroll down to "Redirect Urls." Click on "Add New Redirect Url," enter <https://localhost:3443/auth/slack/callback> in the textbox that pops up, and then click on "Add."
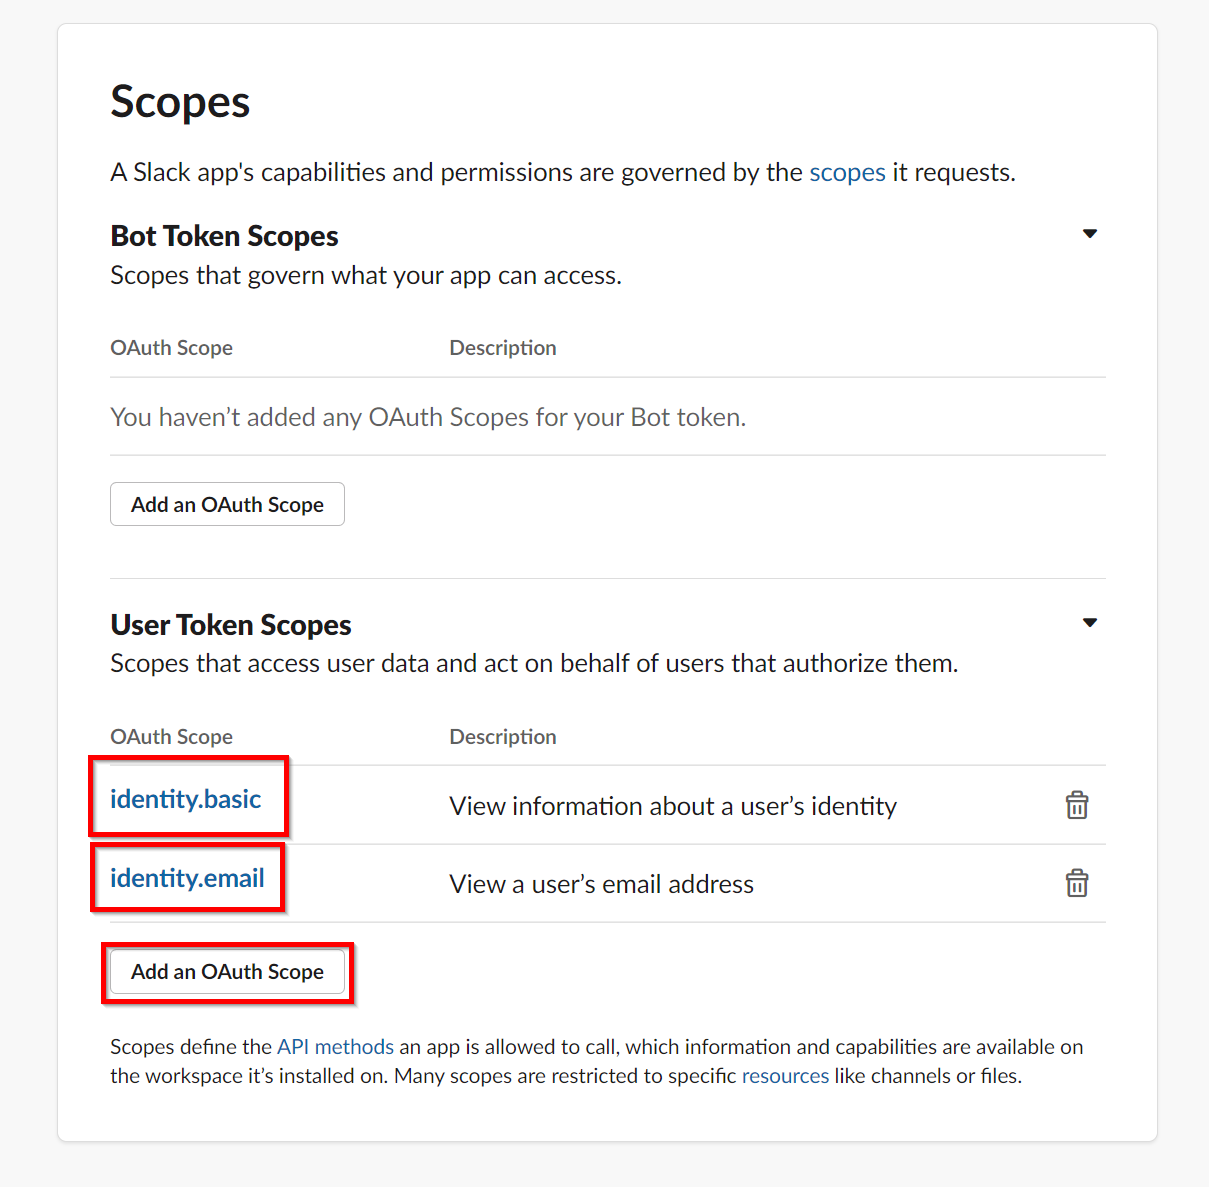
Scroll down a little further on the same page until you see "Scopes." Click on "Add OAuth Scopes." In the pop-up, select "identity.basic" and add another one for "identity.email."
Finally, go to "Manage Distribution" and "Activate Distribution." Here, you can get links to share your app.
Setting Up the Project
Open a terminal window and create a new directory.
mkdir slack-oauth
Then, navigate into the directory.
cd slack-oauth
Next, you need to initiate Node.js.
npm init -y
After that, install the dependencies you'll need.
npm install express @slack/web-api
Now you have the basics of the projects set up. Next, create a new file in your slack-oauth directory called slack-oauth.js.
Due to security requirements within Slack, you need to have HTTPS running on your server. If you're running locally, you need to have your own signed certificates. This guide on setting up HTTPS locally is quick and easy to follow. Once you have the certificate and the key files, you can test your setup by entering the following code in the slack-oauth.js file:
const express = require('express');
const app = express();
const http = require("http");
const https = require("https");
const fs = require("fs");

const credentials = {
    key: fs.readFileSync('./localhost-key.pem'),
    cert: fs.readFileSync('./localhost.pem')
};

app.get('/', (req, res) => {
    res.send('Successfully setup and running Node and Express.');
});

const httpServer = http.createServer(app);
const httpsServer = https.createServer(credentials, app);

httpServer.listen(3000, () => console.log('Your Slack-OAuth app is listening on port 3000.'));
httpsServer.listen(3443, () => console.log('Your Slack-OAuth app is listening on port 3443.'));
Start Node by running the following command:
node slack-oauth.js
You should see the message "Your Slack-OAuth app is listening on port 3000" and "Your Slack-Oauth app is listening on port 3443" in the terminal. Navigate to https://localhost:3443 in your web browser, and you should see the message "Successfully setup and running Node and Express."
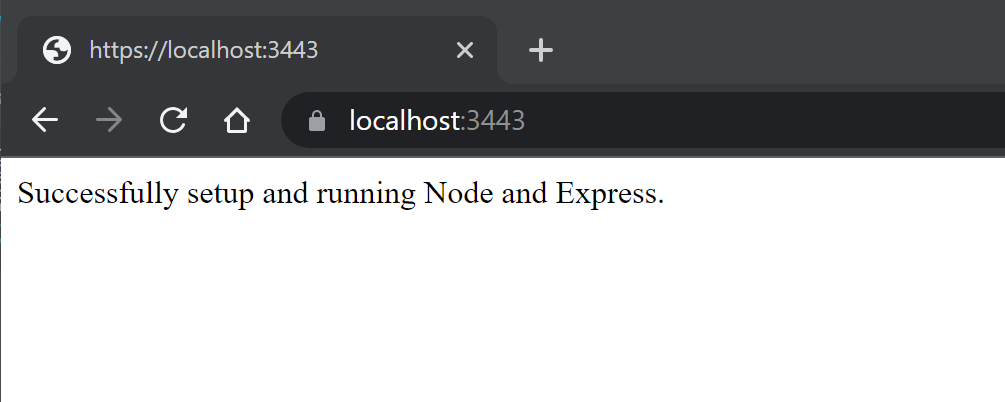
Now you have all you need to start developing our Slack OAuth app.
Writing the Code
The first bit of code you need to add is to import WebClient.
const {WebClient} = require('@slack/web-api');
const client = new WebClient();
Next, you'll define our page to display the "Add to Slack" button. In this, you'll define the scopes you want and the redirect URL for this particular call. At this point, you're only using what you previously defined, but you can change the scope for other API calls for security reasons or redirect a call to a specific endpoint.
**
 * On this page you display the Add to SLACK button. The user can click it to login with Slack.
 */
app.get('/auth/slack', async (_, res) => {
    const scopes = 'identity.basic,identity.email';
    const redirect_url = 'https://localhost:3443/auth/slack/callback';
    //Here you build the url. You could also copy and paste it from the Manage Distribution page of your app.
    const url = `https://slack.com/oauth/v2/authorize?client_id=${process.env.SLACK_CLIENT_ID}&user_scope=${scopes}&redirect_uri=${redirect_url}`;

    res.status(200)
        .header('Content-Type', 'text/html; charset=utf-8')
        .send(`
            <html><body>
            <a href="${url}"><img alt="Add to Slack" height="40" width="139" src="https://platform.slack-edge.com/img/add_to_slack.png" srcSet="https://platform.slack-edge.com/img/add_to_slack.png 1x, https://platform.slack-edge.com/img/add_to_slack@2x.png 2x" /></a>
            </body></html>
        `);
});
Now, you need to add the route for the callback page. This is taking details from the response from Slack and registering them with WebClient.
/**
 * This is the callback page.
 */
app.get('/auth/slack/callback', async (req, res) => {
    try {
        const response = await client.oauth.v2.access({
            client_id: process.env.SLACK_CLIENT_ID,
            client_secret: process.env.SLACK_CLIENT_SECRET,
            code: req.query.code,
        });

        const identity = await client.users.identity({
            token: response.authed_user.access_token
        });

        // At this point you can assume the user has logged in successfully with their account.
        res.status(200).send(`<html><body><p>You have successfully logged in with your slack account! Here are the details:</p><p>Response: ${JSON.stringify(response)}</p><p>Identity: ${JSON.stringify(identity)}</p></body></html>`);
    } catch (eek) {
        console.log(eek);
        res.status(500).send(`<html><body><p>Something went wrong!</p><p>${JSON.stringify(eek)}</p>`);
    }
});
Testing
To test that everything is working correctly, stop the server via the command line. Then, set two environment variables, substituting in your own values from the "Basic Credentials" > "App Credentials" section for the client ID and client secret.
export SLACK_CLIENT_ID=34****************4334
export SLACK_CLIENT_SECRET=bore23*********************************23ke
Now, start the server back up with this:
node slack-oauth.js
Then, navigate to https://localhost:3443/auth/slack.

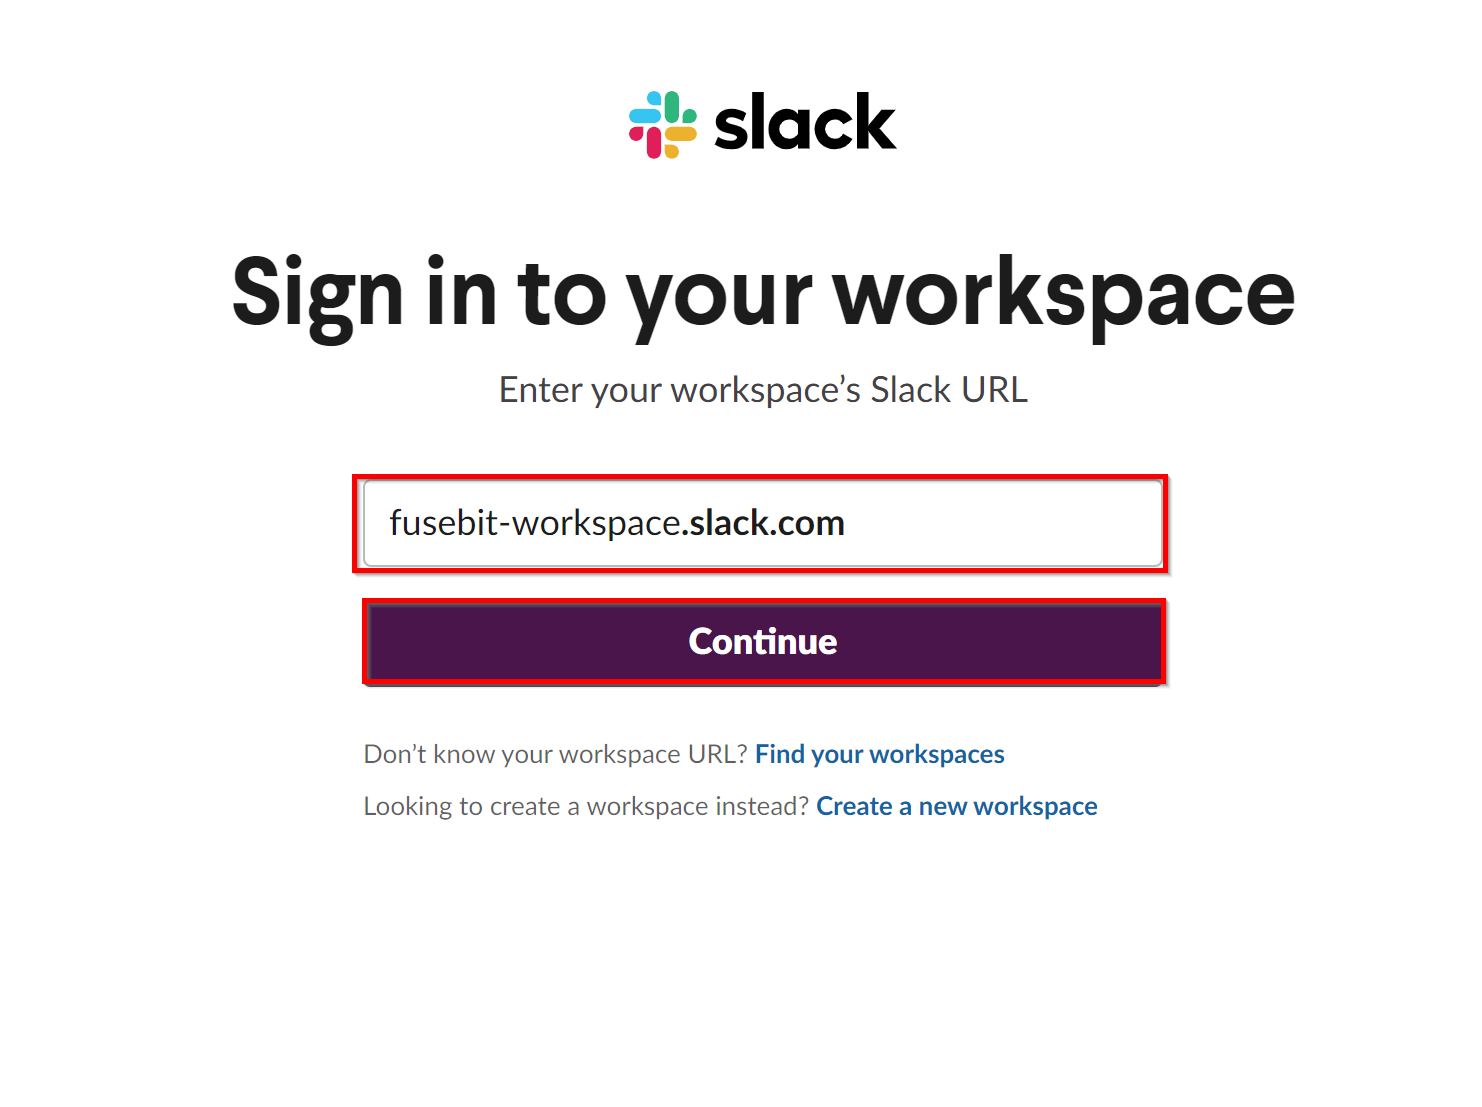
Click on "Add to Slack." Next, enter your workspace name as you had defined above and click on "Continue."
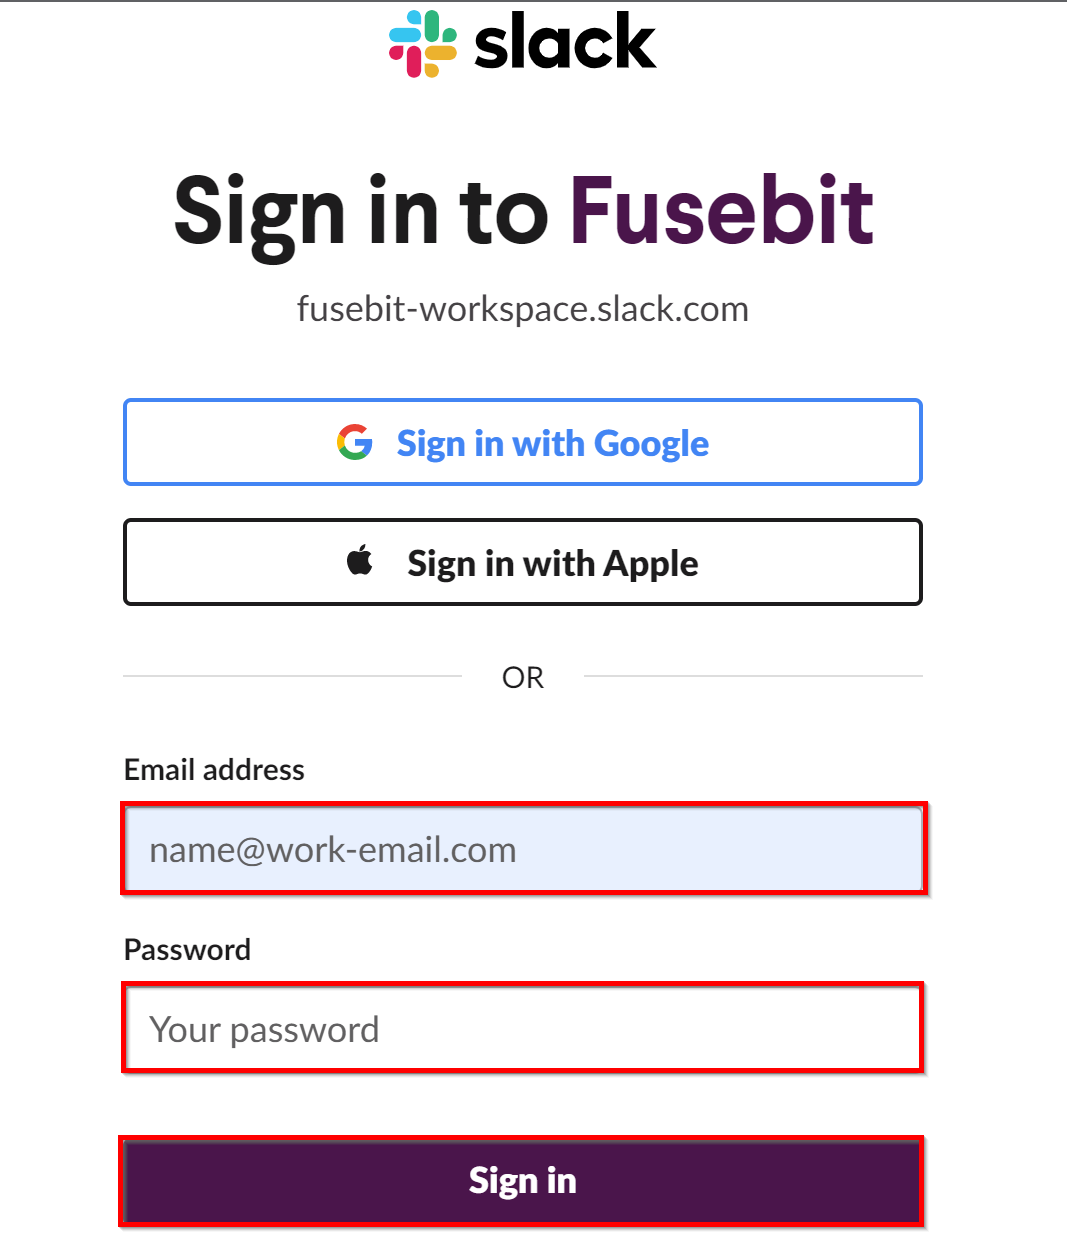
Now, enter your login credentials and click on "Sign In."
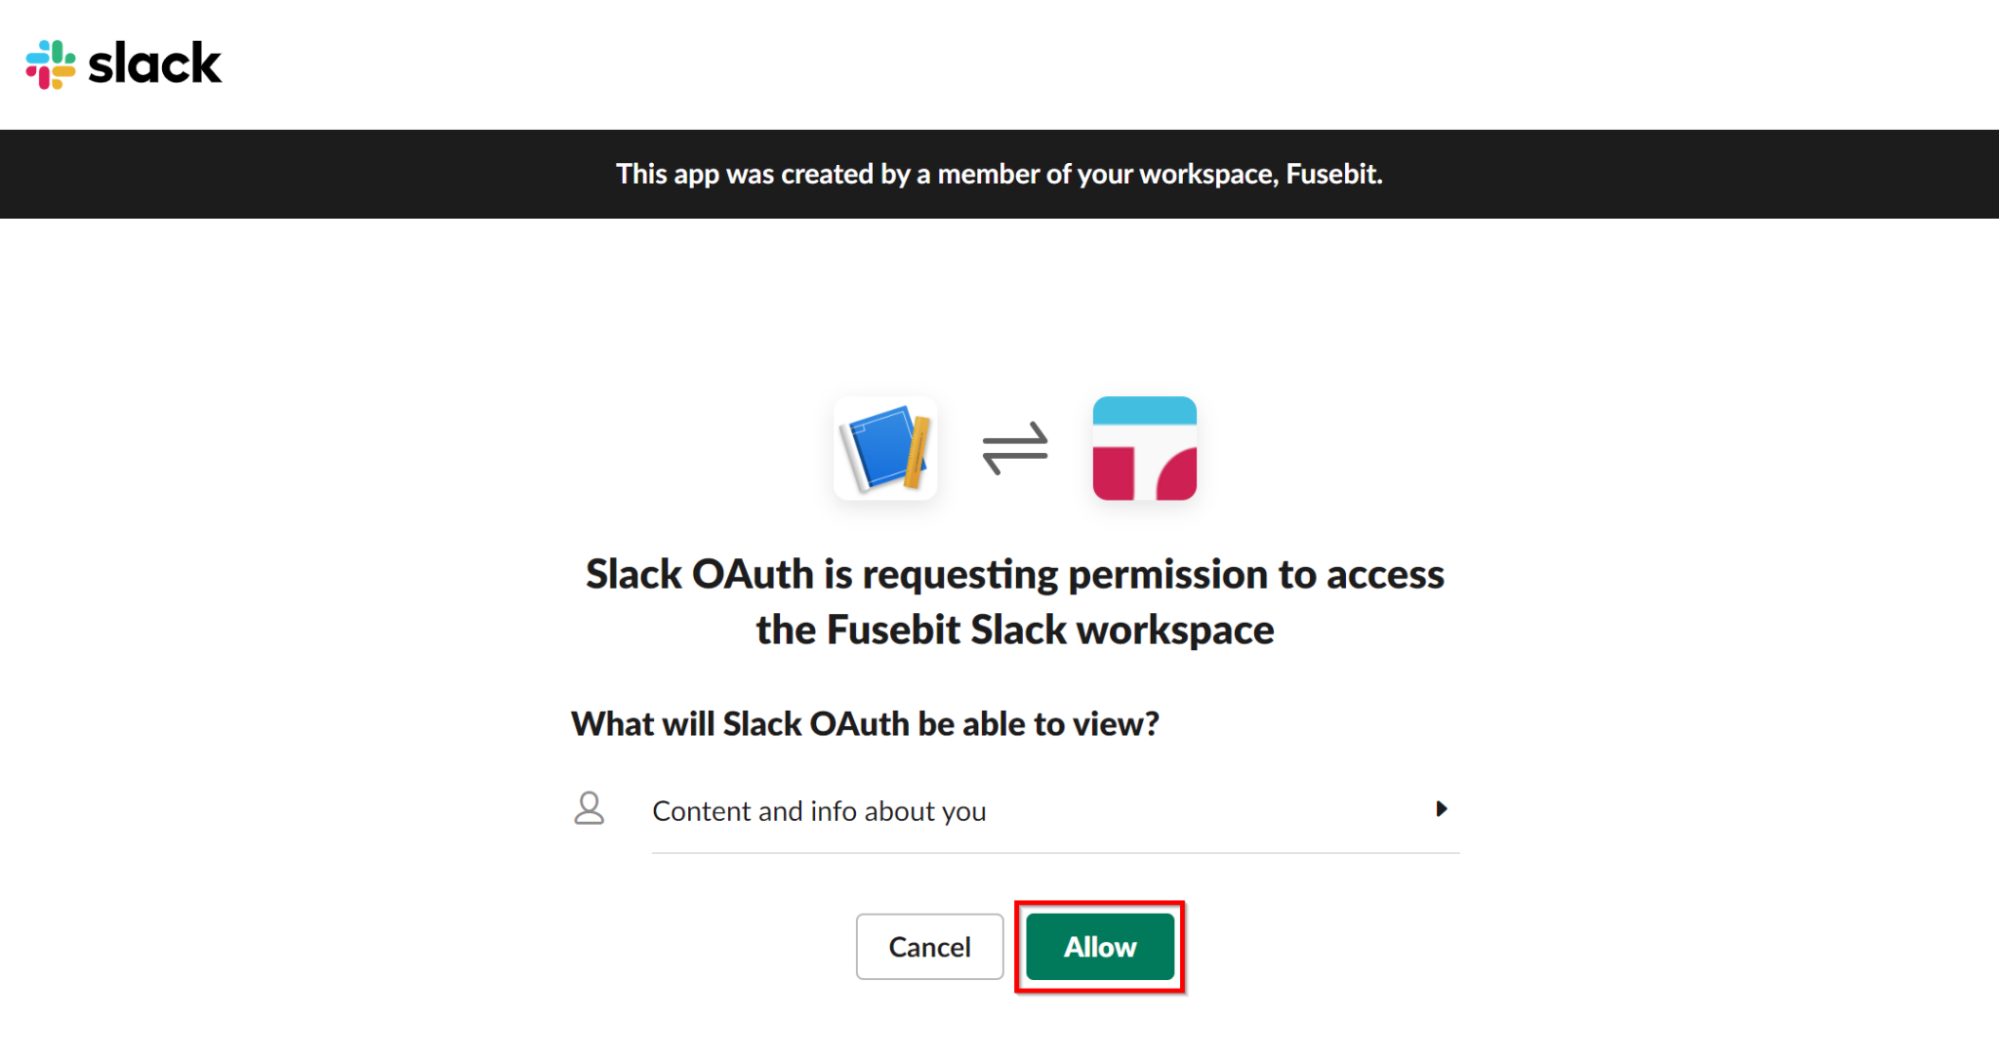
The next screen is asking if your application is allowed to access details about your workspace. Click on "Allow.
On the next screen, you should see the message "You have successfully logged in with your Slack account! Here are the details:" and a dump of what came back from Slack.
Wrapping Up
Slack is a popular messaging app with a wide range of features. In this post, we’ve shown you how to implement OAuth in a Node.js app.
Once you have the OAuth token you can provide it to connect to the Slack APIs. From there, your app can post messages to workspaces, create and manage channels, and more.
Have fun exploring what you can do with the Slack APIs!
This post was written by Steven Lohrenz. Steven is an IT professional with 25-plus years of experience as a programmer, software engineer, technical team lead, and software and integrations architect. They blog at StevenLohrenz.com about things that interest them.
