How to Integrate Your App With HubSpot Using OAuth
In today's world, reaching out to a large audience is essential to expanding your business. To do so, you need to be present on various platforms. And to leverage the power of these platforms, you'll need to integrate them with your business website or application.
But this is easier said than done. Here is a complete guide to help you integrate your app with HubSpot using OAuth.
This blog post will look at integrating your app with HubSpot using OAuth and Node.js. But before diving deeply into it, let's first understand what HubSpot and OAuth are.
What Is HubSpot?
HubSpot is a cloud-based digital ecosystem that provides apps and tools for businesses to sell, market, and support better. It offers CRM, CMS, Live Chat, Surveys, Forms, and other helpful business tools.
However dynamic or powerful HubSpot's offerings are, there's always room for more. For that reason, HubSpot offers developers a platform to build custom apps and integrations to extend its already diverse functionality if you need a more tailored experience or want to connect your data ecosystem with that of HubSpot.
Developers can build private custom apps with HubSpot, available to only those predefined HubSpot accounts they own, or public apps, which any HubSpot user can install into their accounts. Public apps require authentication between the custom app and the HubSpot account for secure communication. That's where HubSpot recommends OAuth!
However dynamic or powerful HubSpot's offerings are, there's always room for more.
What Is OAuth in HubSpot?
HubSpot OAuth is a secure means of authentication that uses authorization tokens rather than a password to connect your app to a HubSpot user account.
Note: HubSpot requires apps to use OAuth to be listed on their marketplace;, else, they'll reject the app listing.
For your app to be able to communicate with HubSpot, your app needs to authenticate before doing anything else.
This works because your app must always send an access token to HubSpot, which then checks which HubSpot account this token is authorized to access and what scopes it has.
For example, a HubSpot user can grant permissions to an app using an OAuth access token to create contacts in the user's HubSpot CRM for the specific account in which the app is installed.
Understanding How HubSpot OAuth Works
HubSpot OAuth uses a straightforward four-step process:
- An app developer predefines scopes in HubSpot, saying that whoever installs a particular app in their account consents to accessing resources with certain permissions—namely read and write.
- HubSpot provides an installation URL that allows a user to log in to their HubSpot account where they want to install the app and approve the scope consent form.
- Post-approval, HubSpot sends a temporary authorization code to the app, which remains valid for a short time. The app then needs to exchange with HubSpot's OAuth server for an access token.
- The app can store the access token, whose expiry is much longer, which the app can further use while utilizing HubSpot's APIs. Now the app can access the connected HubSpot account's data within the predefined scope of access.
HubSpot OAuth uses a straightforward four-step process
Getting Started with a Sample App
Let's develop a simple HubSpot app that, upon installation, creates a sample contact in HubSpot CRM for the sake of the demonstration.
Prerequisites
Before proceeding with any code, let's ensure some prerequisites are in order. The scope of this article doesn't include setting up development and testing environments, so here are the official HubSpot links to get started:
Further on in this post, we'll assume you have one developer account and one test account.
Setting Up a HubSpot App and Secrets
Let's build a very simple app for HubSpot that'll complete the OAuth process and, once completed successfully, will create a dummy contact in the connected HubSpot account in which our app will be installed.
To give some brief context, we'll be developing and testing locally, thus serving our front end on port 3000 and our back end on port 4000. Hang on for more clarification below!
Before proceeding to the code, let's configure OAuth on HubSpot's end.
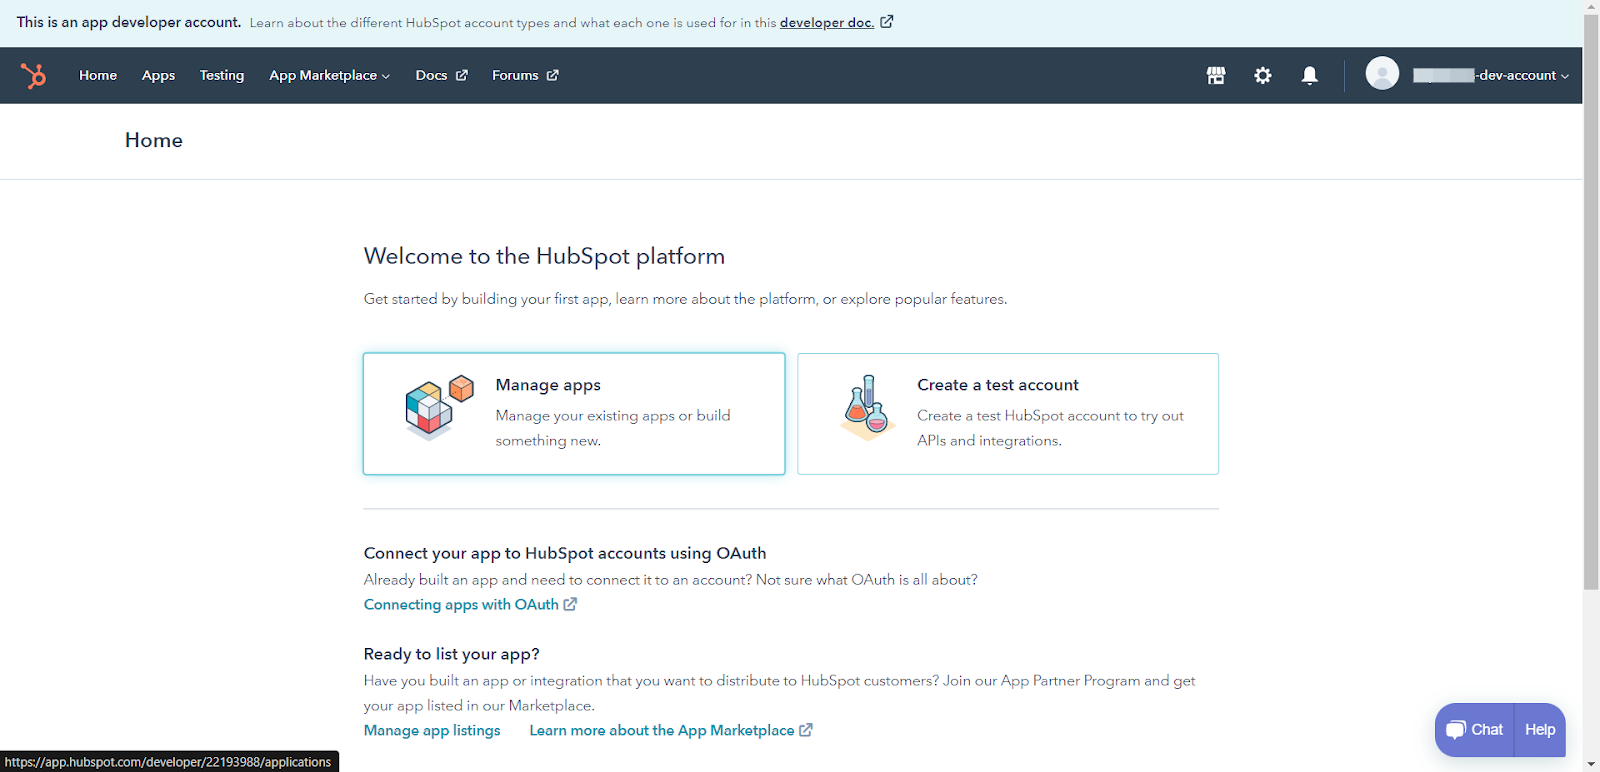
- Sign in to your developer account and go to Manage Apps.
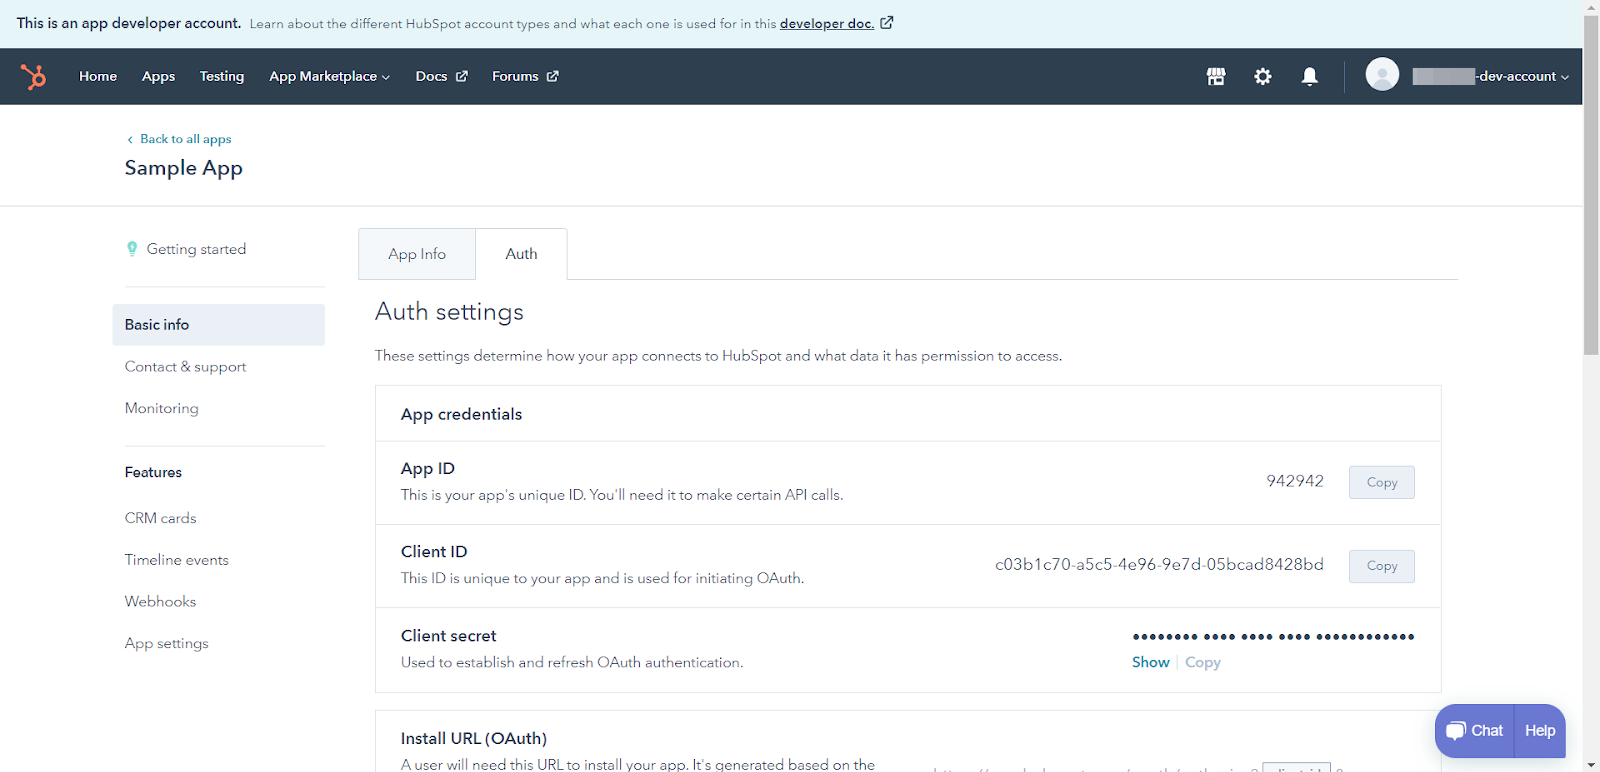
- From the list, choose your app and switch to the Auth tab.
- Scroll down to the very bottom, find sections Redirect URL and Scopes, and set them up as shown. Provide http://localhost:3000 as the Redirect URL. Search for crm.objects.contacts in the search bar under Scopes and check Write. We need this scope to create dummy contacts down the line.
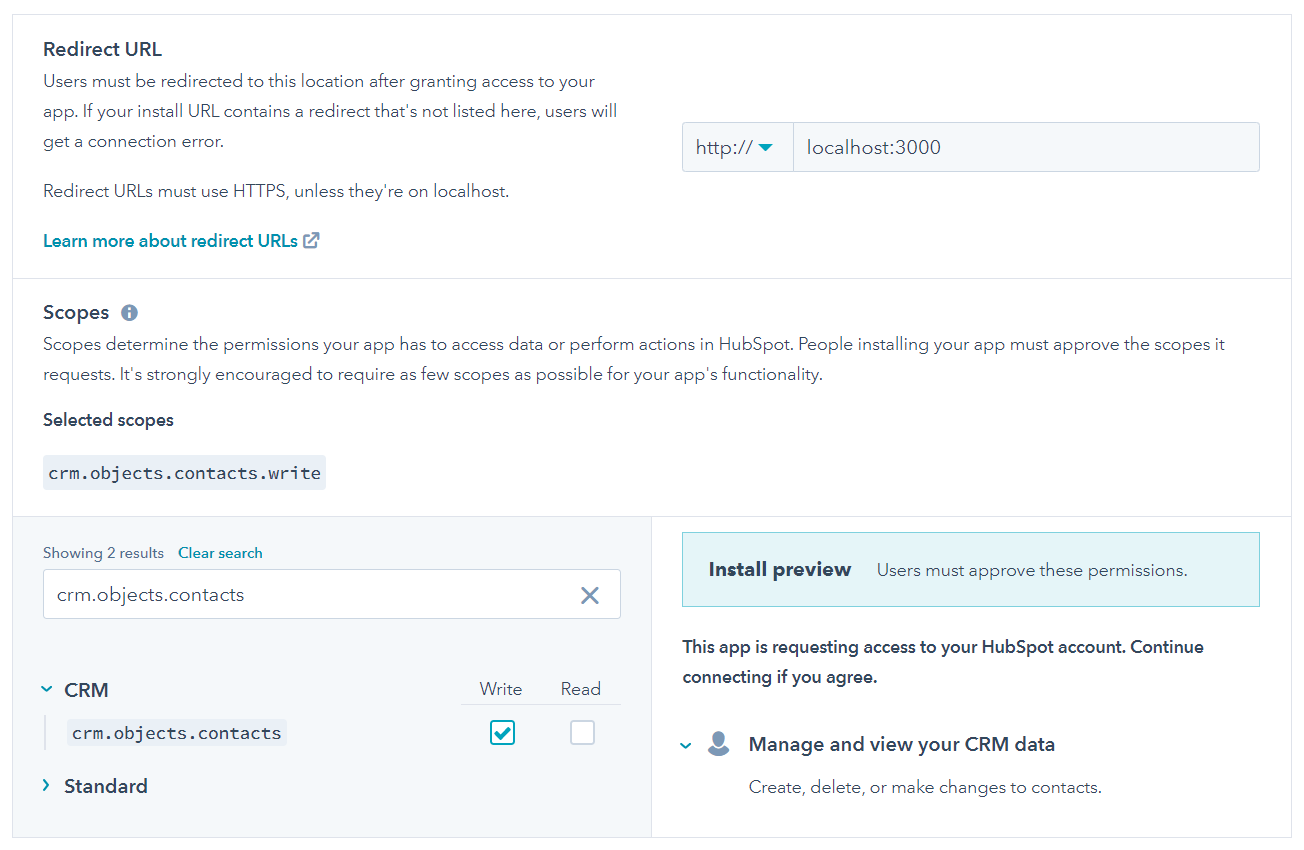
Let's take a look a what these values mean:
- Redirect URL: This is the URL that HubSpot will send a GET request to once the user approves the OAuth consent form, as mentioned in Step 3 of the OAuth process above.
- Scopes: For the scope of this example, we only need crm.objects.contacts.write, as we won’t be accessing any other resource of our users’ HubSpot accounts. You can select multiple scopes too, if you want.
Our work on HubSpot's end is complete! Note: Keep a note of the Client ID, Client Secret, and the Redirect URL, as we’ll need these in our sample app’s codebase further on.
Setting Up a Node.js Application
To communicate with HubSpot, we can use HubSpot’s REST API or the official client library for Node.js for the demo.
First, we'll create an empty directory and install the relevant packages to get started. Use the following command to create a directory and initiate the node package.
mkdir hubspot-nodejs
cd hubspot-nodejs
npm init -y
Use the following command to install the relevant packages:
npm i express cors dotenv @hubspot/api-client body-parser axios url
Create an index.js file and paste the following code:
require("dotenv").config();

const hubspot = require("@hubspot/api-client");
const bodyParser = require("body-parser");
const express = require("express");
const axios = require("axios");
const cors = require("cors");
const url = require("url");

const app = express();

app.use(cors());
app.use(bodyParser.json());

app.listen(process.env.PORT, () => {
    console.log(`Sample app listening on port ${process.env.PORT}`);
});
Client ID, Client Secret, and Redirect URL are now stored in our .env file (code mentioned below). For your app's security, do not commit these sensitive data points to code repositories or anywhere else.
PORT=4000
CLIENT_ID=
CLIENT_SECRET=
REDIRECT_URI=http://localhost:3000
Now let’s add a REST endpoint in our node app (index.js), which will receive the temporary authorization code as a query parameter in the Redirect URL once the user approves the OAuth consent form from HubSpot.
app.get("/install", (req, res) => {
  const hubspotClient = new hubspot.Client();

  const uri = hubspotClient.oauth.getAuthorizationUrl(
    process.env.CLIENT_ID,
    process.env.REDIRECT_URI,
    "crm.objects.contacts.write"
  );

  res.redirect(uri);
});

app.get("/oauth-callback", async (req, res) => {
  // here we create a payload as prescribed by HubSpot for the token exchange where our app exchanges the temporary authorization code for an access token that can be used to call HubSpot APIs
  const payload = {
    grant_type: "authorization_code",
    client_id: process.env.CLIENT_ID,
    client_secret: process.env.CLIENT_SECRET,
    redirect_uri: process.env.REDIRECT_URI,
    code: req.query.code,
  };

  const params = new url.URLSearchParams(payload);

  // we are using the rest api method here to exchange the tokens
  const apiResponse = await axios.post(
    "https://api.hubapi.com/oauth/v1/token",
    params.toString()
  );

// once we receive the access token we can instantiate a hubspot client using the official client library and reuse it across the codebase for our own convenience
  const hubspotClient = new hubspot.Client({
    accessToken: apiResponse.data.access_token,
  });

  const dummyContact = {
    properties: {
      firstname: "Bruce",
      lastname: "Wayne",
    },
  };

  // this will create a contact in the hubspot crm of the user who installs our app with firstname and lastname as declared above
  await hubspotClient.crm.contacts.basicApi.create(dummyContact);

  return res.sendStatus(200);
};
Shown below is the easiest way to offer a link to the installation page of the app. The installation page provides the OAuth consent form from HubSpot, where users can log into their HubSpot accounts and install the app.
<a href="https://app.hubspot.com/oauth/authorize?client_id=c03b1c70-a5c5-4e96-9e7d-05bcad8428bd&redirect_uri=http://localhost:3000&scope=crm.objects.contacts.write">
  Install
</a>
Tip: You can copy your unique app installation URL from the same page where we set up the Scopes and the Redirect URL (shown above in this post).
When users visit this link, they’ll be required to log in to their HubSpot accounts, approve the OAuth consent form, and then choose which account to install the app in. For this demo, we can choose our test account.
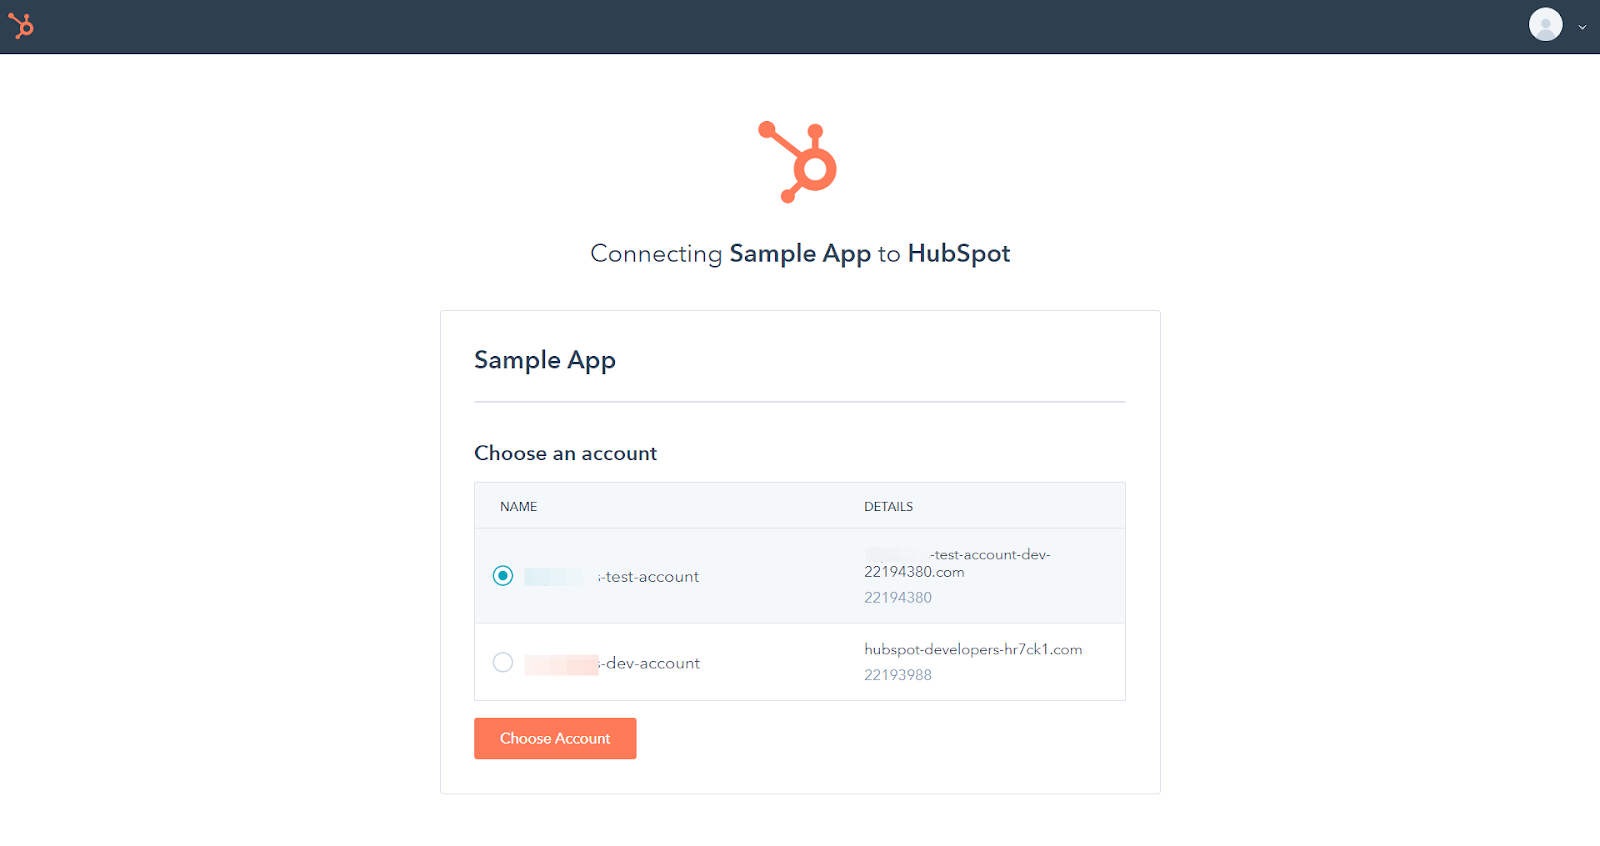
Note: App installations do not work in developer accounts. You can only install apps in either actual production accounts or test accounts.
Clicking on Choose Account takes us to the front end of our app, where we can see this stage of the OAuth token exchange process.
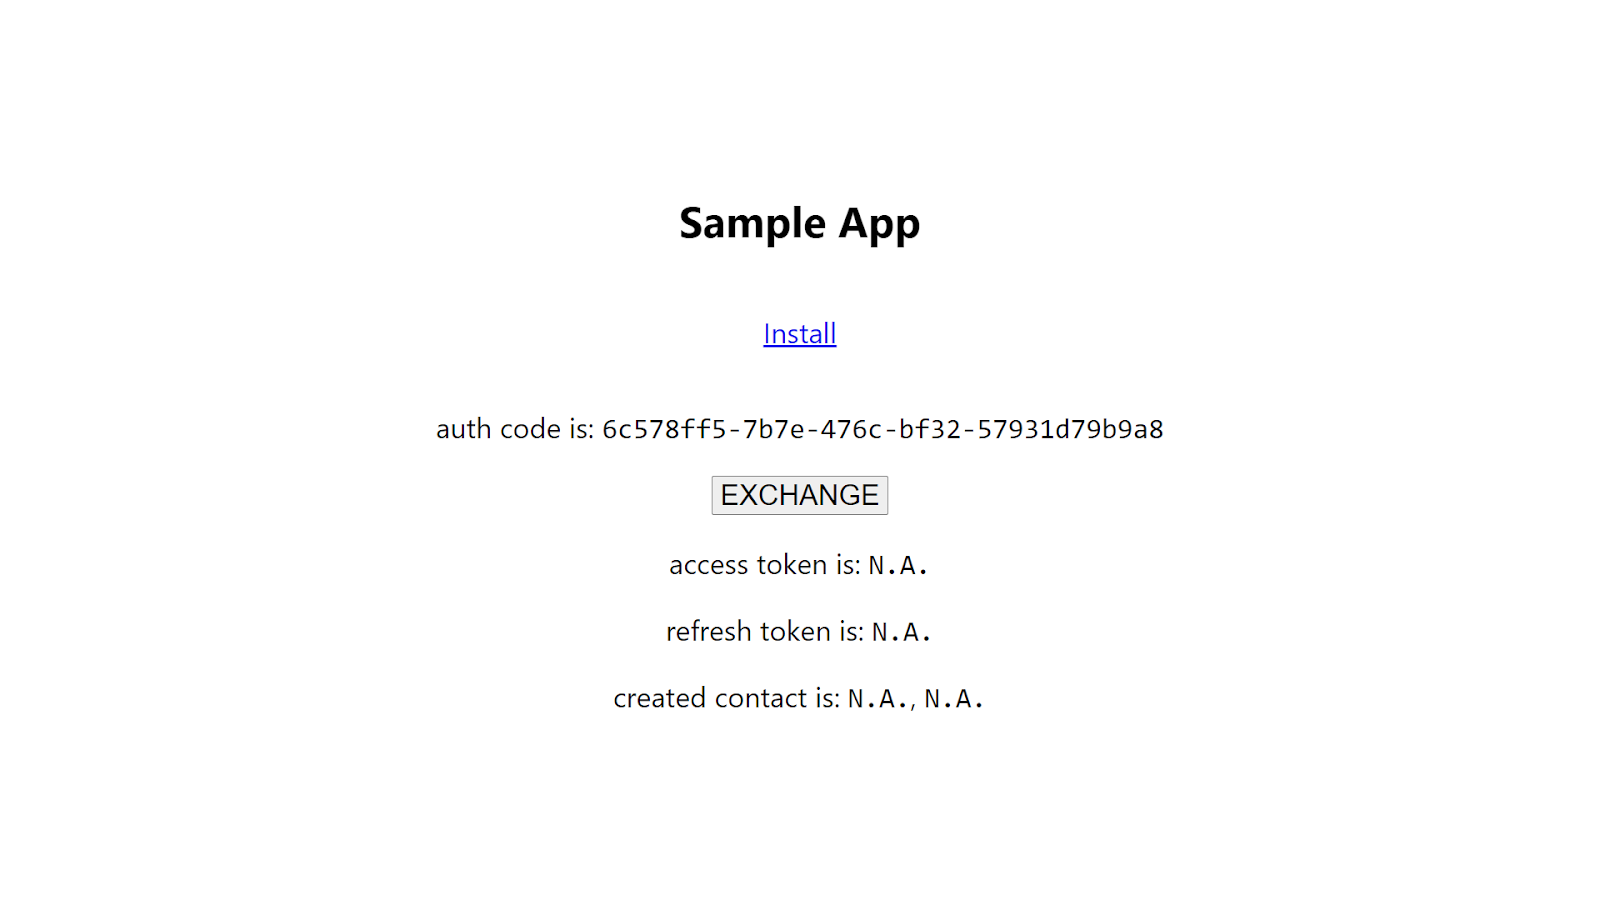
Here, we have the temporary authorization code as auth code. Click on the EXCHANGE button to complete the exchange process, which takes you to the following page:
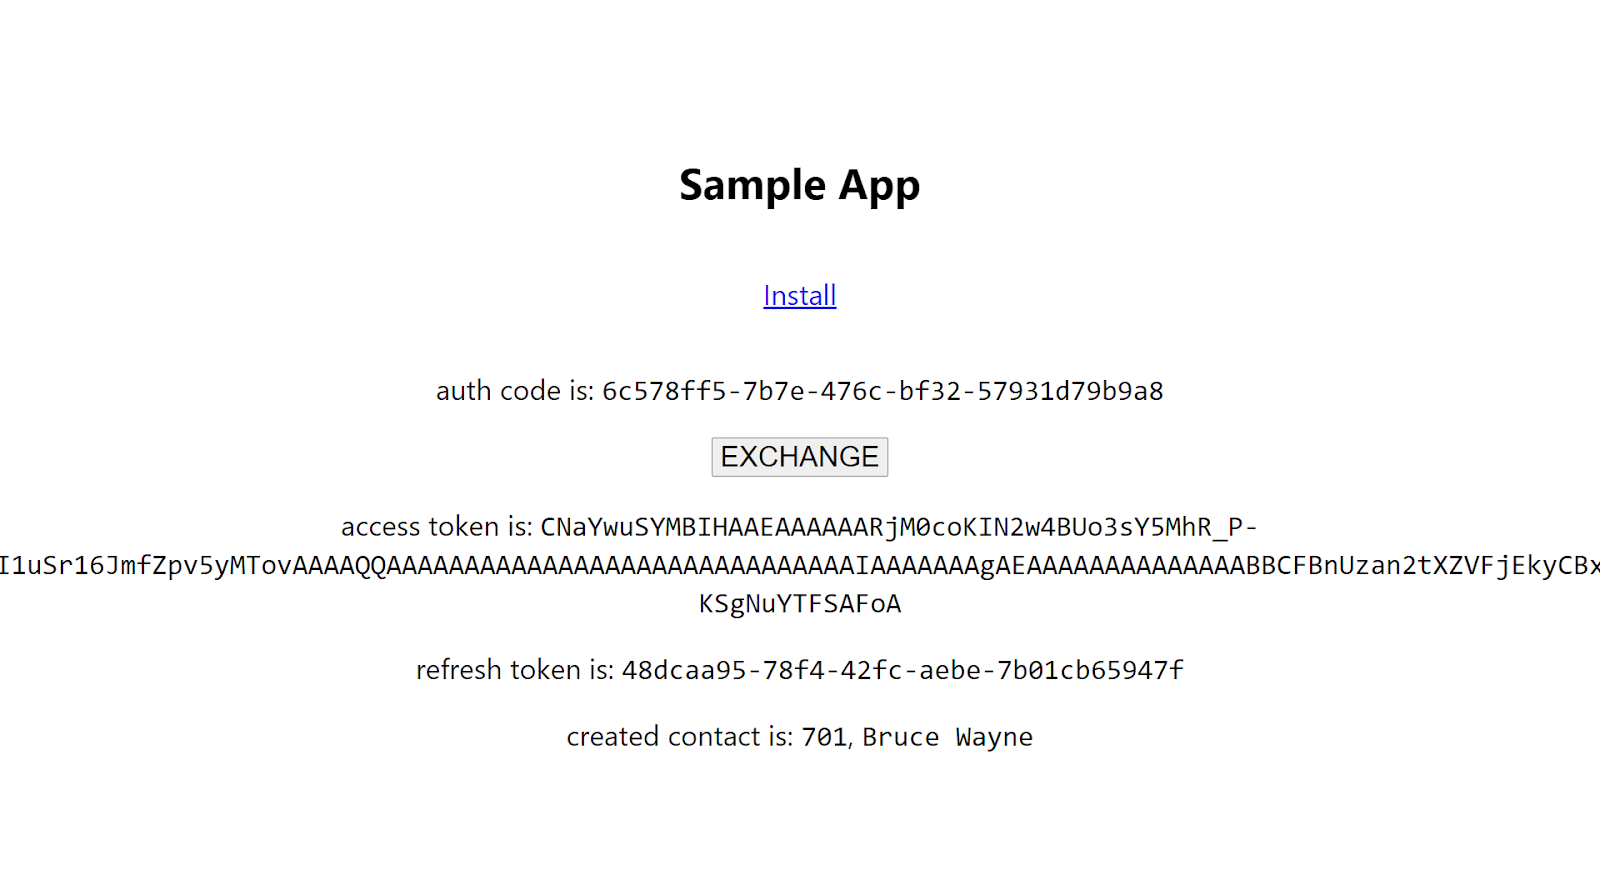
As you can see, the exchange has been completed successfully, and we have the access token with us. And as set in our sample app's back-end node app, the ID is now 701 and the name is Bruce Wayne.
Note: Never expose your access and refresh tokens like this. We did this only for the purpose of demonstration and to deliver a clear understanding of how the OAuth token exchange process works.
Let’s quickly head to HubSpot and verify it.
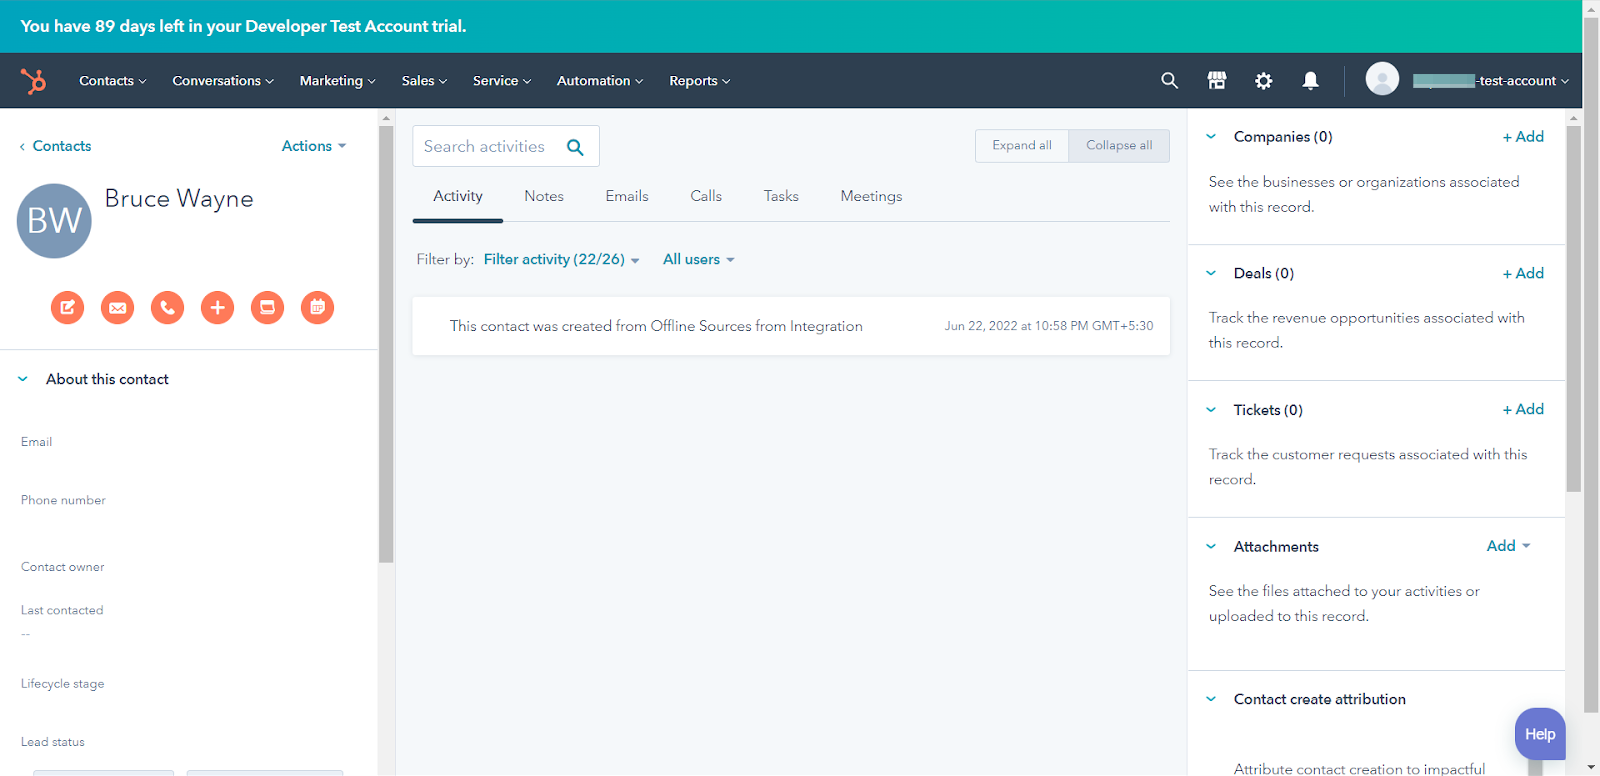
We've confirmed that the CRM of our test account contains a contact with the ID of 701 and the name Bruce Wayne, and with that, the demo is complete.
Conclusion
HubSpot is already a powerful suite of business applications, but you can further extend its functionality via custom integrations and apps like the sample app created in this demo. Our sample app's use case isn't even the tip of the iceberg when it comes to what can be achieved with custom apps with HubSpot.
HubSpot also offers multiple ways to authenticate with its apps and accounts, however, OAuth is the industry standard for secure inter-application communication.
Thank you for reading!
Relevant Links
-
HubSpot APIs | Getting started
This post was written by Keshav Malik. Keshav is a full-time developer who loves to build and break stuff. He is constantly on the lookout for new and interesting technologies and enjoys working with a diverse set of technologies in his spare time. He loves music and plays badminton whenever the opportunity presents itself.
