Google Calendar Webhooks with Node.js
There is a high chance you have a meeting booked right now using Google Calendar, and that's not a surprise - millions of people use it every day to organize their events. As a result of this popularity, we can think of hundreds of use cases leveraging the Google Calendar API webhook infrastructure to help make life easier for teams.
Use cases
As you can imagine, there are tons of use cases for Google Calendar watch events:
- Update a Slack channel when a specific recurring meeting is updated (e.g., hangout link updated / zoom meeting added).
- Send a message via any communication tools like Slack / Discord / SMS when a meeting details you’re invited changed (e.g., meeting location changed, attendees added/removed).
- Get a notification when someone declines an event invite.
What do you need?
In this blog post, we will build an app that accesses your user's primary calendar. You will learn how to subscribe to specific calendar events and generic notifications.
To interact with Google Calendar API, you need to ensure you have a Google Cloud Account
Once you have access to the console, follow these setup instructions:
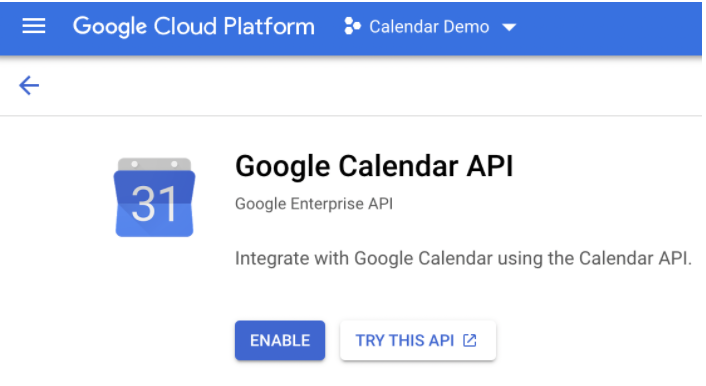
- Enable the Calendar API: Search for Google Calendar API in the top search bar, and click enable
- Create a new Project, choose any name you want.
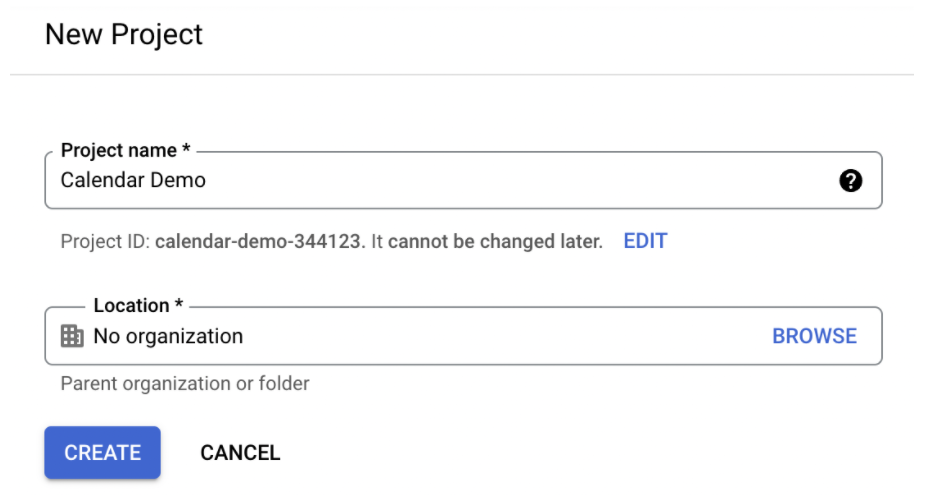
- Ensure you have selected the newly created project. You can verify it by switching to the project in the top bar.

-
Configure the credentials to access the API: There are different alternatives to configure your application credentials. In this tutorial, we will authenticate using an OAuth 2.0 Client; the other options are API Keys and Service Accounts. This section is under the credentials section from the left menu.
-
You need to configure a consent screen since your application requires user interaction. Click the OAuth Consent Screen section from the left menu.
-
A consent screen informs the user what permissions are needed to perform actions using the Calendar resources.
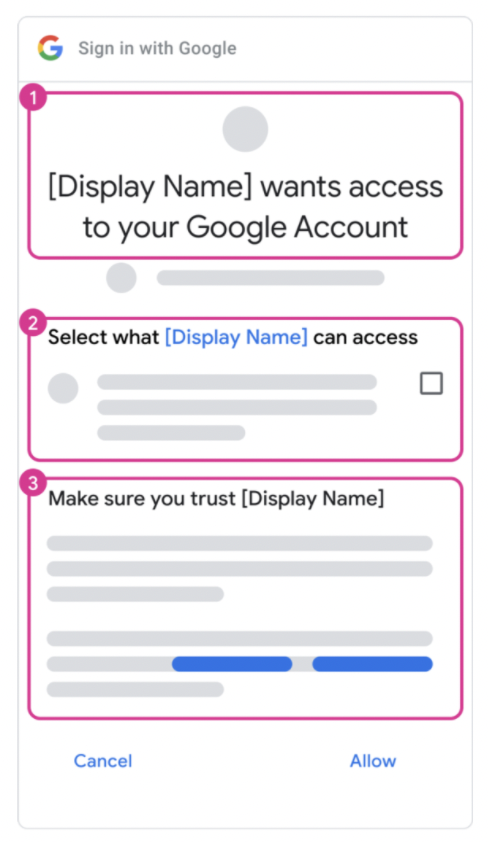
- When configuring the OAuth screen, you need to provide the following information: Application information Application domain
Note: The authorized domain needs to be a top-level domain.
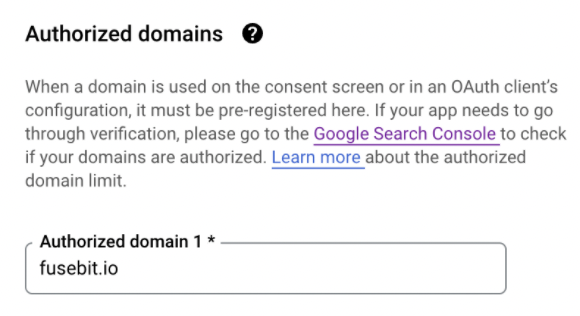
- Add Scopes: Click add or remove scopes, add the following scope manually: https://www.googleapis.com/auth/calendar.events then click update. You should see the added scope under the sensitive scopes section:

-
Click save and continue.
-
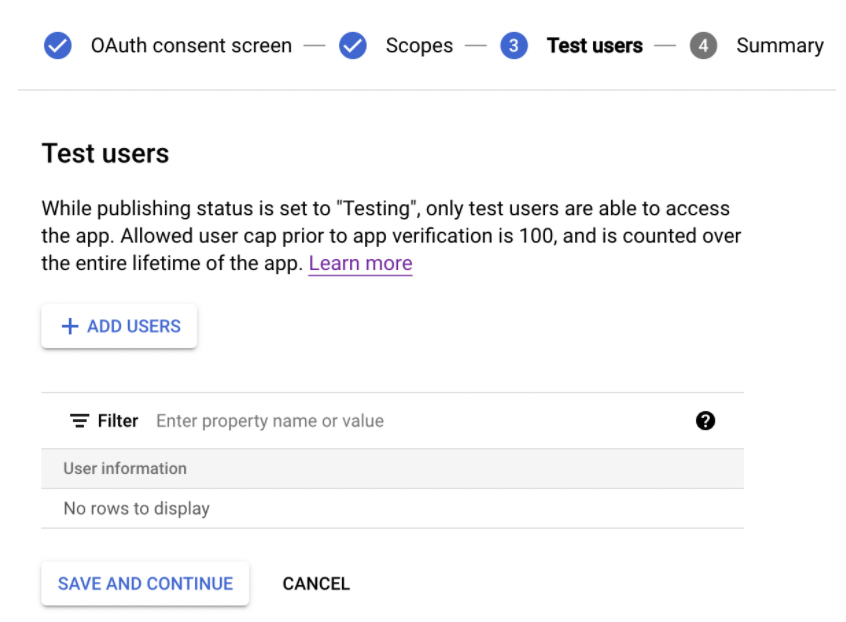
Since your application is in Test mode, you need to add some test users. Only test users can access the app.
-
Click save and continue. Confirm all the settings for your application are correct.
-
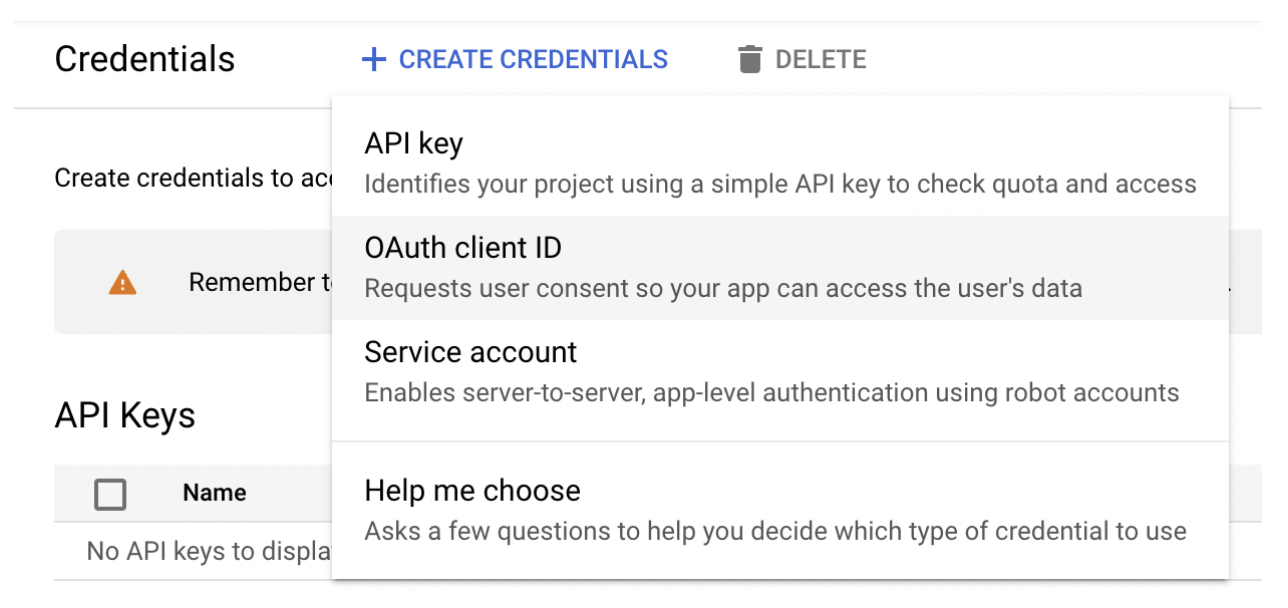
Add credentials: Localize the Credentials section in the left menu, Click create credentials and select OAuth Client Id.
-
Set the application type to Web Application
-
Set the allowed origins to
localhost:3002; our code examples will run locally on port3002. You can change it according to your needs. -
Copy the Client Id and Client secret or download the JSON file with the credentials.
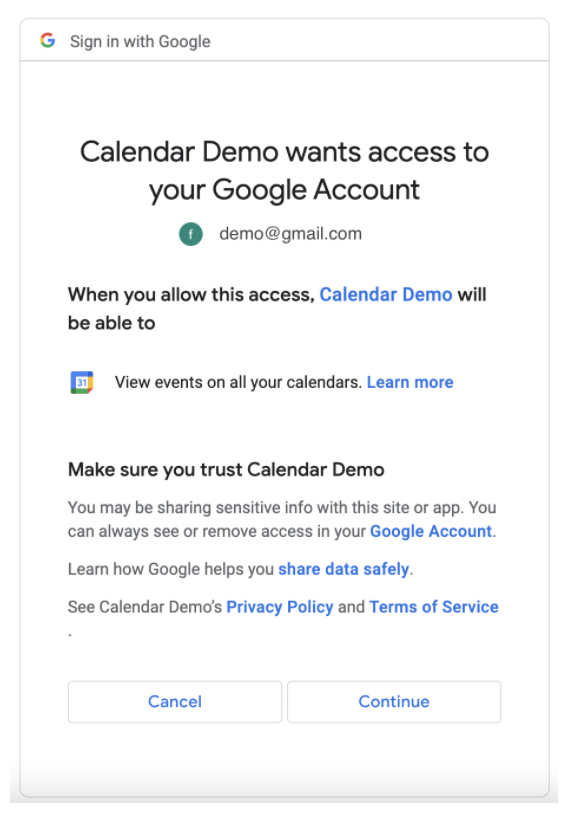
Note: During the authorization screen, users for applications in Test mode will see an unverified screen. Applications in production mode will see the access request screen instead.
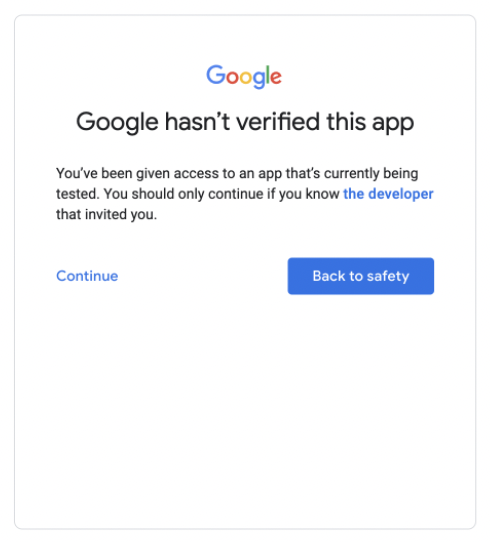
Click continue, and then authorize the application to access the Calendar resources.
Implementing the API using Node.js
Since we’re using an OAuth application, let’s see how you can handle the different parts to interact with the Calendar API.
Starting the authorization flow
The first thing you need to do is to initiate an authorization flow against Google to request authorization to your application and access to Google Calendar resources. We will be using the official npm package Google client library
const crypto = require('crypto');
const { google } = require('googleapis');

const secret = '<YOUR APPLICATION SECRET>';
const clientId = '<CLIENT ID>.apps.googleusercontent.com';
const redirectUri = 'http://localhost:3002/callback';
const oauthState = crypto.randomBytes(32).toString('hex');

const oAuth2Client = new google.auth.OAuth2(clientId, secret, redirectUri);

const authUrl = oAuth2Client.generateAuthUrl({
  access_type: 'offline',
  scope: 'https://www.googleapis.com/auth/calendar.events',
  redirect_uri: redirectUri,
  state: oauthState,
  client_id: clientId,
});

console.log(`Authorize your application by navigating to ${authUrl}`);
Handling the authorization callback
A user authorizes your application to access their Google Calendar resources with their Google credentials.
Your application needs to handle the authorization callback properly:
- Validate the state parameter. Used for preventing cross-site request forgery.
- Use the returned authorization code to get an access token.
In this example, we will be using fastify, but you can use other frameworks like Express, Hapi.js.
Upon authorization, Google will redirect the user to the configured callback URL in your application. Let’s see how to implement this part:
const fastify = require('fastify');
const serverPort = 3002;
// If you want a fancy logger install pino-pretty package
const server = fastify({
logger: {
prettyPrint: true,
},
});
server.get('/callback', { logLevel: 'error' }, async (request, reply) => {
const { state, code } = request.query;
// Use the state generated during the authorization flow in the previous step.
if (state !== oauthState) {
return reply.status(403).send('Invalid state');
}
const {
res: {
data: { access_token },
},
} = await oAuth2Client.getToken(code);
oAuth2Client.setCredentials({ access_token });
google.options({ auth: oAuth2Client });
const calendar = google.calendar({ version: 'v3' });
// You can now use the calendar API here
return reply.status(200).send();
});
const startHttpServer = async () => {
try {
await server.listen(serverPort);
} catch (err) {
server.log.error(err);
process.exit(1);
}
};
startHttpServer();
Create a new watch event
You can watch Calendar resources changes using Google Calendar Push notifications API. Take into account the following:
- You must provide a unique identifier for your watch event, representing a notification channel within your project. In this example, we will use a universally unique identifier (
UUID). - Provide a type property with a value of
web_hook - A
Webhook addresswill be the URL that listens and responds to notifications. It must useHTTPS. If you want to run this code locally, you can run a tunnel that allows you to expose your application securely. You can use Localtunnel for that. - A
token(optional). You can provide a token used to validate incoming webhooks preventing notifications spoofing attacks to guarantee that it is a legit Webhook call from Google. You can also use this to route the webhook message to the proper destination, taking into account the max length of this property is 256 characters. - Set an expiration property (optional) if you want the watcher to expire and stop sending notifications.
Let’s see a code example:
const { google } = require('googleapis');
const localtunnel = require('localtunnel');
const { v4: uuidv4 } = require('uuid');
const serverPort = 3002;

// Start the tunnel right after you start your Http server using fastify (see Handling the authorization callback step)
const tunnel = await localtunnel({
  port: serverPort
});
// Authorization details for google API are explained in previous steps.
const calendar = google.calendar({ version: 'v3' });
const watchResponse = await calendar.events.watch({
  resource: {
    id: uuidv4(),
    type: 'web_hook',
    address: `${tunnel.url}/webhook`, // Expose localhost using a secure tunnel
    token: webhookToken,
  },
  calendarId: 'primary',
});
Handling webhook calls
Now that you have registered a new watch event at the specified address let’s see how to handle the webhook and what you can do.
One thing to consider is that the webhook event will not send specific information about updated events. You will need to use event filters to see the events changed during a particular timestamp; the webhook will be the baseline for defining such timestamp.
After creating a new notification channel to watch a resource, the Google Calendar API sends a sync message to indicate that notifications are starting. You will usually acknowledge the webhook response when the resource state is in sync.
server.post('/webhook', { logLevel: 'error' }, async (request, reply) => {
  const resourceId = request.headers['x-goog-resource-id'];
  const channelToken = request.headers['x-goog-channel-token'];
  const channelId = request.headers['x-goog-channel-id'];
  const resourceState = request.headers['x-goog-resource-state'];

  // Use the channel token to validate the webhook
  if (channelToken !== webhookToken) {
    return reply.status(403).send('Invalid webhook token');
  }

  if (resourceState === 'sync') {
    return reply.status(200).send();
  }

  // Authorization details for google API are explained in previous steps.
  const calendar = google.calendar({ version: 'v3' });
  // Get the events that changed during the webhook timestamp by using timeMin property.
  const event = await calendar.events.list({
    calendarId: 'primary',
    timeMin: new Date().toISOString(),
    maxResults: 10,
    singleEvents: true,
    orderBy: 'startTime',
  });
  // log in the console the total events that changed since the webhook was called.
  server.log.info(event.data.items);

  return reply.status(200).send('Webhook received');
});
Creating webhooks for specific events
If you want to create a webhook for an existing event, you can do it too. Remember, it’s just an URL you configure in the address property. You just need to ensure your application responds to that particular request.
Define a webhook that listen for any event created watcher:
server.post('/webhook/event/:eventId', { logLevel: 'error' }, (request, reply) => {
  const { eventId } = request.params;
  const resourceState = request.headers['x-goog-resource-state'];
  const channelToken = request.headers['x-goog-channel-token'];

  if (channelToken !== webhookToken) {
    return reply.status(403).send('Invalid webhook token');
  }

  if (resourceState === 'sync') {
    return reply.status(200).send();
  }
  server.log.info(`Webhook event for ${eventId}`);
});
The following example creates a watch event for the ten most recent events from the user's primary Calendar.
const eventsResponse = await calendar.events.list({
  calendarId: 'primary',
  maxResults: 10,
  singleEvents: true,
  orderBy: 'startTime',
  calendarId: 'primary',
  timeMin: new Date().toISOString(),
});

// Create a watch event for the next closer 10 events:
const eventsList = eventsResponse.data.items || [];

for await (const event of eventsList) {
  try {
    await calendar.events.watch({
      resource: {
        id: uuidv4(),
        type: 'web_hook',
        address: `${tunnel.url}/webhook/event/${event.id}`,
        token: webhookToken,
      },
      calendarId: 'primary',
    });
  } catch (error) {
    server.log.error(`Failed to create watcher for event ${event.id}`);
  }
}
To Wrap up
Google Calendar watch events allow you to integrate powerful features within your application; instead of constantly polling Google Calendar resources, you can configure multiple webhooks to handle different use cases.
