How to Use the GitHub Pulls API to Manage Pull Requests
The pull request process is one of the key facets of working with GitHub. Engineers ask for and give reviews through the pull request and discuss design and architectural decisions. Additionally, pull requests often act as quality gates, kickstarting the CI process.
You might often wish you could do more with pull requests, creating automations and integrations around them. The good news is that you can use the GitHub Pulls API. And in this post, you'll learn how to get started with this GitHub API to manage your pull requests.
Requirements for GitHub Pull Request
Throughout this post, I assume that you:
- Have some experience working with RESTful APIs
- Are familiar with GitHub (including having a GitHub account) and its pull request process
- Don't necessarily have experience working with the GitHub API
- Are comfortable working with the command line, and know how to use cURL
- Know how to use the most common Git commands For the code examples, when they're needed, I'll use Node.js, though you're not required to know it to understand the examples.
With all of that out of the way, let's get started. I'll walk you through some common scenarios you might face when using the API to handle pull requests.
You might often wish you could do more with pull requests, creating automations and integrations around them.
Listing Pull Requests for a Given Repository
To get all pull requests for a given repository, you need to know its name and the name of the user or organization to which it belongs. Then, make a GET request using this template:
GET repos/<OWNER>/<REPOSITORY-NAME>/pulls
Where <OWNER> is the user or organization and <REPOSITORY-NAME> is the name for the repository. For this example and all of the next ones, the base URL you'll use for calls is https://api.github.com.
With that in mind, let's see a sample request using cURL:
curl https://api.github.com/repos/nodejs/node/pulls
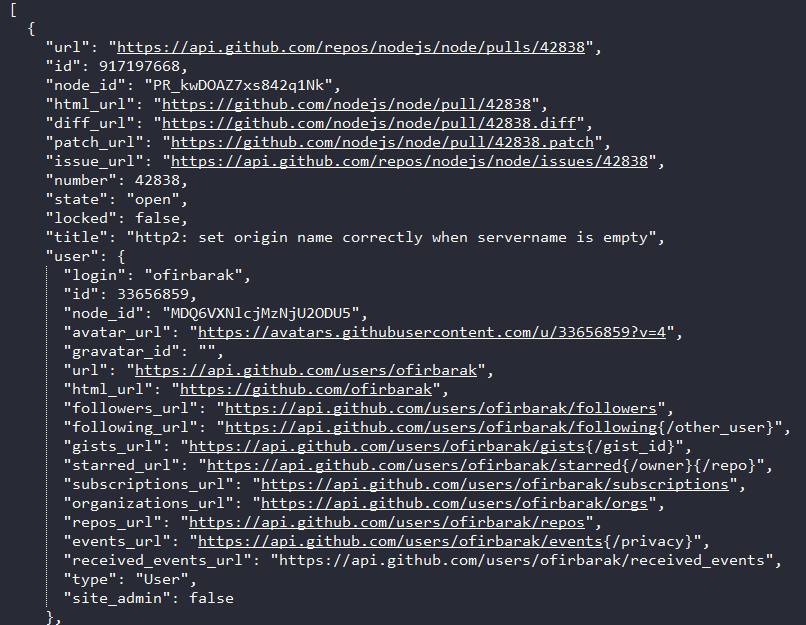
Here, I'm retrieving the pull requests for the Node.js project. The repository's name is simply "Node," and it belongs to the organization NodeJs. The response is quite long for this repo, so here's just a part of it:

You can further filter the results using parameters. For example, let's retrieve the pull requests again, but this time only the closed ones, based on the canary-base branch:
curl https://api.github.com/repos/nodejs/node/pulls?state=closed&base=canary-base
The state parameter accepts open, closed, and all.On the other hand, the base parameter accepts the name of a branch.
Listing Comments for Pull Requests
Another equally easy scenario involves listing all comments for all pull requests on a given repository. For that, use the following template:
GET /repos/<OWNER>/<REPOSITORY-NAME>/pulls/comments
Let's use Node as an example again:
curl https://api.github.com/repos/nodejs/node/pulls/comments
In this case, we're retrieving all comments from all pull requests. But what about getting the comments for one specific pull request? In this case, you'd use the following template:
GET /repos/<OWNER>/<REPOSITORY-NAME>/pulls/<PULL-REQUEST-ID>/comments
The next example retrieves the comments for the pull request number 42837 on the Node.js repository:
curl https://api.github.com/repos/nodejs/node/pulls/42837/comments
Creating a Pull Request
Up until now, you've only used GET requests when interacting with the API. Things are about to change, though, because to create a pull request, you'll need to send a POST request.
Preparing the Repository
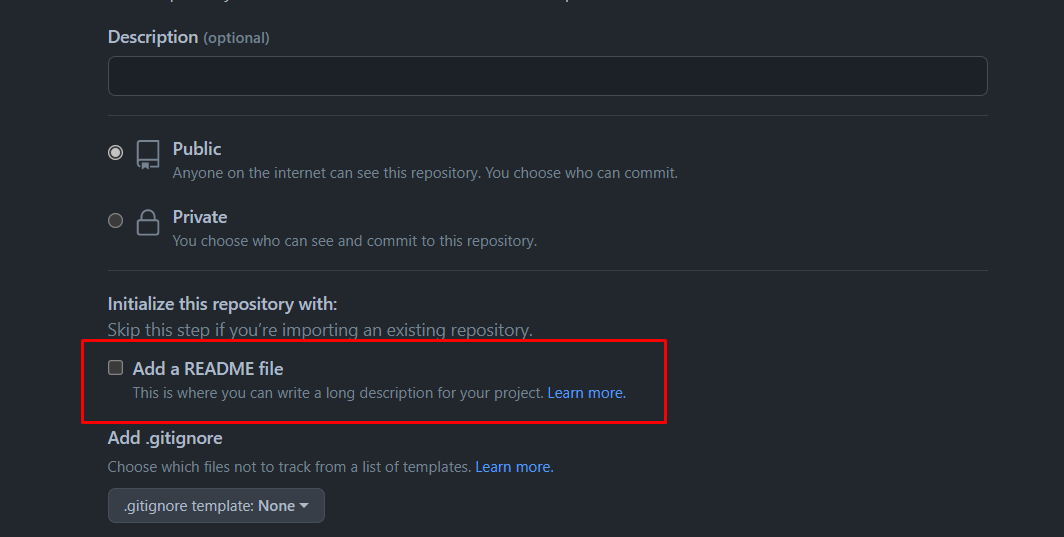
Let's start by creating a new repository on GitHub. Pick whatever name you want, but make sure to check the "Add a README file" option:

After the repository is created, clone it locally using Git:
git clone https://github.com/<YOUR-USERNAME>/<REPOSITORY-NAME>
Then, access the directory:
cd <REPOSITORY-NAME>
Create a new branch, edit the README file, commit, and push the changes:
git checkout -b new
echo whatever >> README.md
git commit -am "Update README file"
git push -u origin new
If you open the repository on your browser, you'll see a message saying that you've pushed recent changes and a button you can use to open a pull request:

Of course, you want to open a pull request, but not this way. Let's use the API instead.
Creating a Node Application
Though I could use cURL for this example as well, I think it makes sense to create a super basic Node.js app. I'll start by creating a folder, initiating a new project, then installing Octokit, which is the official client library for the GitHub API:
mkdir gh-api-node
npm init -y
npm install octokit
npm install dotenv --save
Additionally, I've also installed dotenv, which is needed for loading environment variables into the Node app (we'll need them soon). Then, I create a file called index.js and add the following content to it:
import { Octokit, App } from "octokit";

let octokit = new Octokit();
let repos = await octokit.request("GET /users/schacon/repos");

console.log(repos);
A final touch is to add the following property to the package.json file:
"type": "module"
That way, I can treat my file as a module and the import statement will work.
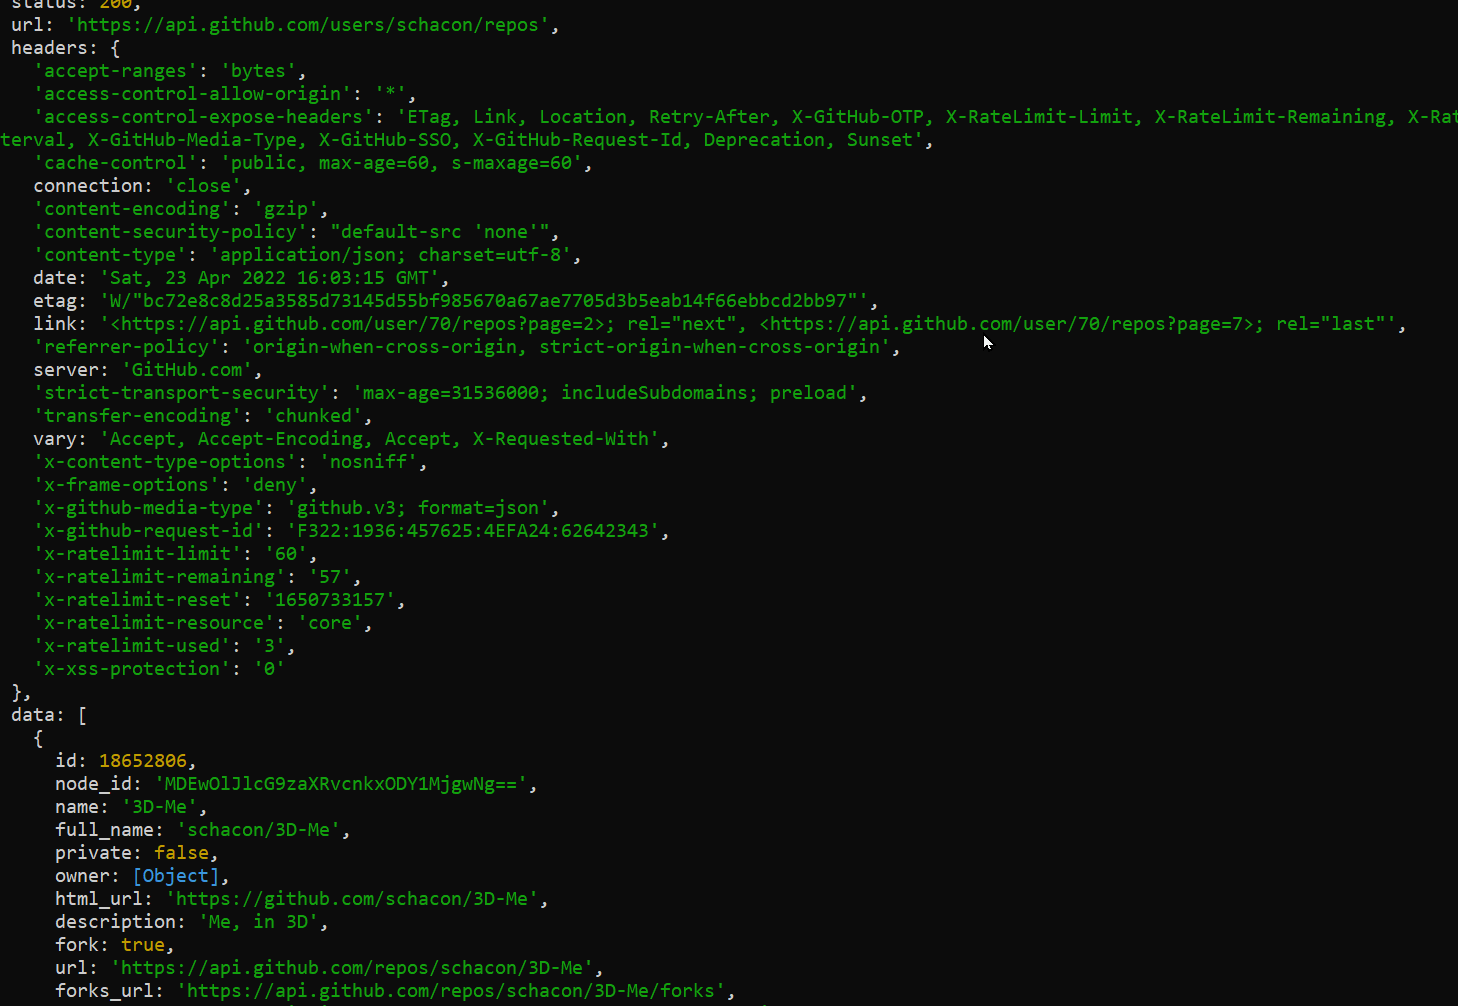
Finally, I executed the app with node index.js. This is the result:

OK, let's now replace this sample call with an actual POST request to create a pull request. The actual call follows this template:
let response = await octokit.request('POST /repos/<OWNER>/<REPO>/pulls', {
owner: '<YOUR-USER-NAME>',
repo: '<YOUR-REPO-NAME>',
title: '<SOME-TITLE>',
body: '<SOME-DESCRIPTION>',
head: '<YOUR-SOURCE-BRANCH>',
base: '<THE-DESTINATION-BRANCH>'
});
Before the actual call is done, it's necessary to create an Octokit object with authentication. In this case, I'm using a .env file to store my GitHub personal access token—for safety reasons, the request fails if you hardcode the token.
My complete code looks like the following:
import { Octokit, App } from "octokit";
import 'dotenv/config';

const octokit = new Octokit({ auth: process.env.GITHUB_AUTH });

let response = await octokit.request('POST /repos/carlosschults/ubiquitous-octo-couscous/pulls', {
  owner: 'carlosschults',
  repo: 'ubiquitous-octo-couscous',
  title: 'My first pull request using the API',
  body: 'This is simply a pull request for demo purposes',
  head: 'new',
  base: 'main'
});

console.log(response);
The response you get from the call is an object with four properties:
- Status: This is the HTTP status code for the request. It should be 201 for a successful request.
- URL: The URL for the newly created pull request
- Headers: The response headers
- Data: The actual data for the pull request created The following image shows part of the actual response I got after making the request:

Merging a Pull Request
Since you now have a pull request, it seems like the next logical step is to merge it, right? So, let's see how to do just that.
To merge a pull request, you need to do a PUT request according to the following template:
PUT /repos/<OWNER>/<REPOSITORY-NAME>/pulls/<PULL-REQUEST-ID/merge
This call accepts a few parameters, though none of them are mandatory. For the example, I'll perform the most basic request possible, simply merging the pull request I previously created using the default options.
I'll just edit the Node app I created earlier, replacing the request with the following one:
let response = await octokit.request('PUT /repos/carlosschults/ubiquitous-octo-couscous/pulls/1/merge');
Of course, replace my username and repo name with yours. That's it. After this, I simply display the contents of response on the console. After the expected status (it should be 200), URL, and headers, we've got another data object, which contains metadata summarizing the operation:
 data: {
    sha: '1613cfc570bdd8c711c82311896e39529d444672',
    merged: true,
    message: 'Pull Request successfully merged'
  }
Here, the sha property refers to the SHA-1 hash that uniquely identifies the resulting merge commit. Merged obviously indicates that the merge was successful, and we finally have a human-friendly success message.
Dig in and learn more about the API. It has plenty of valuable options, more than can fit in the scope of a single blog post
GitHub Pulls API: Delve Deeper for Fun and Profit
The GitHub API is certainly one of the best REST APIs out there, not only according to me but also according to people who are way smarter than me. But don't take our words for it: check it out for yourself. Dig in and learn more about the API. It has plenty of valuable options, much more than I can fit in the scope of a single blog post.
I encourage you to learn more about the GitHub API, not only relating to pull requests but to all aspects of it. You'll certainly become prepared for when you need to integrate with GitHub, and you'll probably have some fun while doing so. I know that official documentation sometimes sounds dry and somewhat frustrating, but now that you have the basics out of the way, you're better equipped to navigate the documentation and go deeper into the topics that matter the most to you.
Before you go...
This post was written by Carlos Schults. Carlos is a consultant and software engineer with experience in desktop, web, and mobile development. Though his primary language is C#, he has experience with a number of languages and platforms. His main interests include automated testing, version control, and code quality.
