How to Use Confluence OAuth to Access Data From a Web App
OAuth 2.0 is the primary mechanism developers use to surface Confluence data in a web application.
Using the Atlassian OAuth mechanism with NodeJS can be a daunting task. In this post, we'll look at how to use the OAuth Client Library to allow a NodeJS web app to authenticate and access Confluence content.
Confluence OAuth is a secure means of authentication that uses access tokens rather than a password to connect your web app to a user’s Confluence account
What Is Confluence OAuth?
Confluence OAuth is a secure means of authentication that uses access tokens rather than a password to connect your web app to a user's Confluence account.
In order for your app to be able to access Confluence data, it needs to authenticate with Confluence's OAuth server. This is because whenever your app wants to communicate with Confluence, it needs to furnish an access token. That means the user the particular token represents has already authorized your app to make API calls to the user's Confluence account and access their data.
To put it simpler, if your app wants to create content in Confluence, the access token it needs to send with the content creation API call needs to have been pre-authorized by the Confluence user, which is now also your app's user.
Understanding How OAuth Works
It's a straightforward four-step process.
- We as app developers predefine scopes in Confluence, saying that whoever authorizes our app with OAuth in their account consents to our app accessing so and so resources like content creation in Confluence.
- Then, Confluence provides us with an installation URL. When the users visit, they have to log in to the Confluence account in which they want to install our app and then approve the scope consent form.
- Post-approval, Confluence sends a temporary authorization code to our app, which remains valid for a short time. Our app then needs to exchange with Confluence's OAuth server for an access token.
- Once this exchange happens, the app can store the access and refresh tokens, which our app can further use while utilizing Confluence's APIs. Now, the app is capable of accessing the connected Confluence account's data within the predefined scope of access.
- Get started with a sample app.
Let's develop a very simple Confluence app that, upon OAuth login by the user, creates a sample page in Confluence Space "Sample Space" for the sake of the demonstration.
Prerequisites
Before proceeding with any code, one must ensure some prerequisites are in order. Setting up development and testing environments is out of this post's scope, but you can get started with these official Confluence links.
Further on, we assume that you've signed up for a Confluence Cloud account and have access to the developer console.
Setting Up a Confluence App
Let’s build a straightforward app for Confluence that’ll complete the OAuth process. Once completed successfully, this will create a sample page in the connected Confluence account.
To give the context, we’ll be developing and testing locally, thus serving our back-end node app on port 4000. Hang on for more clarification!
Let’s first set up the base of our sample app on Confluence’s end before proceeding to the code.
- Sign in to the developer console, click “Create,” and then select “OAuth 2.0 integration."
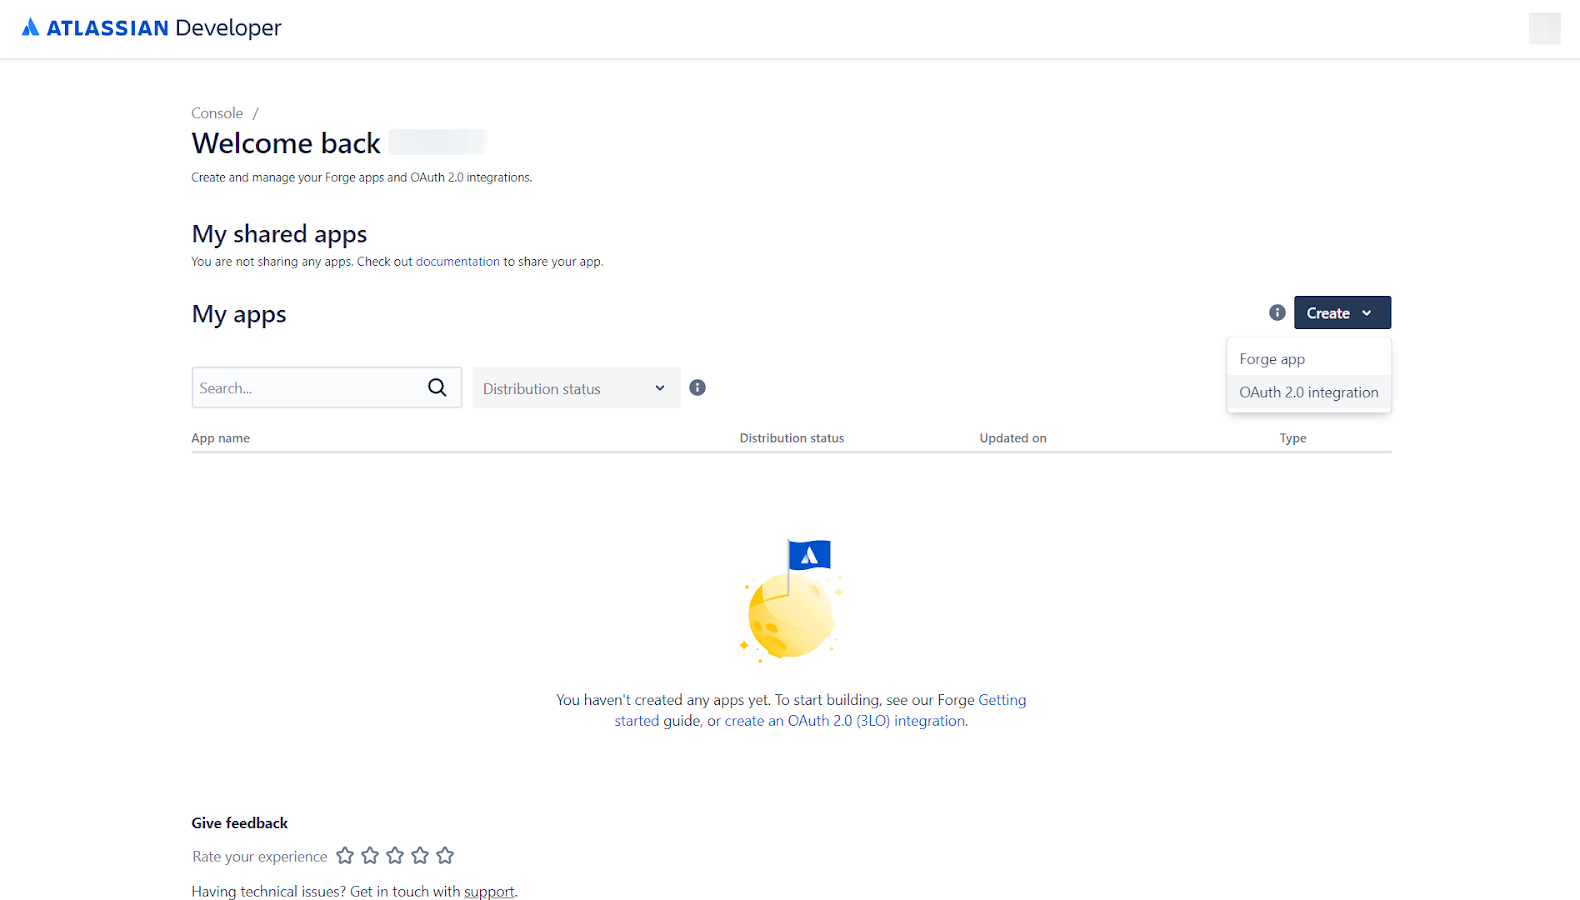
- Enter a name for the app and click on “Create."
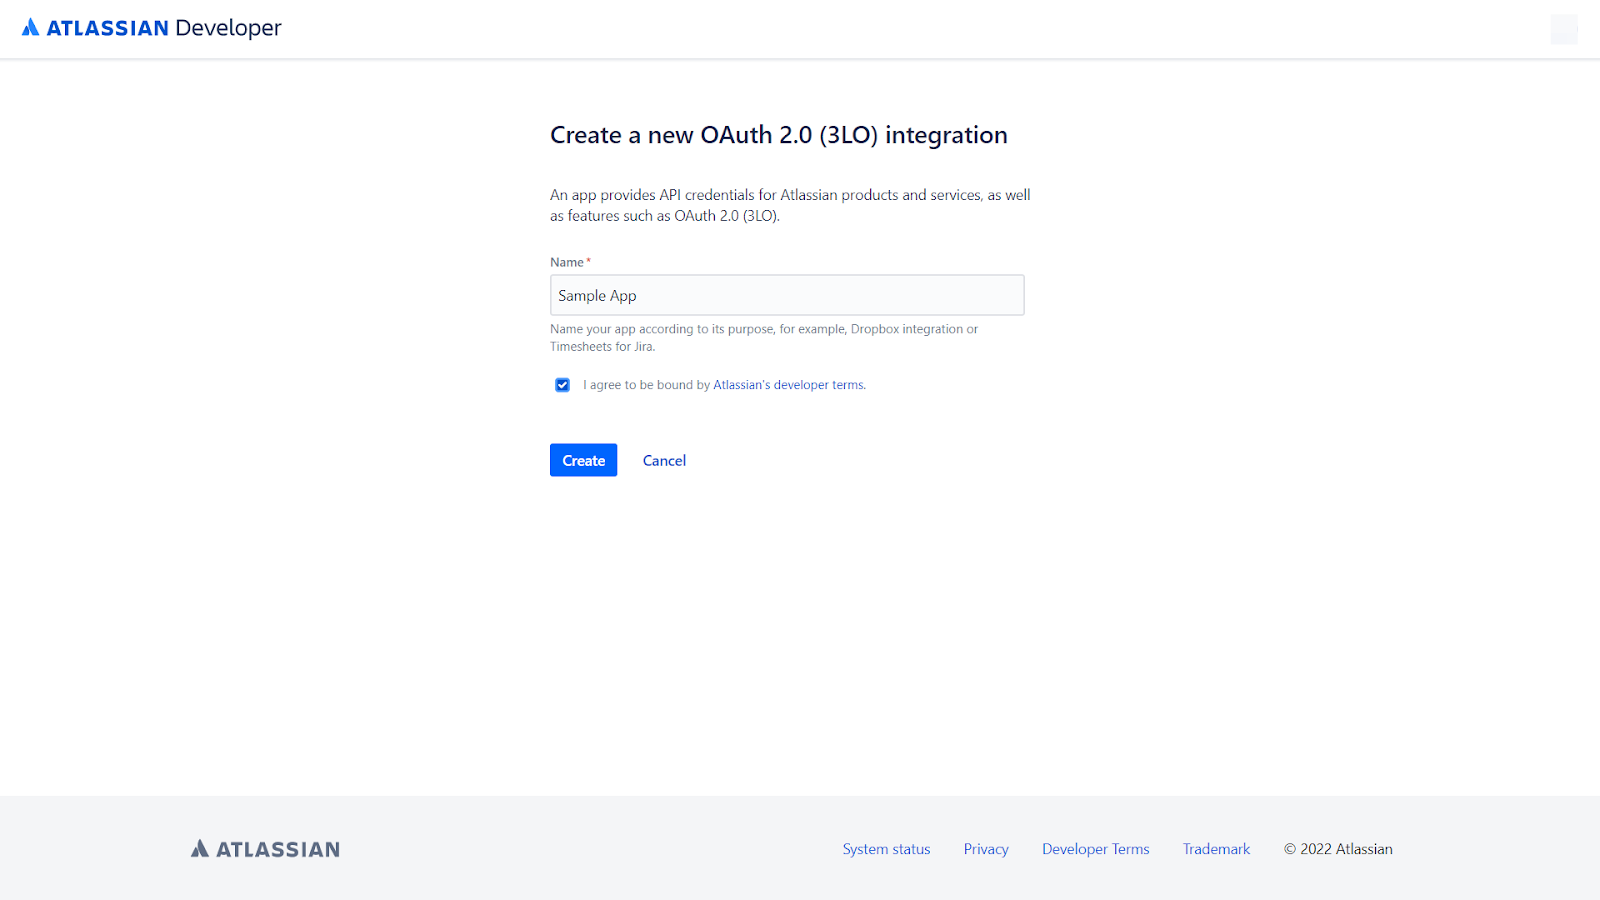
- That will create the app for you and take you to the overview page.
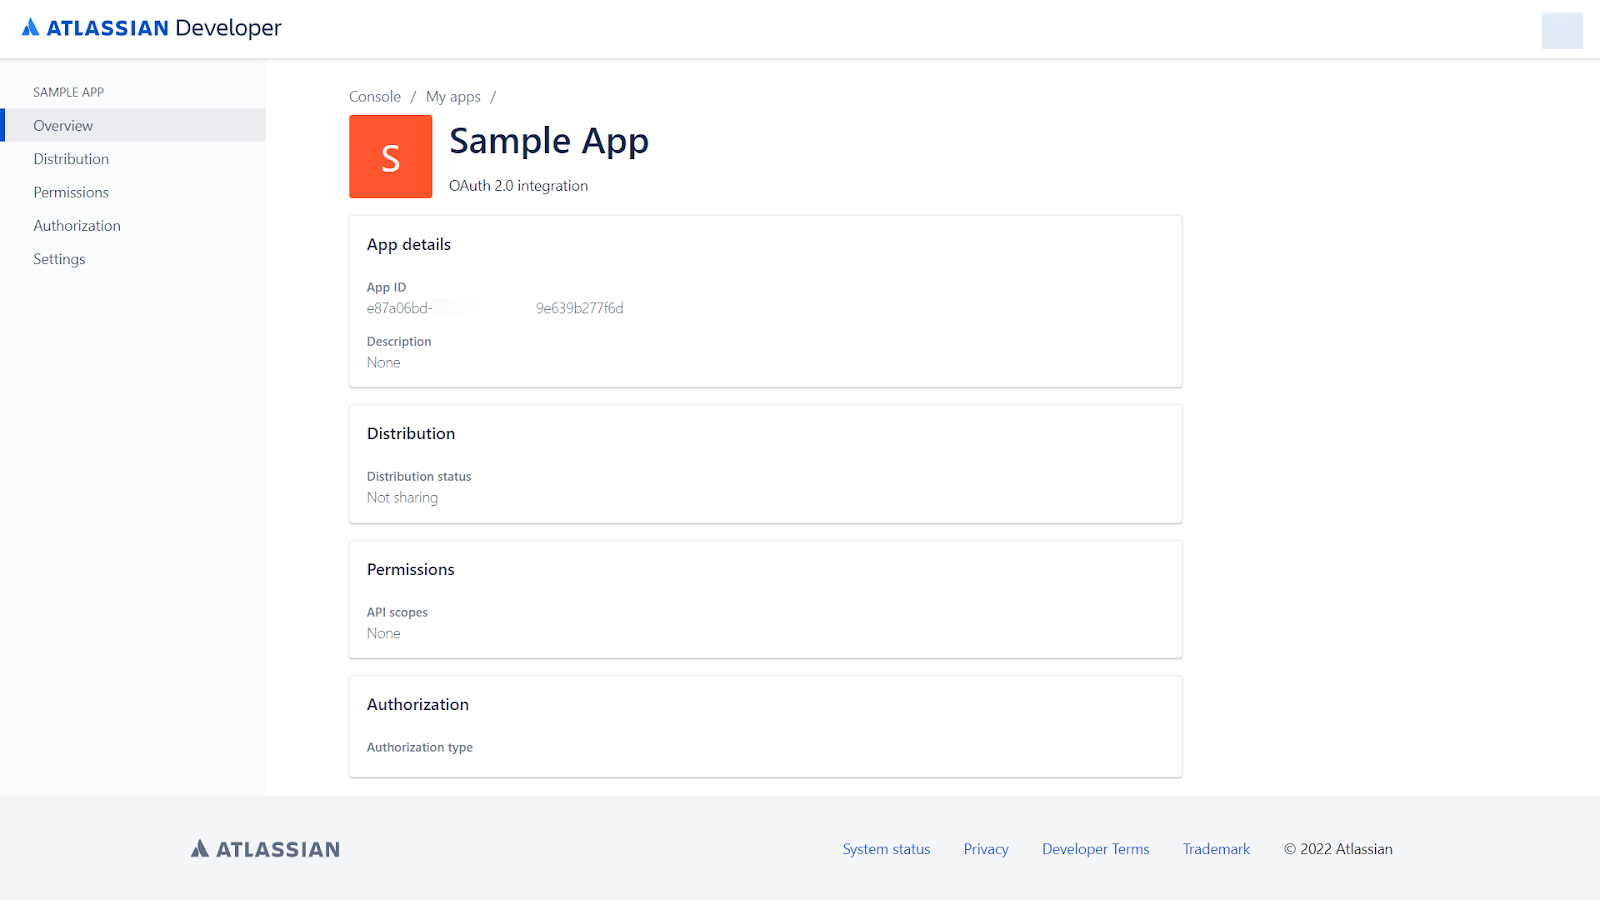
- Next, click on “Authorization” and “Add” in the row that reads “OAuth 2.0 (3LO)."
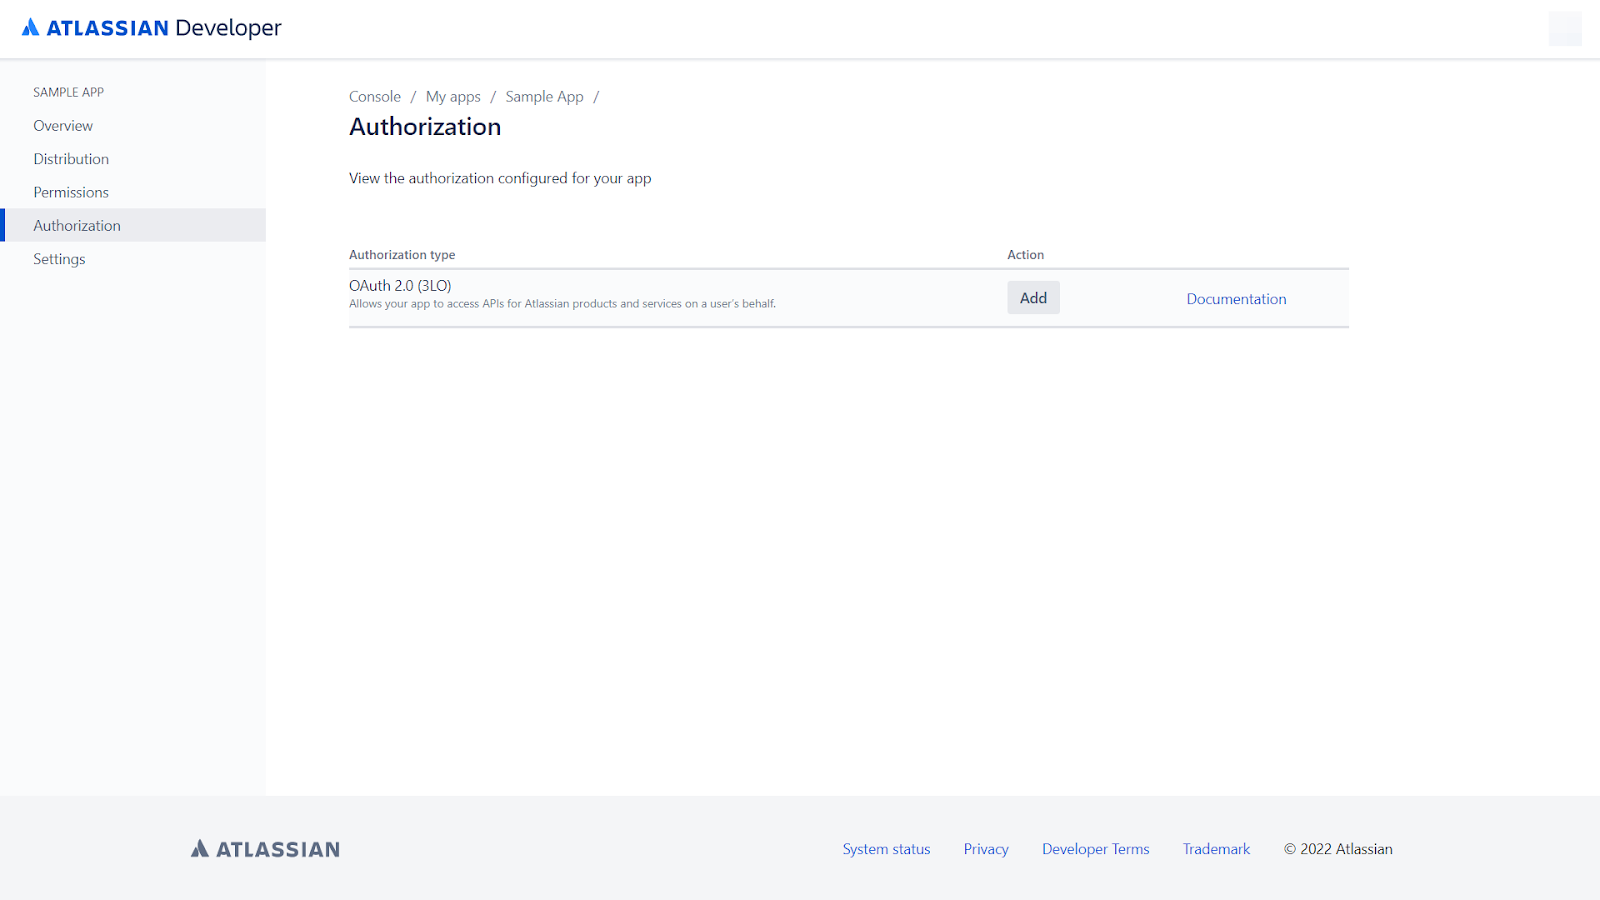
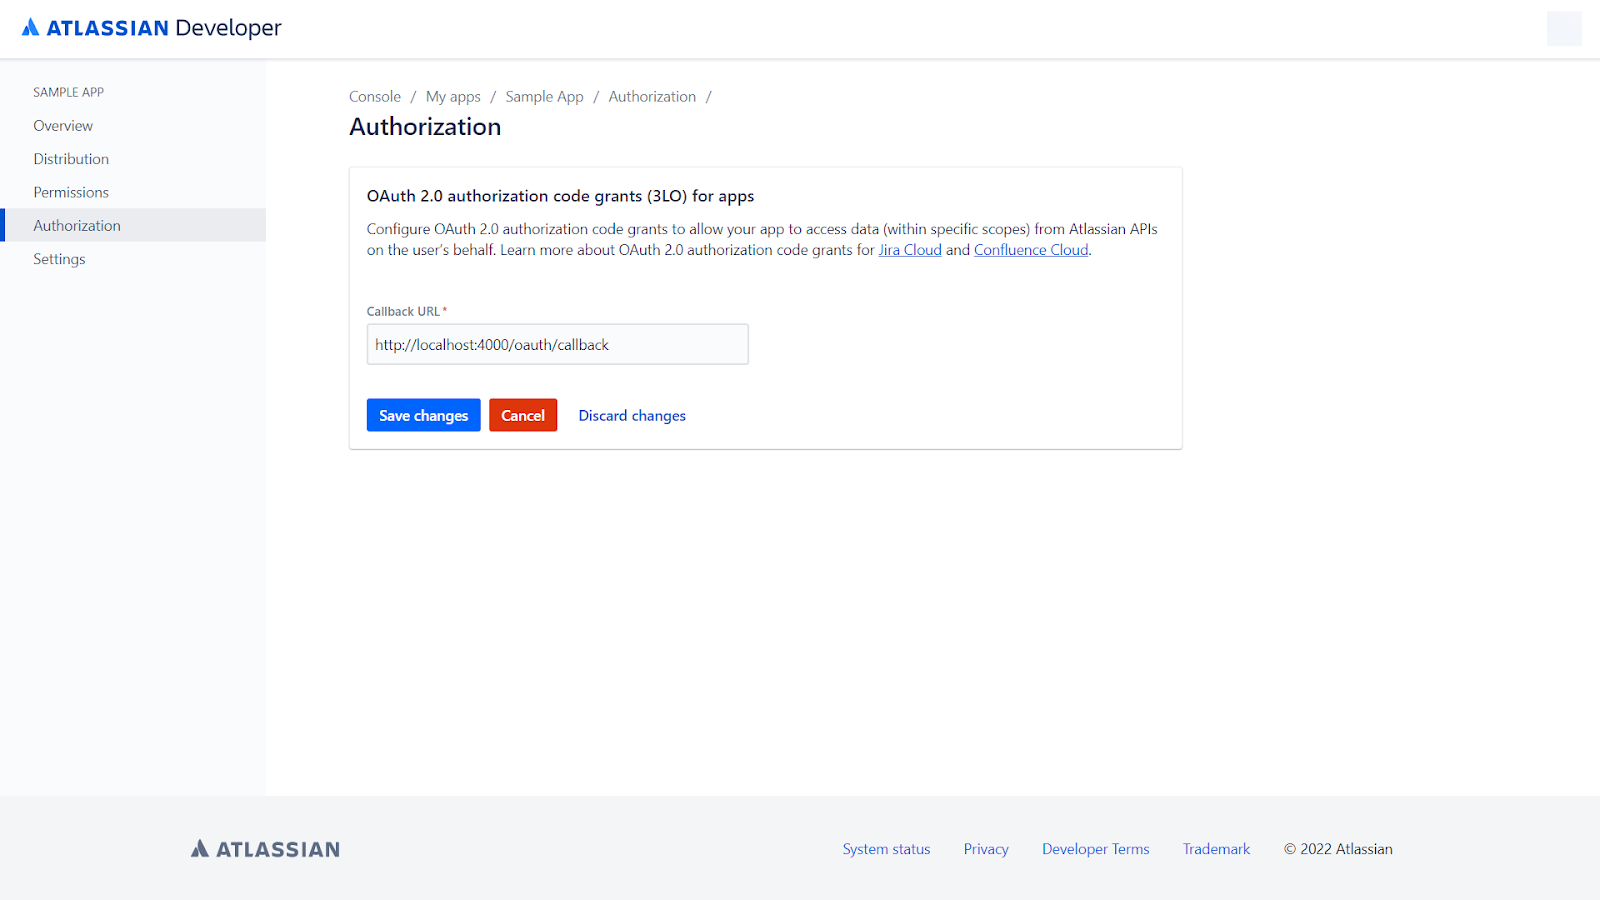
- Provide http://localhost:4000/oauth/callback in the callback URL and click on “Save changes." Take note of this callback URL somewhere (more on this later).
- Now, let’s go to the “Permissions” section and click on “Add” for the row that reads “User identity API." This will authorize our app to view the profile details of the currently logged-in user.
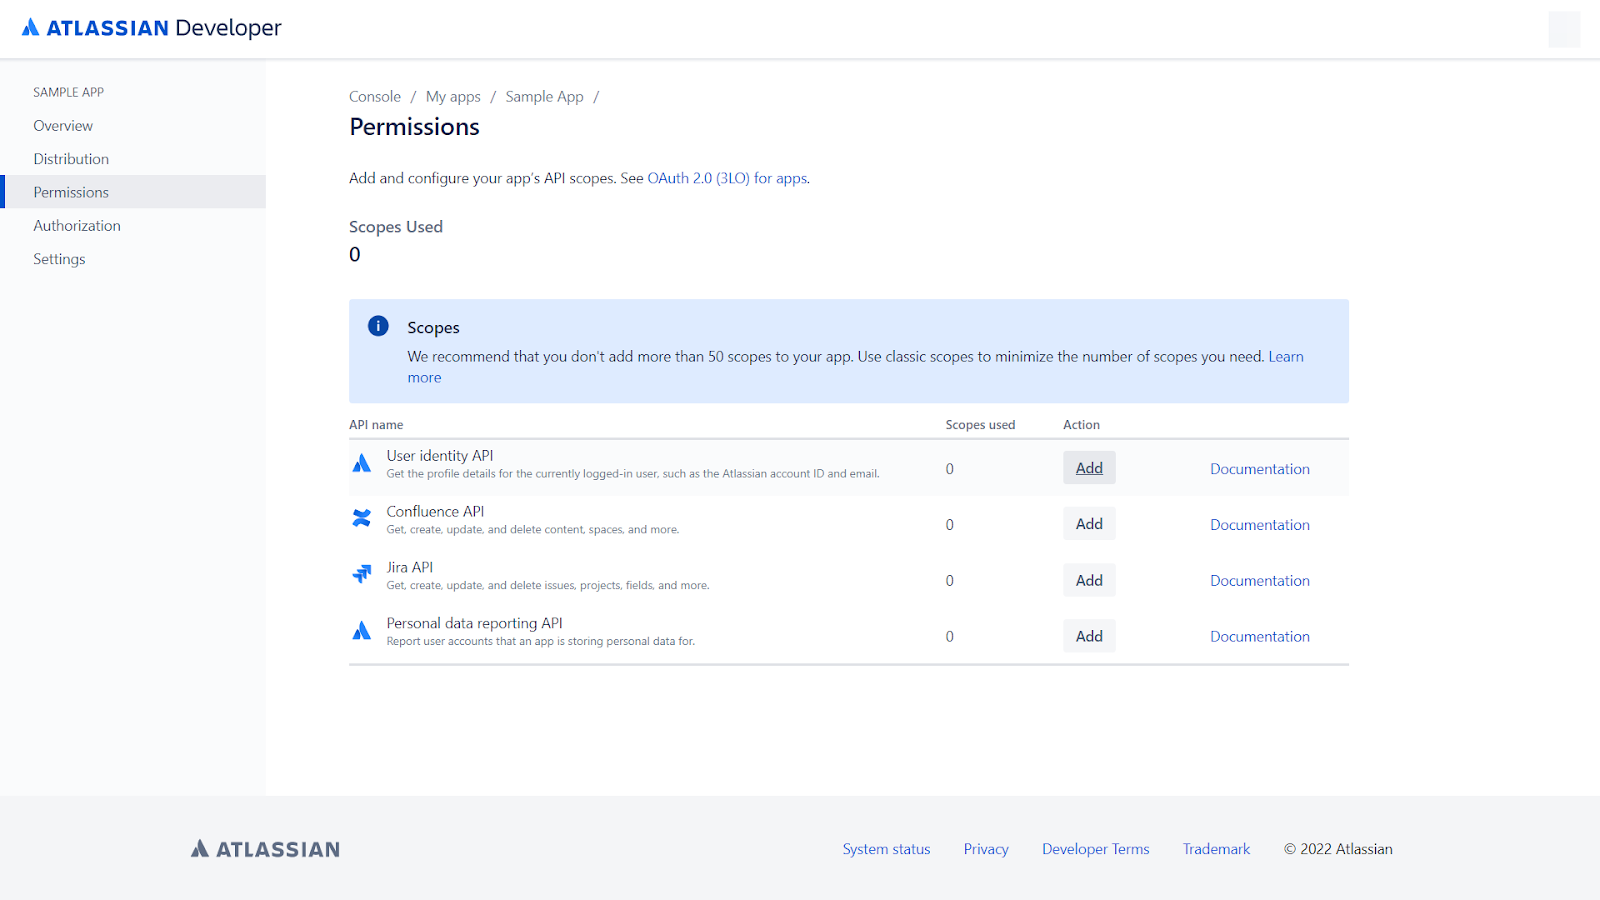
- Repeat the last step for the row that reads “Confluence API." Once done, click on “Configure” in the Action column, which will take us to the following page:
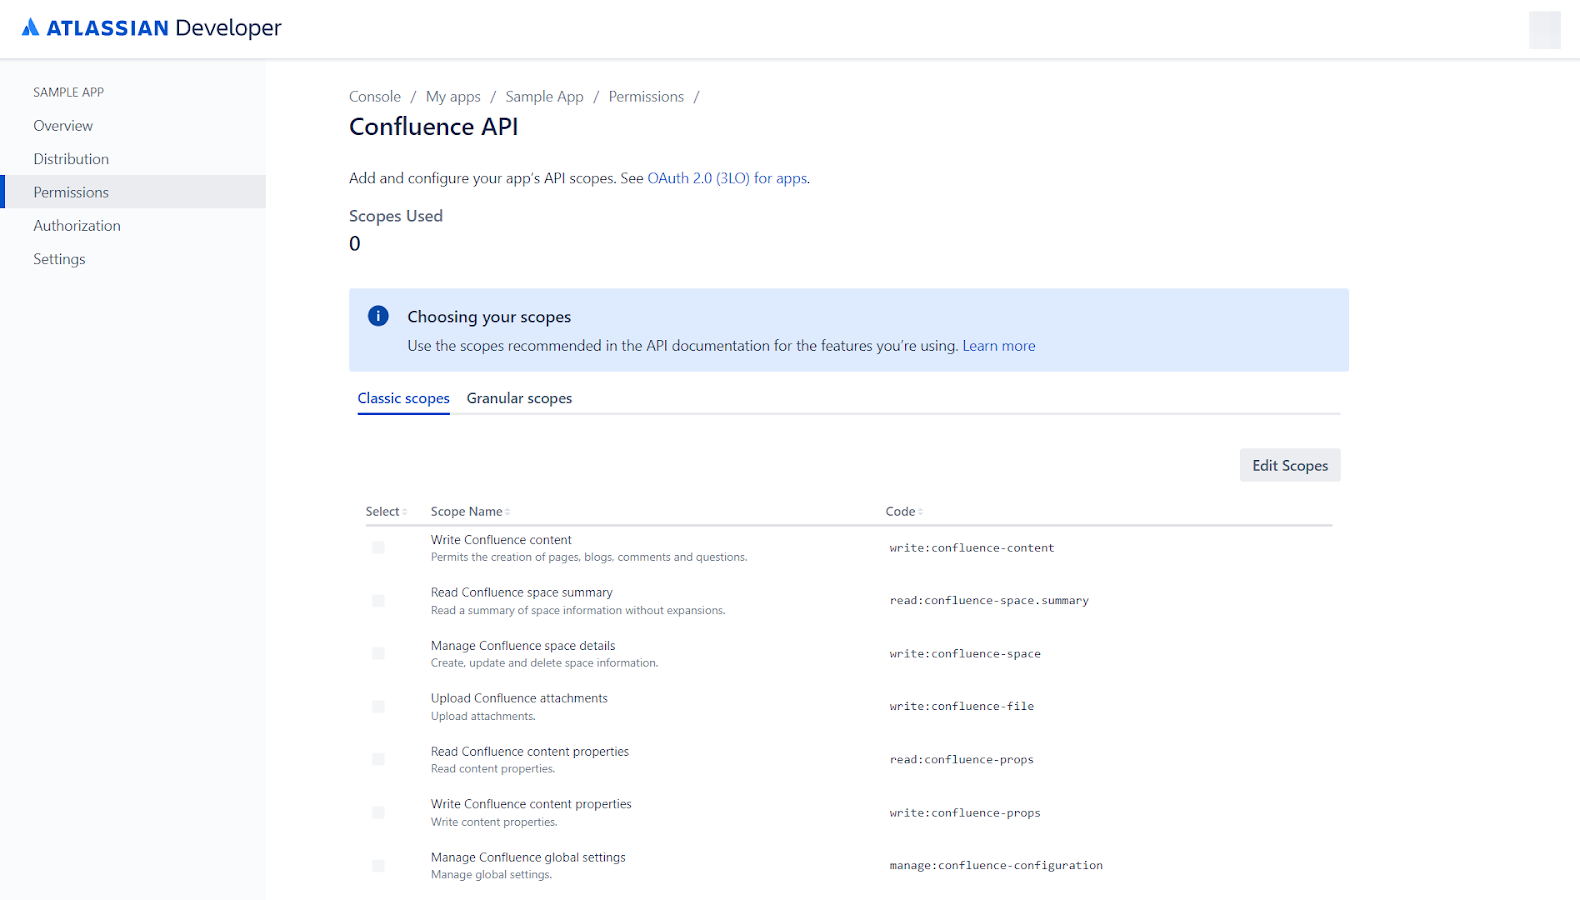
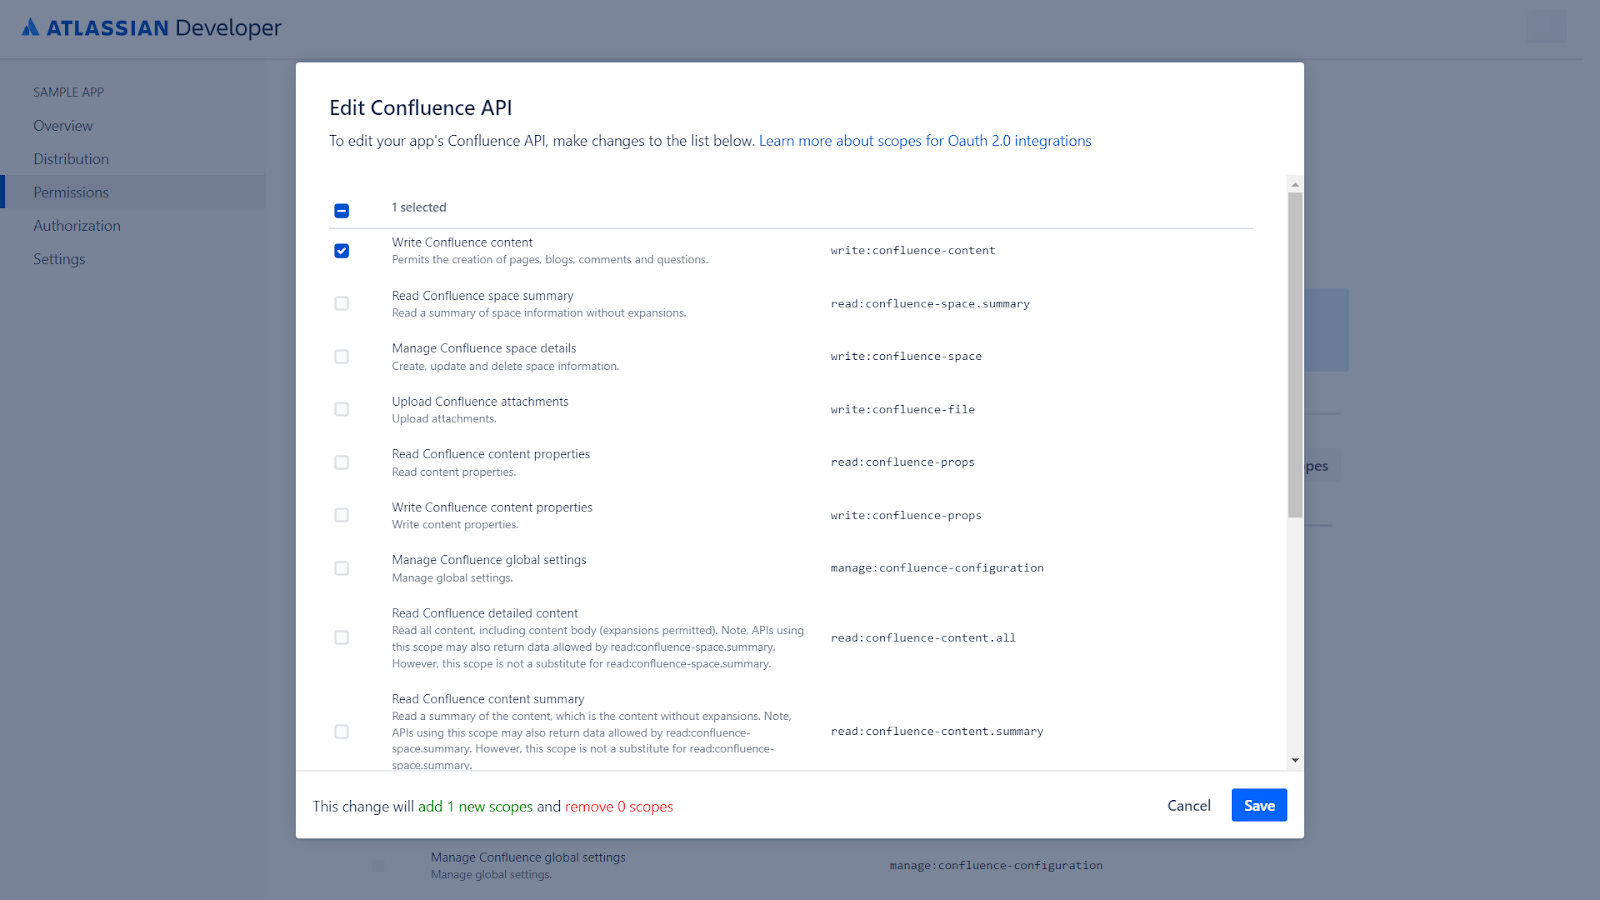
- Click on “Edit Scopes" and select the row that reads “Write Confluence content." Then, click on “Save."
-
We also need to note the code of the scopes we've enabled. It's the strings joined with period characters. So far, we've enabled read:me (in step 6) and write:confluence-content (in step 8). We'll use these later while initializing the OAuth flow for our users.
-
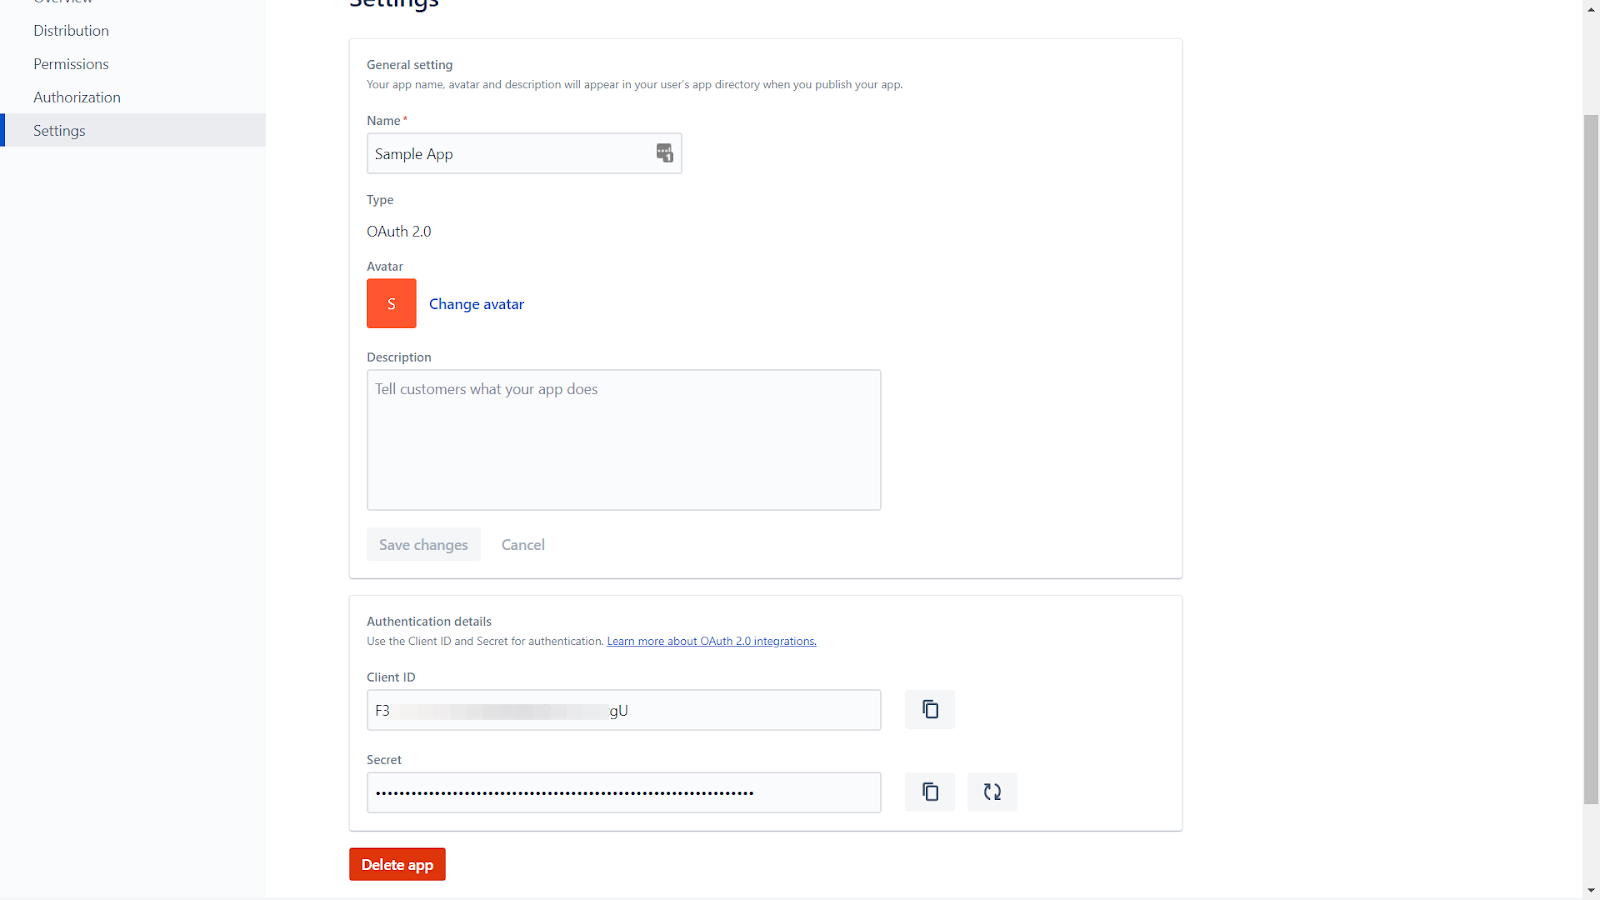
Let's quickly go to the "Settings" page of our app, scroll down to the "Authentication details" section, and copy the Client ID and Client Secret.
Setup Review
Now we’re done on Confluence’s end, where we've created a sample app (steps 1 through 3), enabled OAuth authorization (steps 4 through 5), enabled required scopes (steps 6 through 8), and noted down all the OAuth-related parameters (steps 9 and 10), for which there's a short explanation below.
- Client ID and Client Secret: Quite similar to a pair of user IDs and passwords we humans would use to identify ourselves on a platform, applications use these parameters to identify themselves as OAuth clients.
- Callback URL: This is the URL Confluence will send a GET request once the user approves the OAuth consent form, as mentioned in step 3 of the OAuth process explained above. This will contain a query parameter in the URL as code, which will be a temporary authorization code that the application will further exchange with Confluence to get a permanent access token, as mentioned in step 4.
- Scopes: For the scope of this example, we only need read:me and write:confluence-content, as we won’t be accessing any other resource of our users’ Confluence accounts. You can select multiple scopes, too, if you want; however, for the sake of simplicity, we’ll keep our setup very minimal to get started quickly.
Setting Up a NodeJS Application
To communicate with Confluence, we’ll use Confluence’s REST API for the demo.
First, create an empty directory and install relevant packages to get started. Use the following command to create a directory and initiate the node package.
mkdir confluence-sample-app
cd confluence-sample-app
npm init -y
Once done, install the relevant packages such asaxios,cors,dotenv, etc. to get started. Use the following command to install the packages.
npm i axios body-parser cors dotenv express
Now, let's create a new file named index.js and paste the following code.
require("dotenv").config();
const bodyParser = require("body-parser");
const express = require("express");
const axios = require("axios");
const cors = require("cors");
const url = require("url");
const app = express();
app.use(cors());
app.use(bodyParser.json());
// the OAuth-related endpoints will come here
app.listen(process.env.PORT, () => {
  console.log(`Sample app listening on port ${process.env.PORT}`);
});
After that, let’s create a .env file and store the OAuth-related parameters like Client ID, Client Secret, and Callback URL in it. Please note that these are extremely sensitive credentials and, thus, you shouldn't commit them to code repositories or anywhere else for your app’s security.
PORT=4000 # port to listen on
CLIENT_ID=********** # secret
CLIENT_SECRET=********** # secret
CALLBACK_URL=http://localhost:4000/oauth/callback
AUTHORIZATION_URL=https://auth.atlassian.com/authorize
TOKEN_URL=https://auth.atlassian.com/oauth/token
Authorization URL is the initial URL that we send users to to initialize the OAuth flow, and Token URL is the base URL we use in step 4 of OAuth, as mentioned above, where we send the temporary authorization code and get back a permanent access token and a refresh token.
Storing these URLs in the .env file keeps our codebase clean and modular.
Now, let’s add a REST endpoint in our node app, which will redirect our users to the Confluence login and OAuth consent page. This is a much cleaner implementation, as you can easily initialize the OAuth flow by just going to localhost:4000/install in your browser, compared with the very long Confluence URL, which users will eventually reach when redirected.
app.get("/install", (req, res) => {
   const payload = {
    audience: "api.atlassian.com",
    client_id: process.env.CLIENT_ID,
    scope: "offline_access read:me write:confluence-content",
    redirect_uri: process.env.CALLBACK_URL,
    state: "",
    response_type: "code",
    prompt: "consent",
  };
  const params = new url.URLSearchParams(payload);
  res.redirect(`${process.env.AUTHORIZATION_URL}?${params.toString()}`); // this is the authorization url we earlier set in our .env file
});
We never requested the scope offline_access in the Confluence OAuth-related steps above.
What’s offline_access in the scope?
The scope offline_access is, by default, provided to all Confluence apps, which, when mentioned in scope, instruct the Confluence OAuth server to provide a refresh token.
Adding an OAuth Callback Route
Now, let’s set up the callback endpoint in our app, which will receive the temporary authorization code as a query parameter in the Callback URL once the user approves Confluence's OAuth consent form.
app.get("/oauth/callback", async (req, res) => {
  const payload = {
    grant_type: "authorization_code",
    client_id: process.env.CLIENT_ID,
    client_secret: process.env.CLIENT_SECRET,
    redirect_uri: process.env.CALLBACK_URL,
    code: req.query.code,
  };
  const apiResponse = await axios.post(
    process.env.TOKEN_URL, // this is the token url we earlier set in our .env file
    new url.URLSearchParams(payload).toString()
  );
  // lets store the tokens for further use
  let accessToken = apiResponseTokenExchange.data.access_token;
  let refreshToken = apiResponseTokenExchange.data.refresh_token;
  res.sendStatus(200);
});
This is a snippet from our sample app’s back-end node app.
Below is the easiest way to offer a link to the installation page of our app, which is the Confluence OAuth consent form.
<a href="http://localhost:4000/install">Install</a>
When users visit this link, they’ll need to log in to their Confluence account and approve the OAuth consent form before our app can further obtain an access token. Let’s go to this link in our browser and land on the following page.
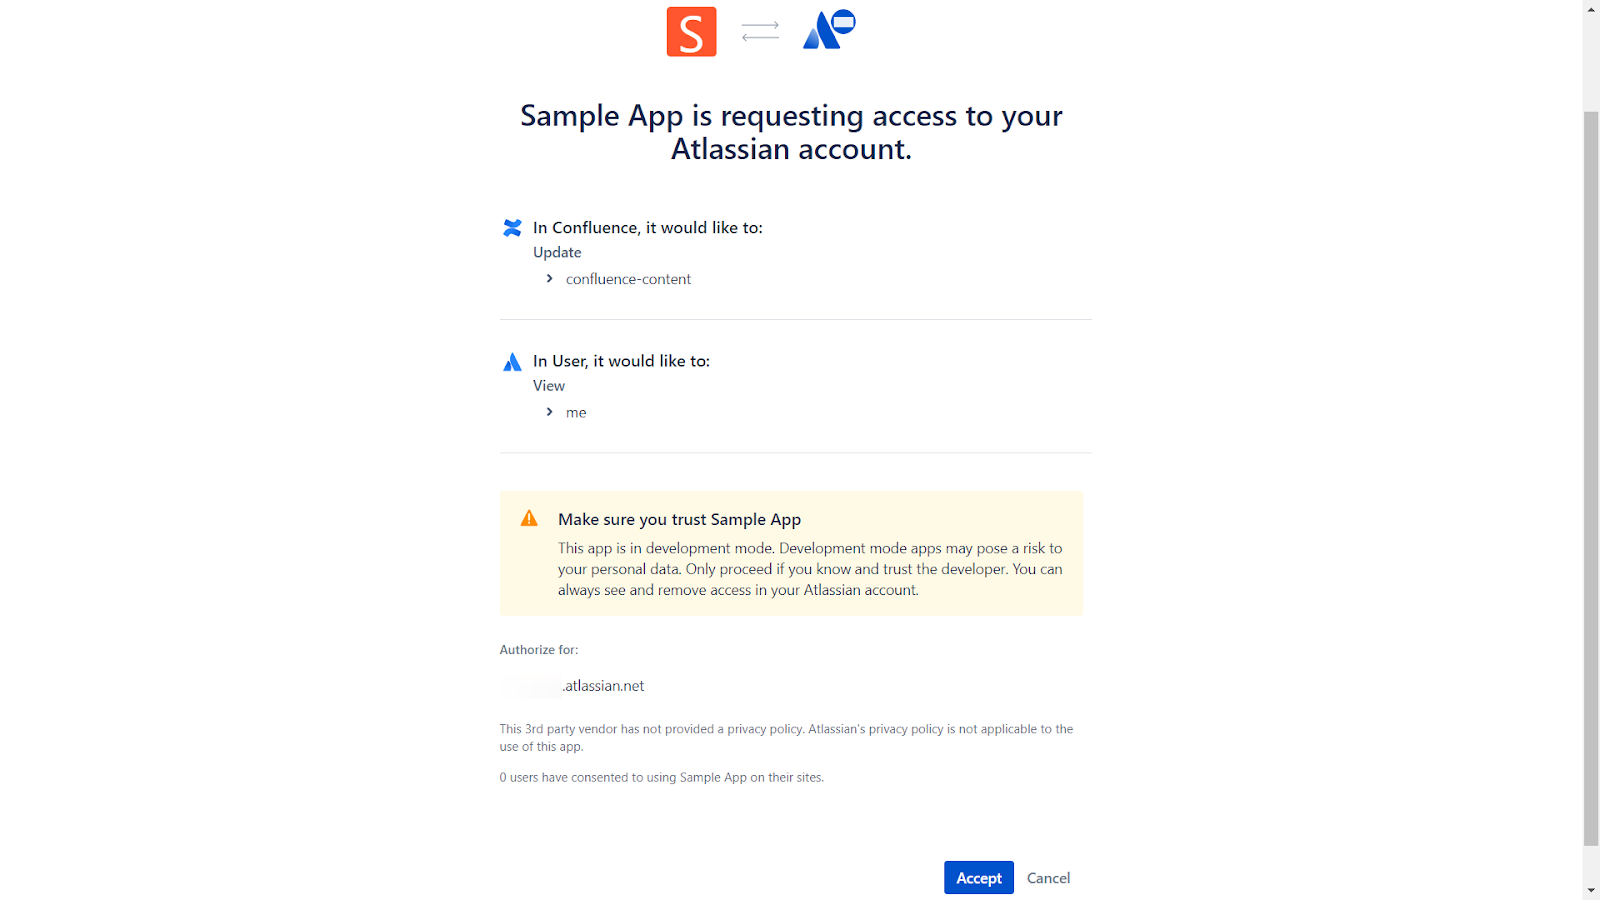
Click on “Accept” and check the node app’s logs in the console to find that we’ve successfully obtained the access and refresh tokens.

Note: Never expose your access and refresh tokens like this. These tokens have been logged to the console above only for this demonstration and to deliver a clear understanding of what the final response of the OAuth tokens exchange process looks like and what to expect.
Now, the next thing we need is a CloudID for our app to be able to call the Confluence APIs as prescribed in their docs. This is quite simple, as it just requires us to construct a base URL using this CloudID.
app.get("/oauth/callback", async (req, res) => {
  /* ... */
  const apiResponseAccessibleResources = await axios.get(
    "https://api.atlassian.com/oauth/token/accessible-resources",
    {
      headers: {
        Authorization: `Bearer ${accessToken}`,
        Accept: "application/json",
      },
    }
  );
  // lets store the cloudId for further use
  const cloudId = apiResponseAccessibleResources.data[0].id;
  /* ... */
});

So far, our sample app can obtain an access_token and the CloudID; thus, it can now create content in Confluence.
Now, let’s add more functionality to create a sample page in a Sample Space in Confluence and also cover refresh tokens a bit.
app.get("/oauth/callback", async (req, res) => {
  /* ... */
  /* let's touch the refresh tokens logic here */
  try {
    // say we try to call some Confluence API here and it fails due to an expired access token
    throw new Error("Uh Oh! The access token seems to have expired :(");
  } catch (err) {
    console.error(err);
    const payloadTokenExchange = {
      grant_type: "refresh_token", // note that we are not passing authorization_code here as we are using a refresh token
      client_id: process.env.CLIENT_ID,
      client_secret: process.env.CLIENT_SECRET,
      refresh_token: refreshToken,
    };
    const apiResponseTokenExchange = await axios.post(
      process.env.TOKEN_URL,
      new url.URLSearchParams(payloadTokenExchange).toString()
    );
    // update the stored tokens for further use
    accessToken = apiResponseTokenExchange.data.access_token;
    refreshToken = apiResponseTokenExchange.data.refresh_token;
    /* let's create that sample page now */
    const payloadForPageCreation = {
      title: "Sample Page",
      type: "page",
      space: { key: "SS" },
      body: {
        storage: {
          value: "<p>This is a sample page</p>",
          representation: "storage",
        },
      },
    };
    const apiResponsePageCreation = await axios.post(
      `https://api.atlassian.com/ex/confluence/${cloudId}/wiki/rest/api/content`,
      payloadForPageCreation,
      {
        headers: {
          Authorization: `Bearer ${accessToken}`,
          Accept: "application/json",
          "Content-Type": "application/json",
        },
      }
    );
    // voila! we have created a sample page here
  }
  /* ... */
});
Let’s quickly head to Confluence and verify whether we've created content or not.

Here, we can confirm that a page named "Sample Page" has been added with the content "This is a sample page," per the parameters we supplied in payloadForPageCreation. We've completed the demo.
Confluence is a collaboration software that helps organizations work together more effectively
Conclusion
Confluence is a collaboration software that helps organizations work together more effectively. It's a central place where people can share ideas, work on projects, and stay up-to-date on what's going on in the company. One can use the Confluence APIs to extend the functionality of Confluence.
This post was written by Keshav Malik. Keshav is a full-time developer who loves to build and break stuff. He is constantly on the lookout for new and interesting technologies and enjoys working with a diverse set of technologies in his spare time. He loves music and plays badminton whenever the opportunity presents itself.
