Elevating Tasks Over Files in the Runme CLI
In case you haven’t used Runme before, Runme is the Open Source tool that allows you to execute commands inside your runbooks, docs, and READMEs ✨. Runme makes runbooks actually runnable, making it easier to follow step-by-step instructions.
Runme comes with a Notebook, Editor, and terminal user interfaces. Users can use them to execute instructions, check intermediate results, and ensure the desired outputs are achieved. Authors can create predefined golden paths in runbooks and share them or overhaul your Developer Experience to streamline onboarding to your microservices and applications.
In today's release, v1.3.0, the Runme CLI is moving to Project Mode.
💡 Install the Runme CLI with
$ brew install runmeor$ npx runme
What is Project Mode?
Simply put, the CLI will no longer default to README.md in the current working directory. Instead, it will scan all code blocks across all markdown files in your repo. If the current working directory is not a git repo, it recursively scans the sub-directory tree. Sensible exclusions to the directory scan, e.g., node_modules, are being applied and can be configured.
The motivation behind this change is to vastly simplify the CLI experience for users. As an author of runbooks or workflow documentation, I can breakdown the structure of my tasks and docs across various markdown files in different directories, such as dev/setup.md, prod/diagnosis.md, prod/deploy.md, and a top-level README.md, without overly burdening a user from understanding every nuance of it. Only two things matter:
1. Named vs. Unnamed Code Blocks
The CLI will filter out unnamed code blocks by default. Unnamed as in no name set explicitly in the code blocks annotations. This allows authors only to expose all crucial tasks across the project. It's in the author's interest to present users with a narrow public interface to task and workflow definitions in the CLI versus all the intermediary steps, which works great in a notebook.
However, unlike the Runme Notebook UX, a terminal user interface benefits from compactness and clarity due to its GUI limitations. In any case, adding the --allow-unnamed flag to any CLI command will deactivate this filter. A keyboard shortcut in the TUI to quickly toggle named vs. unnamed is coming soon.
2. Proximity in Directory Tree
This rule is simple; the more deeply nested a code block's file is in the directory tree, the lower it will appear in the interactive terminal UI. Specifically, if your project is a git repo, the Runme CLI will consider the root of the repo in its top-level directory. In other words, a deploy-now in ./runbooks/prod/operations.md will rank lower than deploy in ./README.md, respecting their respective proximity to the top-level directory.
A Quick Walkthrough
To gain an overview of your project's workflow and tasks structure, simplifying navigation and organization, launch into the terminal user interface (aka TUI): runme tui
💡 Install the Runme CLI with
$ brew install runmeor$ npx runme
As shown here:
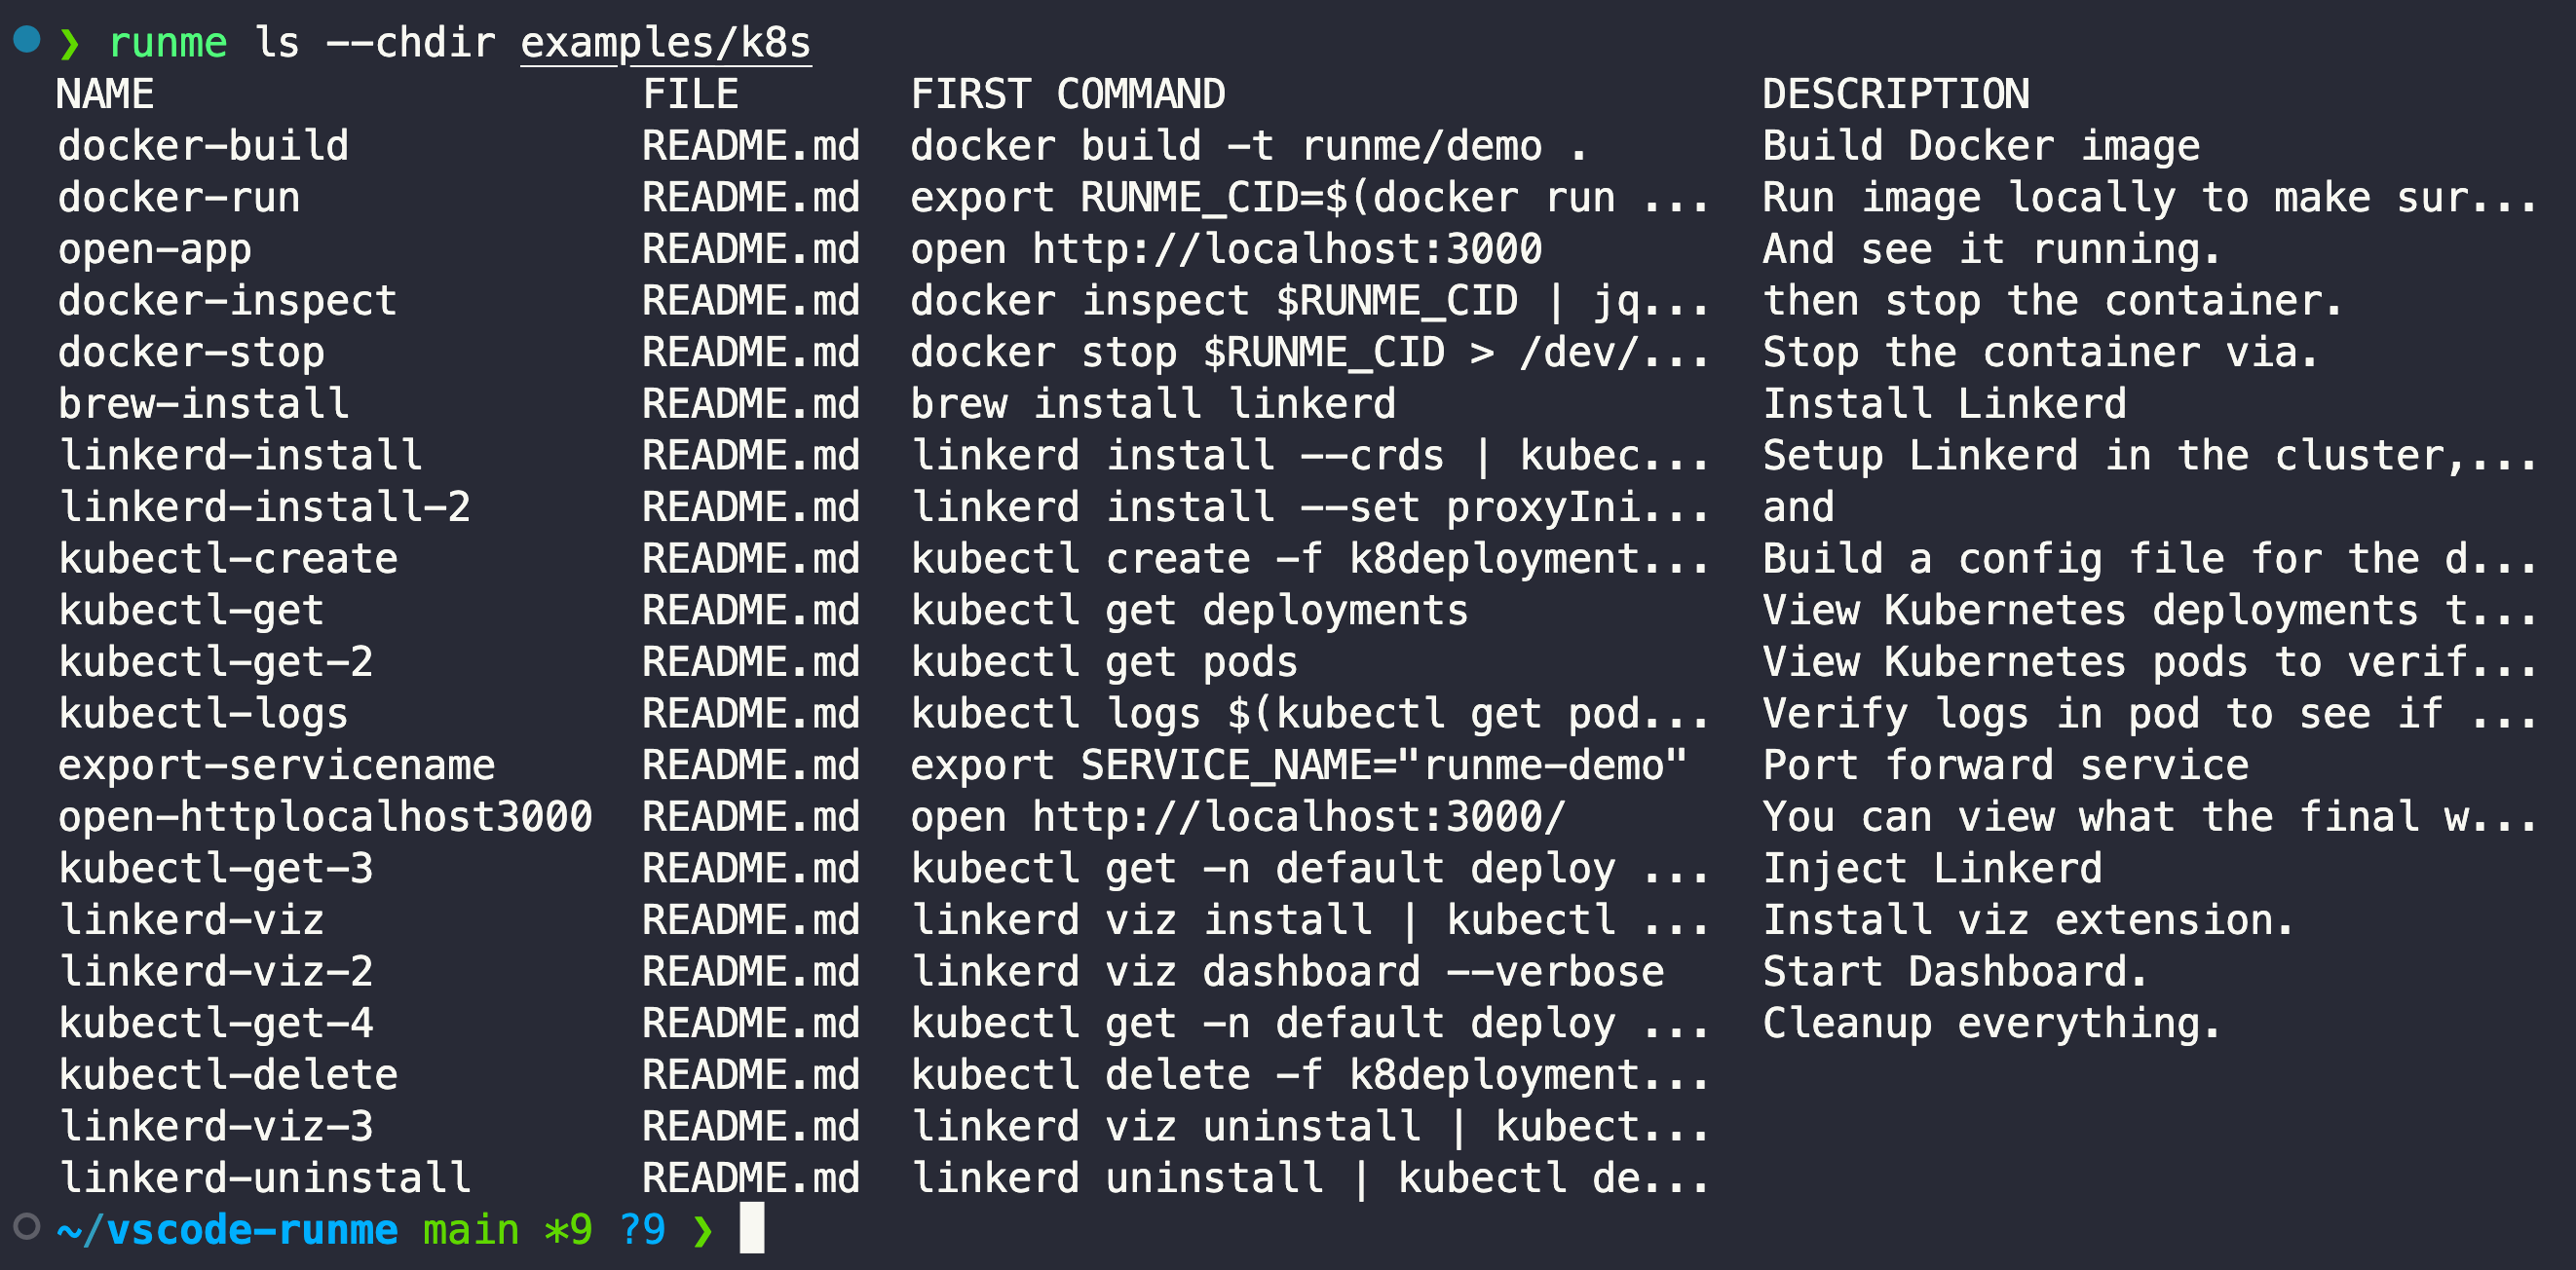
However, it is still possible to scope down to a single markdown file's code blocks using --filename or --chdir or both. Please note that using --chdir with specifying a file will default to --filename README.md. Here's an example:

By default, the nearest git repo in relation to your current directory location is traversed. Even when you're in a sub-directory, it will identify the markdown file within the parent directory by traversing the directory tree. This allows you to seamlessly explore your whole project and execute scripts across it without sweating the details.
Why would you use this?
Let's say you have a script that operates in dev mode, and you're currently working within a sub-directory of your project. Typically, you would have to navigate all the way back to the root directory to execute it. However, with the capability of Runme to locate the nearest project, you can simply use the command runme run dev from your current location, making it very convenient. Please note that the execution's current working directory (cwd) will match the location of the containing markdown file.
By the way, if you want to specify a top-level directory explicitly, you can use a flag: runme ls --project ../examples.
Additional Flags and Considerations
Below are relevant flags helpful for shifting to Project Mode. When in doubt, the CLI's help section conveniently lists all the flags with a description: just run runme --help.
→ The flag --ignore-pattern will allow you to ignore patterns in project mode. By default will ignore the node_modules folder, but you can ignore other folders, for example: runme ls --ignore-pattern "__pycache__"
→ To exit project mode, you can do runme ls -chdir <directory> or runme ls --filename <filename> and it will show you the scripts of that file, instead of the whole project.
Four commands to take into account are:
lswhich list all the scripts of a project; gives info on script name, description, and commands.runwill run provided scripts. For example, to run a script nameddevin thedocssubdirectory, you can dorunme run docs/devif multiple code blocks have the same name, you can specify with{directory}/{script}.tuiis the default command for the runme cli. it runs by default with justrunme, or withrunme tui.fmtFormats all recognized markdown files in the project in a consistent, runme-friendly style. Changes are written to console by default, but can be persisted with--write.
The --allow-unnamed flag, will allow scripts without explicit names, so you can see all your scripts, even if they have names or not. To deactivate this feature you can do --allow-unnamed=false.
Additionally, starting with v1.3.0, if you have an .env file, the Runme CLI will load the environment variables automatically, and with the --load-env flag, you can toggle whether to load or not the environment variable from the local file.
💡 Install the Runme CLI with
$ brew install runmeor$ npx runme
Feedback Welcome!
Please give the Runme CLI a spin and get in touch.
