Sending Email With the Gmail API: A How-To Guide
Sending emails is the cornerstone of any business, small or large. But when it comes to sending many emails, you need to find an appropriate way to send them—quickly and without any hiccups. There are many ways to achieve this, and one such way is using the Gmail API.
In this post, we'll learn how to send emails using the Gmail API. But before getting into that, let's cover what the Gmail API is and what it offers.
Introduction to the Gmail API
The Gmail API is a set of RESTful HTTP request methods that allow developers to access and manipulate Gmail mailbox data like threads, messages, and drafts. Gmail uses OAuth 2.0 for authentication and authorization. This means you'll need to register your application to use the Gmail API.
Some of the functionalities that you can achieve using Gmail APIs are as follows:
- Create drafts and send messages
- Upload attachments
- Search for messages
- Receive push notifications and much more
Understanding Prerequisites
The Gmail API supports most top programming languages, including Go, Node.js, PHP, Ruby, Python, etc. In this guide, we'll be using Node.js for sending out emails.
We'll also be referring to the Node.js quickstart guide by Google for reference.
To run the application that we'll be building, you need the following prerequisites:
And that's pretty much it!
The Gmail API supports most top programming languages, including Go, Node.js ,PHP, Ruby, Python, etc.
Getting Started With the Gmail API
To work with the Gmail API, first, we need to generate a client ID and client secret from the Google Cloud Console. So let's get started.
Step 1: Enable the Gmail API
First of all, go to the Google Cloud API dashboard and enable the Gmail API.
Step 2: Generate the API Key and Secret Key
Now that we've enabled the Gmail API for our use, we need proper keys for authentication for using the API. So let's get to it.
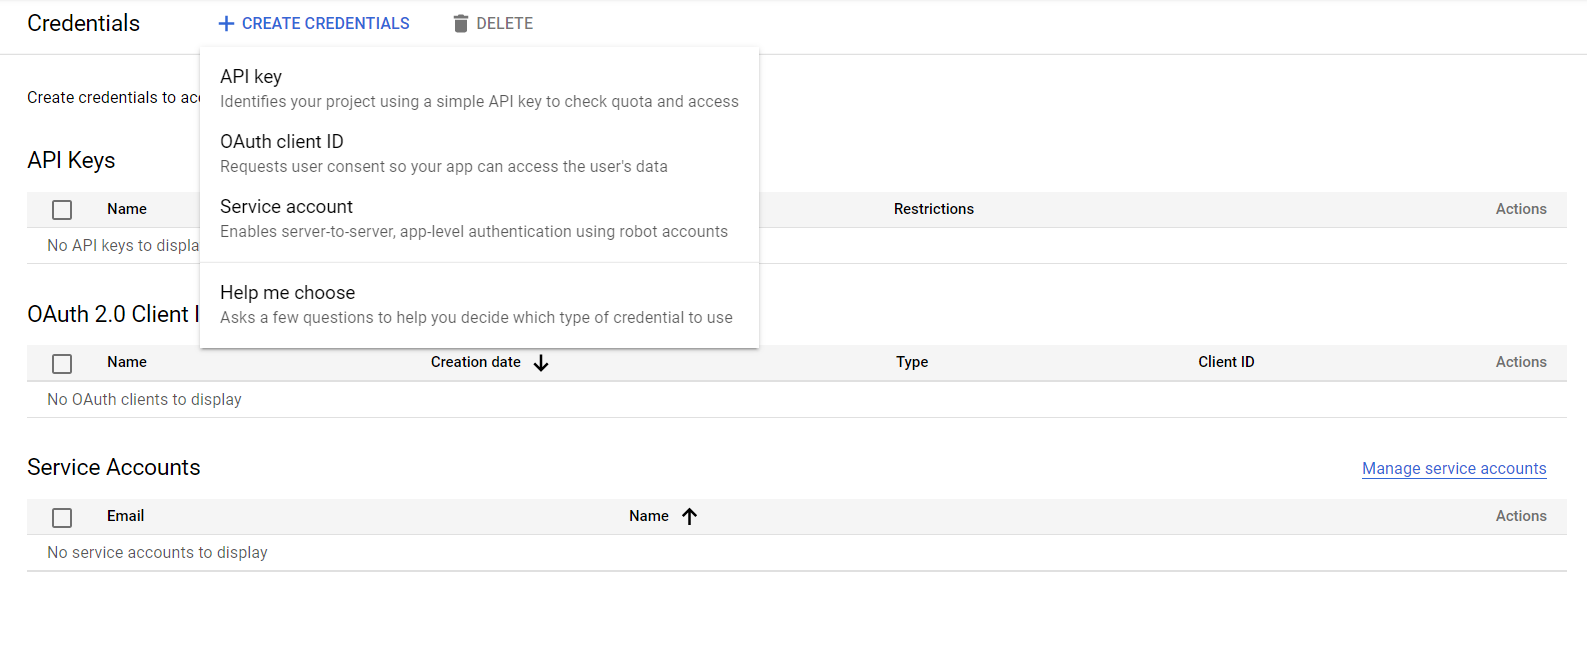
To generate the keys, navigate to the Credentials tab from the sidebar and set up the consent screen (i.e., fill out the complete application form). This will generate the client ID and client secret, which you can copy from the screen or download as a JSON file and rename it to credentials.json.

Integrating the Gmail API With an Application (Initial Setup)
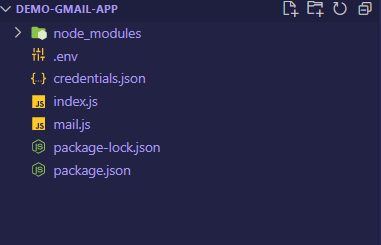
As discussed before, we'll be using Node.js for sending emails. To get started, create a directory (with any name) and use the npm init -y command to set things up.
After this is complete, it's time to install the npm package for using the Gmail API. Use the below-mentioned command to install the package:
npm install googleapis@39 --save
We're good to go now.
Next, create an index.js file in the root directory and paste the code from the quickstart guide.
Open the terminal and use the following command to run the index.js file. If you use VS Code as your code editor, you can use Ctrl + Shift + ` to open the terminal.
Note: Make sure you move the credentials.json file into the working directory.
>> node index.js
If this is your first time, there will be a prompt on your terminal that will ask you to authorize the application by visiting the URL and then entering the code.
Authorize this app by visiting this URL: <<URL>>

Enter the code from that page here: <<CODE>>
After the application is authorized, a new token.js file will be created, containing two tokens (the access token and refresh token) that we'll use to send emails in the next step.
The code will also log a list of labels associated with your account on your console once the application is authorized (listLabels function).

Sending Emails With Nodemailer and the Gmail API
At this point, we've already done most of the heavy lifting. Now we just have to use Nodemailer to send emails. But what exactly is Nodemailer?
Nodemailer is an open-source module for Node.js applications that allows developers to send emails programmatically.
To install Nodemailer, use the npm i nodemailer command.
Now let's add our secrets to the .env file. (Install the dotenv package using npm i dotenv.)
EMAIL_ADDRESS=
REFRESH_TOKEN= //This comes from the token.js
CLIENT_SECRET=
CLIENT_ID=
After that, create an OAuth client and transporter using the following code in a new file (mail.js):
const nodemailer = require("nodemailer");
const { google } = require("googleapis");
const OAuth2 = google.auth.OAuth2;

require('dotenv').config();

const EMAIL_ADDRESS = process.env.EMAIL_ADDRESS
const REFRESH_TOKEN = process.env.REFRESH_TOKEN
const CLIENT_SECRET = process.env.CLIENT_SECRET
const CLIENT_ID = process.env.CLIENT_ID


const REDIRECT_URI = [] // Array of redirect_uri


const setupTransporter = async ()=> {
  // Creating OAuth Client
  const oauth2Client = new OAuth2(
      CLIENT_ID,
      CLIENT_SECRET,
      REDIRECT_URI[0]
  );


  oauth2Client.setCredentials({
      refresh_token: REFRESH_TOKEN
  });


  // Generate access token using OAuth Client
  const accessToken = await new Promise((resolve, reject) => {
    oauth2Client.getAccessToken((err, token) => {
      if (err) {
        reject("error", err);
      }
      resolve(token);
    });
  });


  // Create a transporter object
  const nodeTransporter = nodemailer.createTransport({
    service: "gmail",
    auth: {
      type: "OAuth2",
      user: EMAIL_ADDRESS,
      accessToken,
      clientId: CLIENT_ID,
      clientSecret: CLIENT_SECRET,
      refreshToken: REFRESH_TOKEN
    }
  });


  // Return transporter object
  return nodeTransporter;
}
In the above function, we return nodeTransporter, which will now be used to send emails. You can either use the accessToken from the token.js file or generate a new one as we did in the above code if the old one has expired.

Just below the setupTransporter function, paste the following code:
const sendEmailViaGmail = async (options) => {
  let gmailTransporter = await createTransporter();
  await gmailTransporter.sendMail(options);
};


sendEmailViaGmail({
  subject: "Exploring Gmail API",
  text: "Hi, this is a test email from Node.js using Gmail API",
  to: "abc@gmail.com",
  from: EMAIL_ADDRESS
});
In the above code, we have the sendEmailViaGmail function, which takes in an object that can accept the following keys:
- subject
- from
- to
- text
- cc
- bcc
We've looked at a basic setup for sending emails, but if you use the Gmail API in any of your projects, sending a simple email won’t be the only thing you’d need to do.
Let’s now see how you can add attachments or send an HTML body via Nodemailer.
Adding Attachments to Emails Using Nodemailer
Sending attachments in emails has always been tricky when it comes to coding and making your application. Attachments are there to deliver information appropriately to the clients, and so here we are, learning how to send attachments to multiple email addresses of clients in an email.
To add attachments to our email, we need to add another key named attachments (array of objects) to the options parameters of the sendEmailViaGmail function. The code provided below shows how you can do that.
sendEmailViaGmail({
  subject: "Exploring Gmail API",
  text: "Hi, this is a test email from Node.js using Gmail API",
  to: "abc@gmail.com",
  from: EMAIL_ADDRESS,
  attachments: [
    {
      fileName: "test.txt",
      filePath: __dirname + "/test.txt"
    },
    {
      fileName: "image.jpg",
      content: fs.createReadStream(__dirname + "/image.jpg")
    }
  ]
});
There are two objects in the attachments array in the above code example. One contains a .txt file, and the other includes a .jpg image.
Sending Emails With HTML Body
Sending HTML emails is still widely used for both business and personal purposes. It is one of the most common ways in which users can see images, links, and other content. Unlike text-only emails, an HTML email can send users a promotional message and call to action.
Unlike text-only emails, an HTML emil can send users a promotional message and call to action
To send emails with an HTML body, check out the below-mentioned code:
sendEmailViaGmail({
  subject: "Exploring Gmail API",
  to: "abc@gmail.com",
  from: EMAIL_ADDRESS,
  html: "<div><h1>Hi, this is a test email from Node.js using Gmail API</h1></div>"
});
You can send emails with an HTML body by adding an html key to the options object.
Adding Images to Emails (In-Line Images)
When you're working with promotional emails, in-line images play an important role, which is why it's essential to understand how to send those. To add an attachment as an embedded image, add a cid to your attachment object and the image's src.
Check out the code below to understand it properly:
sendEmailViaGmail({
  subject: "Exploring Gmail API",
  to: "abc@gmail.com",
  from: EMAIL_ADDRESS,
  html: 'Hi! This is an image: <img src="cid:unique string"/>',
  attachments: [{
        filename: 'image.png',
        path: '/path/to/file',
        cid: "unique string"
  }]
});
And that’s all for this guide.
Conclusion
Sending emails using the Gmail API is not a piece of cake. But with the help of our guide, you can now easily send emails with the Gmail API. We hope that this guide has helped you understand the basics of sending emails, along with tasks like adding attachments and images and using HTML in emails.
This post was written by Stuti Malik. Stuti is a hardworking and performance driven professional in cybersecurity and development, ready to take challenging roles to develop advanced projects with efficiency and quality.
